Forget store-bought rooting hormones 🌿💧 Root cuttings naturally!
Are you tired of shelling out cash for expensive rooting hormones, often packed with chemicals you can’t pronounce? Do you dream of expanding your plant collection or sharing your green thumb creations with friends, all while embracing a more sustainable, natural approach? Get ready to unlock the ancient secrets of plant propagation, right from your own kitchen and garden!
In this article, we’re diving deep into simple, incredibly effective, and completely free methods to encourage robust root growth in your beloved plant cuttings. We’ll be using ingredients you likely already have at home, proving that you don’t need fancy solutions to achieve gardening success. The benefits are abundant: it’s incredibly cost-effective, wonderfully eco-friendly, often just as effective as synthetic alternatives, and profoundly satisfying to watch new life emerge from your natural efforts.
Prepare to be amazed at the magic of natural rooting. From harnessing the power of willow to leveraging the soothing properties of aloe vera, you’ll discover how to give your cuttings the best possible start, all while feeling great about the sustainable choices you’re making for your garden and the planet.
Why Natural Rooting Works: Understanding Plant Hormones
To truly appreciate the power of natural rooting, it helps to understand a little bit about what makes plants tick, specifically when it comes to growing roots. The key players here are called auxins. Auxins are natural plant hormones that act as the primary architects of root development. They are present in varying concentrations throughout a plant, but they play a particularly crucial role in signaling a cutting to form new roots.
So, how do our natural methods fit into this? Many of these everyday ingredients either contain trace amounts of compounds that mimic auxins, or more commonly, they create an optimal environment that stimulates the plant’s own production of auxins. Think of it less as directly injecting hormones and more as gently nudging the plant’s inherent biological processes into action, encouraging it to focus its energy on growing those vital roots.
While synthetic rooting hormones are essentially concentrated doses of these auxins, natural methods offer a gentler, often slower, but equally effective approach. They work in harmony with the plant’s natural systems, providing a supportive boost rather than an intense chemical shock. This subtle encouragement is often all a healthy cutting needs to transform into a thriving new plant.
Your Natural Rooting Arsenal: The Best DIY Solutions
A. Willow Water: The Original Root Stimulator
Willow water is perhaps the most ancient and revered natural rooting solution, and for good reason! It’s like nature’s own rooting concentrate.
- Why it works: Willow branches, particularly the young green growth, are packed with natural compounds that are incredibly beneficial for root development. Primarily, they contain Salicylic Acid (a natural rooting stimulant, similar to aspirin, which helps with plant stress and defense) and Indolebutyric Acid (IBA), which is one of the most effective natural auxins for root formation.
- How to make it:
- Gather young, flexible willow branches. Green, new growth is best, but older branches can also work.
- Chop the branches into small pieces, roughly 1-2 inches long. The more surface area exposed, the better.
- Place the chopped willow in a container and cover it with hot (not boiling) water. The ratio should be roughly 1 part willow to 2-3 parts water.
- Let the willow soak for 24-48 hours. As it steeps, the beneficial compounds will leach into the water.
- Strain the liquid, discarding the willow pieces. The resulting “willow tea” is your natural rooting solution.
- Practical Tip: Use your willow water immediately for best potency. If you have extra, you can store it in a sealed container in the refrigerator for up to a month. Use it as a pre-soak for your cuttings (30 minutes to a few hours) or as a gentle watering solution for rooted cuttings.
B. Honey: The Antiseptic Root Helper
Honey isn’t just for sweetening your tea; it’s a fantastic ally in the propagation game!
- Why it works: Honey is a powerful natural antiseptic and antifungal agent. When applied to the cut end of a plant, it forms a protective barrier that helps prevent common issues like rot, bacterial infections, and fungal diseases. This allows the cutting to focus its energy on developing roots rather than fighting off pathogens. While not a direct auxin source, some believe raw honey also contains trace elements beneficial for overall plant vitality.
- How to use it:
- Take your freshly prepared cutting.
- Dip the cut end directly into a small amount of honey. Raw, unpasteurized honey is often preferred due to its higher concentration of beneficial enzymes, but any honey will offer antiseptic properties.
- Ensure the cut surface is thinly coated.
- Plant the cutting as you normally would in your chosen rooting medium.
- Practical Tip: A thin, even coating is all you need. Don’t overdo it, as a thick layer could potentially hinder water absorption.
C. Aloe Vera Gel: Soothing & Stimulating
The humble aloe vera plant is a powerhouse of healing and growth, not just for humans, but for plants too!
- Why it works: Fresh aloe vera gel is a treasure trove of beneficial compounds. It naturally contains auxins, those essential plant growth hormones that stimulate root development. Additionally, it boasts salicylic acid (like willow), along with a rich blend of enzymes, amino acids, vitamins, and minerals that promote healing, strengthen plant cells, and encourage overall vitality in cuttings. Its gel-like consistency also helps seal the cut, protecting it from pathogens.
- How to use it:
- Select a healthy, mature leaf from your aloe vera plant.
- Cut a section of the leaf (about 2-3 inches long) from the base.
- Squeeze or scoop out the clear, gelatinous gel directly from the leaf.
- Dip the freshly cut end of your plant cutting directly into the aloe gel, ensuring it’s well coated.
- Plant your cutting into your preferred rooting medium.
- Practical Tip: Fresh gel is always most potent. If you have extra, you can store it in an airtight container in the fridge for a few days, but it’s best used immediately.
D. Apple Cider Vinegar (ACV): A Gentle Boost
While a bit more controversial and requiring careful dilution, apple cider vinegar can be a surprising addition to your natural rooting toolkit.
- Why it works: Apple cider vinegar contains acetic acid. In extremely diluted forms, acetic acid can act as a mild plant stimulant, potentially encouraging cell division and root growth. However, the key here is *extreme* dilution, as too much ACV will quickly become detrimental to your cuttings. It’s thought to gently lower the pH around the cutting, making it more favorable for certain rooting processes.
- How to use it:
- Mix 1 teaspoon of pure apple cider vinegar (with “the mother” is often preferred) with 5-6 cups of water. This dilution is critical.
- You can use this solution as a very brief pre-soak for your cuttings (no more than 30 minutes).
- Alternatively, you can use it as a very light watering solution for cuttings already in their medium, but use sparingly and infrequently.
- Practical Tip: When in doubt, use less ACV. It’s much better to under-apply than to over-apply, which can quickly burn and kill your tender cuttings. Monitor your cuttings closely if using this method.
E. Cinnamon Powder: The Fungal Fighter
Cinnamon isn’t just a delicious spice; it’s a natural protector for your precious plant cuttings.
- Why it works: Ground cinnamon is a powerful natural fungicide. When applied to the cut end of a cutting, it creates a barrier that helps prevent “damping off” disease, other fungal infections, and bacterial growth that can quickly lead to rot and kill new cuttings before they even have a chance to root. It doesn’t directly stimulate roots but protects the cutting while it focuses on forming them.
- How to use it:
- After making your clean cut, lightly moisten the end of your cutting.
- Dip the moist cut end directly into a small pile of ground cinnamon powder, ensuring a light coating.
- Plant your cutting as usual.
- Practical Tip: Cinnamon works wonderfully in combination with other rooting aids. For example, dip your cutting in aloe gel or honey, then immediately dip it into cinnamon powder for a powerful antiseptic and stimulating duo.
Essential Principles for Successful Rooting (Regardless of Method)
While natural rooting aids provide a fantastic boost, their success largely hinges on adhering to fundamental propagation principles. Master these, and you’ll dramatically increase your chances of success.
A. Healthy Cuttings are Key
- Choose wisely: Always select cuttings from a healthy, vigorous mother plant. Avoid any stems that show signs of disease, pests, wilting, or stress. Non-flowering stem tips or sections are generally best, as the plant’s energy isn’t diverted to flower production.
- Clean cuts: Use a sharp, sterile knife or pruners to make a clean cut. A jagged cut can invite disease and slow healing. Sterilize your tools with rubbing alcohol between cuttings to prevent the spread of pathogens.
- Ideal length: Aim for cuttings that are typically 4-6 inches long. Ensure each cutting has at least 2-3 nodes (the points on the stem where leaves or branches emerge). Roots primarily form from these nodes.
- Prepare the cutting: Remove all lower leaves that would be below the soil line. This prevents rot and exposes the nodes for rooting. If leaves are very large, you can trim them in half to reduce moisture loss.
B. Proper Growing Medium
- Light and well-draining: Cuttings need a medium that provides good aeration and drainage. Heavy garden soil is a no-go, as it compacts easily and retains too much moisture, leading to rot.
- Sterile is best: Use a sterile, soilless mix to minimize the risk of fungal diseases and pests. Excellent options include perlite, vermiculite, seed-starting mix, sand, or a blend of these.
- Moisture balance: The medium should be consistently moist but never soggy. Think of a well-wrung-out sponge.
C. The Right Environment
- Humidity is paramount: Cuttings lack roots to absorb water, so they are highly susceptible to wilting and desiccation. High humidity is crucial. You can achieve this with a humidity dome, by placing the pot in a clear plastic bag (supported so it doesn’t touch the leaves), or by misting regularly throughout the day.
- Temperature matters: Warmth encourages root growth. Aim for a consistent temperature between 65-75°F (18-24°C). A heating mat can be very beneficial, especially in cooler environments.
- Light requirements: Cuttings need bright, indirect light to photosynthesize and produce energy. Direct sunlight is too intense and can scorch tender leaves and dry out the cutting. A north-facing window, a shaded spot outdoors, or under grow lights are ideal.
D. Patience & Observation
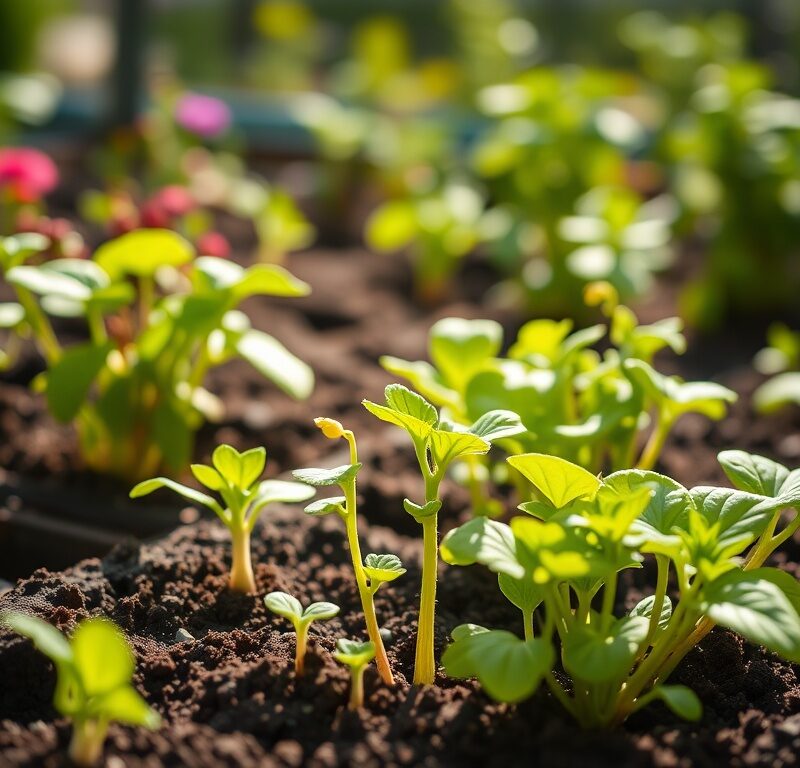
- Time is key: Rooting is not an instant process. Depending on the plant species, it can take anywhere from a few weeks to several months for roots to form. Resist the urge to constantly check!
- How to check for roots: Don’t pull up cuttings repeatedly to look for roots, as this can damage delicate new growth. Instead, gently tug on the cutting. If you feel resistance, it means roots have likely formed and are anchoring the cutting in the medium. You might also see new leaf growth as a sign of successful rooting.
Troubleshooting Common Rooting Problems
Even with the best intentions and methods, propagation can sometimes present challenges. Here are common issues and how to tackle them:
A. Cuttings wilting/dying
This is often a sign of desiccation. The cutting is losing water faster than it can absorb it.
Solutions: Increase humidity immediately (use a dome or plastic bag). Move the cutting out of direct sun. Ensure the rooting medium is consistently moist but not waterlogged. Also, double-check that your original cutting material was healthy.
B. Cuttings rotting
Rot is usually caused by excessive moisture and/or fungal issues.
Solutions: Ensure your rooting medium is well-draining and not too heavy. Avoid overwatering; the medium should be moist, not soggy. Use cinnamon powder on the cut end to prevent fungal growth. Make sure your cutting tools were sterile to begin preventing bacterial or fungal introduction.
C. No roots after a long time
Patience is key, but sometimes a cutting just isn’t rooting.
Solutions: Verify that the temperature is warm enough (65-75°F). Ensure it’s receiving adequate bright, indirect light. Re-evaluate your cutting material – was it from a healthy, non-flowering part of the plant? Try a different natural rooting method with a fresh cutting. Some plants are simply more difficult to root than others; research your specific plant’s propagation habits.
Conclusion: Embrace the Natural Gardener Within!
There you have it! A comprehensive guide to ditching those store-bought chemicals and embracing the incredible power of nature for your plant propagation endeavors. We’ve explored how simple, everyday ingredients like willow, honey, aloe vera, and cinnamon can effectively stimulate robust root growth, often rivalling their synthetic counterparts.
By understanding the role of natural auxins and combining these DIY solutions with essential principles like healthy cuttings, proper medium, and the right environment, you’re now equipped to propagate with confidence. Not only will you save money, but you’ll also nurture your plants in an eco-friendly way, fostering a deeper connection with the natural world.
So, what are you waiting for? Embrace the natural gardener within! Start experimenting with these methods today and watch as your plant collection flourishes through your own sustainable efforts. We’d love to hear about your successes – go forth and propagate!