Introduction
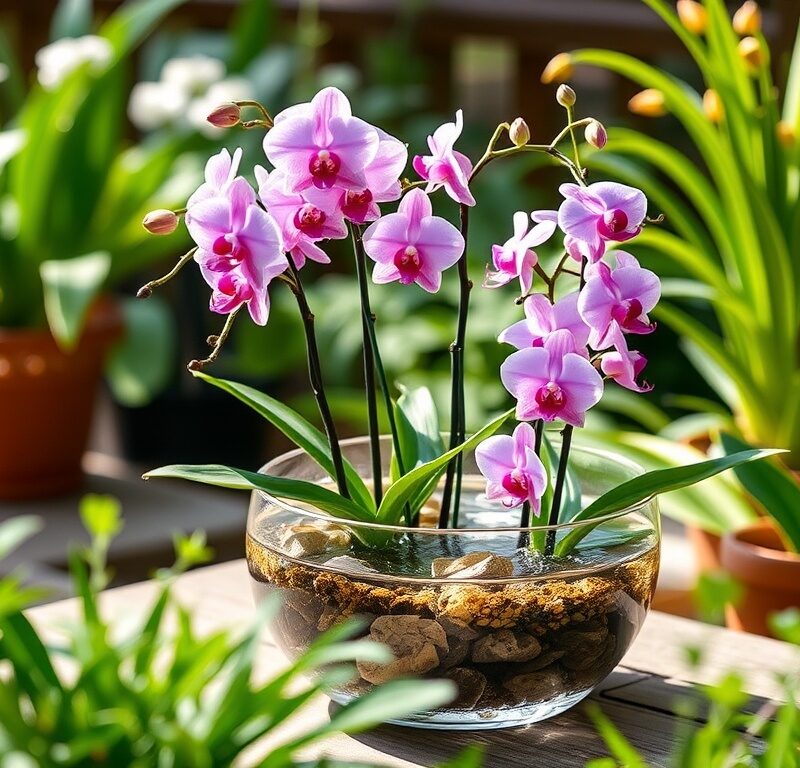
Imagine an orchid, not nestled in bark or moss, but elegantly suspended in a clear glass vase, its intricate root system on full display, a living sculpture reaching gracefully into the water. This isn’t a futuristic fantasy; it’s the beautiful reality of growing orchids in water, a method often referred to as hydroponic orchid culture or semi-hydroponics. For years, orchid enthusiasts have debated the best way to cultivate these famously finicky flowers, but water culture offers a unique blend of aesthetic appeal and surprising simplicity once you understand the basic principles. It transforms the often-hidden world of orchid roots into a mesmerizing focal point, turning your plant into a dynamic piece of living art.
The allure of water-grown orchids lies not just in their stunning visual presentation, but also in the potential benefits for both the plant and the grower. For the orchid, this method can provide consistent hydration and aeration, two critical factors for root health, while minimizing the risk of media breakdown and pests often associated with traditional potting mixes. For you, the grower, it simplifies watering routines, eliminates the mess of potting soil, and allows for easy observation of your orchid’s root development – a fascinating insight into its well-being. While it’s true that not every orchid species is suited for this approach, many popular varieties, especially the ubiquitous Phalaenopsis, adapt remarkably well, rewarding patient cultivators with lush growth and spectacular blooms.
Embarking on this hydroponic journey with your orchids can feel daunting at first, but with the right knowledge and a bit of dedication, you’ll discover a rewarding new way to appreciate these magnificent plants. This guide will walk you through everything you need to know, from selecting the perfect orchid to mastering ongoing care, troubleshooting common issues, and ultimately, enjoying the ethereal beauty of your water-borne blooms. Get ready to transform your orchid care routine and bring a touch of living elegance into your home.
Nutritional Information
Per serving (approximate values – for the orchid, not for human consumption!):
- Calories: 0 (Plants produce their own energy through photosynthesis)
- Protein: 0g
- Carbohydrates: 0g
- Fat: 0g
- Fiber: 0g
- Sodium: 0mg
Ingredients
- 1 healthy orchid (Phalaenopsis recommended for beginners)
- 1 clean, clear glass vase or container (size appropriate for orchid roots)
- Filtered or distilled water
- Orchid-specific fertilizer (liquid, highly diluted)
- Rubbing alcohol (for sterilizing tools)
- Sterilized pruning shears or sharp scissors
Instructions
- Select Your Orchid: Choose a healthy orchid, ideally a Phalaenopsis (Moth Orchid), with a robust and green root system. Avoid plants with mushy, black, or shriveled roots if possible.
- Prepare Your Workspace and Tools: Lay down newspaper or a cloth to catch debris. Sterilize your pruning shears or scissors by wiping them thoroughly with rubbing alcohol. Allow them to air dry.
- Unpot the Orchid: Gently remove the orchid from its original pot. Squeeze the sides of a plastic pot to loosen the roots if necessary. Be careful not to damage the leaves or flower spikes.
- Remove All Potting Media: This is the most crucial step. Carefully and meticulously remove ALL traces of bark, moss, sphagnum, or any other potting medium from the roots. You can use your fingers, a small stick, or even tweezers for stubborn bits. Be patient; this may take some time. Rinse the roots under lukewarm running water to help dislodge particles.
- Inspect and Trim Roots: Once all media is removed, thoroughly inspect the entire root system. Using your sterilized shears, trim away any roots that are:
- Mushy or soft (signs of rot)
- Black or dark brown and squishy
- Completely shriveled, brittle, and papery dry
- Broken or damaged
Healthy roots should be firm, plump, and typically silvery-green or white.
- Air Dry the Roots: After trimming, allow the orchid’s roots to air dry for at least 2-4 hours, or even overnight. This helps to heal any cuts and prevents bacterial or fungal issues when introduced to water. Place the orchid upside down or on its side on a clean surface.
- Prepare the Container: Ensure your clear glass vase or container is thoroughly washed with soap and hot water, then rinsed well. Sterilizing with a dilute bleach solution or hydrogen peroxide rinse is an extra layer of precaution, followed by a thorough rinse.
- Position the Orchid: Carefully place the air-dried orchid into the clean glass container. The goal is to have only the very tips of the roots submerged in water. The crown (where the leaves emerge) and the base of the plant MUST remain dry to prevent rot. You may need to adjust the orchid’s position or use small, clean stones at the bottom (ensure they are inert and won’t leach chemicals) to support it, if the container is too deep.
- Add Water: Pour filtered or distilled water into the container until only about 1/4 to 1/2 inch of the root tips are submerged. Ensure no leaves or the plant’s crown are touching the water.
- Initial Placement: Place your newly set-up water-grown orchid in a location that receives bright, indirect light. Avoid direct sunlight, which can scorch the leaves and encourage rapid algae growth in the water.
- Establish a Watering Schedule: For the first few weeks, change the water every 2-3 days to ensure freshness and oxygenation. Once the orchid has settled, you can transition to changing the water every 3-7 days, or immediately if the water appears cloudy or discolored.
- Begin Fertilization: After the first week or two, when the orchid seems to be adapting, begin fertilizing. Mix an orchid-specific fertilizer at a very diluted strength – typically 1/4 to 1/8 of the recommended dosage. Fertilize every 2-4 weeks during periods of active growth. On non-fertilizing weeks, simply use plain filtered water.
- Monitor and Adjust: Regularly observe your orchid’s roots for new growth (green tips), signs of rot, or algae. Adjust your watering and light as needed. Patience is key; it may take some time for the orchid to fully adapt to its new environment.
Cooking Tips and Variations
While we’re not cooking in the traditional sense, these tips will ensure your “hydroponic journey” is a success!
- Choose the Right Container: A clear glass container is ideal not just for aesthetics, but because it allows you to easily monitor root health and water levels. Ensure it has a wide enough opening to comfortably place and remove the orchid. Avoid containers that are too deep, as this makes it harder to keep the crown dry.
- Consider the “Semi-Hydroponic” Method: For some, a semi-hydroponic approach using LECA (Lightweight Expanded Clay Aggregate) pebbles can be a good intermediate step. The LECA provides support and wicks water up to the roots, while allowing for excellent air circulation. This still involves a reservoir of water, but the roots are not constantly submerged. If you venture into this, ensure the LECA is thoroughly rinsed before use.
- The Importance of Aeration: Even in water, orchid roots need oxygen. This is why partial submersion and frequent water changes are non-negotiable. Stagnant, oxygen-depleted water is a prime cause of root rot.
- Temperature Matters: Keep your water-grown orchid in a consistent temperature range, ideally between 65-80°F (18-27°C). Avoid sudden temperature fluctuations, which can stress the plant.
- Boosting Humidity: While water culture provides some humidity around the roots, orchids still appreciate overall ambient humidity. Consider placing the vase on a pebble tray with water, or using a room humidifier, especially in dry environments.
- “Flush and Fill” Fertilizing: A popular method is to fertilize for one week (with diluted solution), then flush with plain water for the next three weeks before repeating. This helps prevent nutrient salt buildup.
- Dealing with Algae: Small amounts of green algae in the water are generally harmless. However, excessive algae can compete for nutrients and indicate too much light. Gently clean the container during water changes. If it’s a persistent problem, consider moving the orchid to a slightly less bright location or using a container that is opaque on the lower half.
- Patience for Re-blooming: Don’t be discouraged if your orchid doesn’t re-bloom immediately. It needs time to establish a healthy root system in its new environment. Consistent care, adequate light, and proper fertilization are the keys to encouraging new spikes.
Storage and Reheating
This section is not applicable to growing orchids, as they are living plants, not food items. However, proper ongoing “storage” (placement) and “reheating” (revitalization) are critical for their health!
Ongoing Placement:
- Light: Place your water-grown orchid in a spot with bright, indirect light. An east-facing window is often ideal, or a few feet away from a south or west-facing window where it won’t receive direct, scorching sun. Too little light will hinder growth and flowering; too much direct light can burn leaves and promote excessive algae.
- Temperature and Airflow: Maintain consistent room temperatures, avoiding cold drafts or extreme heat. Good air circulation around the plant is also beneficial, which is why open glass containers are preferred over enclosed terrariums.
Revitalizing a Struggling Orchid:
If your water-grown orchid shows signs of stress (yellowing leaves, shriveled roots, no new growth), consider these “reheating” or revitalization steps:
- Root Check: Immediately remove the orchid from the water and thoroughly inspect the roots. Trim away any dead or rotting roots with sterilized shears. Allow the roots to air dry for several hours before returning to fresh, clean water with only minimal root submersion.
- Water Quality: Ensure you are consistently using filtered or distilled water. Tap water, especially if it’s hard or chlorinated, can stress the roots over time.
- Fertilization Review: Are you over-fertilizing or under-fertilizing? Adjust the dilution and frequency. A period of plain water can help if you suspect nutrient burn.
- Light Adjustment: Assess your light conditions. Is it too dark or too bright? Sometimes a slight repositioning can make a big difference.
- Humidity Boost: If your environment is very dry, an increase in ambient humidity (e.g., pebble tray, humidifier) can help the orchid recover.
- Patience and Observation: Orchids are slow to respond. Continue consistent care and closely observe for any signs of improvement. Sometimes a change in method (e.g., temporarily moving back to a very airy bark mix) can help a severely struggling plant recover before attempting water culture again.
Frequently Asked Questions
Can I use regular tap water for my water-grown orchid?
While some growers with very clean tap water might get away with it, it’s generally not recommended. Tap water often contains chlorine, chloramines, and various dissolved minerals (salts) that can build up over time, leading to root tip burn, nutrient imbalance, and unsightly mineral deposits on your container and roots. Filtered water (from a Brita-type filter or whole-house filter) or distilled water is much preferred as it’s free of these contaminants, making it safer for your orchid and preventing mineral buildup.
My orchid’s roots are turning yellow/brown and mushy. What’s happening?
This is a classic sign of root rot, the most common issue with water-grown orchids. It typically occurs due to too much water, meaning the roots are submerged too deeply, or the water isn’t changed frequently enough, leading to oxygen deprivation and bacterial/fungal growth. Immediately remove the orchid from the water, trim all affected mushy roots with sterilized shears until you reach firm, healthy tissue, and allow the remaining roots to air dry for several hours. When you return it to the container, ensure only the very tips of the roots are submerged, and commit to more frequent water changes (every 2-3 days initially).
How often should I fertilize my water-grown orchid?
Orchids in water culture still require nutrients, but they are very sensitive to over-fertilization. The general rule is “weakly, weekly” or “weakly, bi-weekly.” Use a high-quality, orchid-specific liquid fertilizer diluted to 1/4 to 1/8 of the recommended strength. During periods of active growth (new leaves, roots), fertilize every 2-4 weeks. Reduce or stop fertilizing during dormancy or if the plant shows signs of stress. Some growers prefer a “flush and fill” method: fertilize for one week, then use plain water for the next three weeks before repeating the cycle.