🍠 Growing Sweet Potatoes at Home in Containers: A Step-by-Step Guide
Sweet potatoes are a nutritious, delicious root crop that you can easily grow at home — even without a large garden. With the right method, a sunny spot, and a container, anyone can cultivate sweet potatoes successfully. Whether you’re in an apartment, have a small patio, or just prefer container gardening, this guide walks you through every step of growing sweet potatoes in containers, from sprouting slips to harvest.
🧰 Materials You’ll Need
- Organic sweet potato(s)
- Toothpicks
- Glass or jar for water
- Large container (bucket, planter, or grow bag — at least 12 inches deep)
- High-quality potting mix
- Organic fertilizer
- Sunny location (6–8 hours of sunlight daily)
- Watering can
🥔 Step 1: Selecting Sweet Potatoes
Choose healthy, firm, organic sweet potatoes — these are more likely to sprout and produce viable slips. Avoid chemically treated or waxed potatoes, which may not grow. Once you have your sweet potato, it’s time to start producing slips (baby plants used to grow new sweet potatoes).
Method A: Whole Potato Method
- Fill a glass with water.
- Insert toothpicks around the sweet potato halfway down.
- Place the sweet potato pointy-side down in the glass so the bottom half is submerged.
- Set it on a warm, sunny windowsill.
- Change the water every few days to keep it fresh.
In 4–6 weeks, slips (green shoots) will begin to grow from the top. Once each slip reaches 6–8 inches in length, gently twist them off — they’re ready to plant.
Method B: Slice Method
- Slice the sweet potato into 1-inch-thick rounds.
- Use toothpicks to suspend slices halfway in water (cut side down).
- Place in a sunny spot and change the water regularly.
Slips will sprout along the sides. Harvest them once they reach 6–8 inches long.
🌱 Step 2: Transplanting Slips into Containers
Once your slips are ready, it’s time to move them into containers:
- Use a container with drainage holes that is at least 12 inches deep and wide.
- Fill it with a high-quality potting mix, leaving 2–3 inches of space at the top.
- Dig a small hole deep enough to cover the roots and 2 inches of the stem.
- Insert the slip, gently pressing the soil around it to secure it in place.
- Water thoroughly after planting.
🌞 Step 3: Ongoing Container Care
Sweet potatoes thrive with warm temperatures, sunlight, and consistent moisture. Here’s how to care for them:
- Place the container in a spot with at least 6–8 hours of sunlight daily.
- Water regularly to keep the soil moist but never soggy. Use a watering can to control flow.
- Apply an organic fertilizer every 3–4 weeks, especially one with higher phosphorus and potassium for root development.
- Watch for pests like aphids or flea beetles. Treat naturally with neem oil or insecticidal soap if needed.
- Ensure proper airflow and drainage to prevent rot and fungal diseases.
📊 Sweet Potato Growing Overview Table
| Stage | Details | Timeframe | Care Notes |
|---|---|---|---|
| Slip Production | Sprout slips from a sweet potato | 4–6 weeks | Keep warm and change water regularly |
| Transplanting | Move 6–8 inch slips into containers | After slips develop roots | Use fertile, well-draining soil |
| Growth Phase | Vines grow vigorously | 2–3 months | Water consistently, fertilize monthly |
| Harvest | Leaves yellow and vines die back | 3–4 months after planting | Dig carefully to avoid damaging tubers |
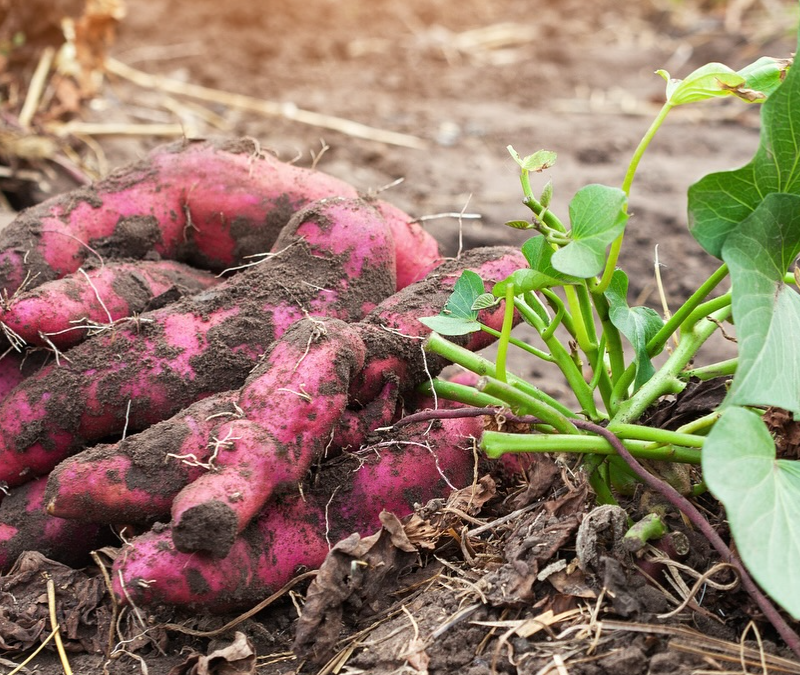
⏳ Step 4: Harvesting Sweet Potatoes
Sweet potatoes are ready for harvest about 90–120 days after transplanting, depending on your climate and variety. Signs it’s time to harvest:
- Leaves start to yellow and vines die back.
- The soil surface may crack or bulge from growing tubers.
To harvest:
- Gently loosen the soil with your hands or a small garden fork.
- Lift the sweet potatoes carefully to avoid cuts or bruises.
- Let them cure in a warm, dry spot for 7–10 days to enhance flavor and sweetness.
🚫 Common Mistakes to Avoid
- ❌ Using non-organic potatoes that may be treated to prevent sprouting.
- ❌ Overwatering — causes rot and fungal growth.
- ❌ Skipping fertilizer — results in small, underdeveloped tubers.
- ❌ Planting slips too deep — can stress young plants.
- ❌ Crowding slips in containers — reduces yield.
❓ 10 FAQs About Growing Sweet Potatoes in Containers
1. Can I grow sweet potatoes indoors?
Yes, if you have a sunny window or use grow lights. A warm, bright location is key.
2. How big should the container be?
At least 12 inches deep and 18 inches wide. Grow bags or large buckets also work well.
3. Do sweet potatoes need full sun?
Yes, they thrive with 6–8 hours of full sun daily.
4. How many slips should I plant per container?
1–2 slips per 5-gallon container to avoid overcrowding.
5. Can I use regular garden soil?
It’s not recommended. Use light, well-draining potting mix to avoid compaction.
6. When should I start growing slips?
About 6 weeks before your last frost date.
7. Can I reuse soil from last year?
It’s best to refresh or replace the soil to reduce disease risk and replenish nutrients.
8. What fertilizer works best?
Use an organic fertilizer balanced in phosphorus and potassium for root growth (like 5-10-10).
9. How long can harvested sweet potatoes be stored?
Properly cured sweet potatoes can last 4–6 months in a cool, dry place.
10. What do I do if my sweet potatoes are small?
Check sunlight, soil nutrients, and watering habits. Small tubers often result from poor care or short growing seasons.
🌟 Conclusion: From Slip to Harvest — Your Container Sweet Potato Success
With a bit of preparation and care, growing sweet potatoes in containers is not only possible — it’s fun, space-saving, and deliciously rewarding. Starting with simple slips, nurturing them in the right soil and sunlight, and finishing with a bountiful harvest, you’ll be amazed at what you can grow right on your patio or balcony. So grab a sweet potato, start your slips, and get ready to dig into homegrown success!