Make Free Liquid Fertilizer at Home Using This Forgotten Ancient Technique
Unlock the power of fermentation and reclaim an age‑old gardening secret! This comprehensive guide teaches you how to transform everyday organic waste—like kitchen scraps, leafy trimmings, or garden debris—into a potent, free liquid fertilizer. Embrace sustainability, nourish your plants naturally, and bypass costly store‑bought options.
The Ancient Wisdom Behind Liquid Fertilizer
Across civilizations, gardeners and farmers have long known that fermenting organic matter in water unlocks a surprising wealth of nutrients—converted into plant-ready forms through microbial action. This “liquid gold” literally takes waste and turns it into nourishment. By fermenting organic scraps, you’re creating compost tea-like elixirs rich in nitrogen, phosphorus, potassium, and beneficial microorganisms. ([turn0news12])
One such traditional method is Jeevamrutha, a staple in Indian farming: a microbial brew made from cow dung, cow urine, local soil, and a sweetener like jaggery to cultivate rich microbial life for healthy soil. ([turn0search19])
The Forgotten Fermentation Technique
This method is straightforward and cost-free:
- Collect organic matter: Kitchen scraps (avoid meat/dairy), yard clippings, fallen leaves.
- Choose your container: Use a large bucket or bin—around 5 gallons works well. Cover partially to allow gases to escape. ([turn0search1])
- Add water: Preferably rainwater or dechlorinated tap water.
- Stir regularly: This introduces oxygen and accelerates microbial fermentation. Start daily, then every few days.
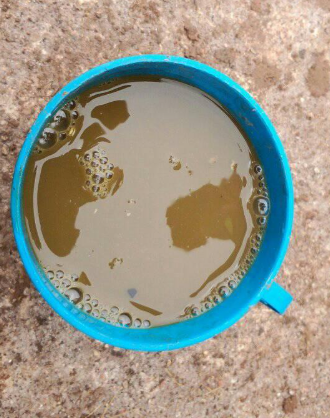
- Wait for fermentation: It may take from two weeks to two months—depending on temperature and material mix—until solids break down and the smell is earthy.
- Strain the liquid: Use fine mesh or cloth to separate solids; the resulting “tea” is your raw fertilizer.
- Dilute before use: A good starting ratio is 1 part fertilizer to 10 parts water to avoid “burning” plants.
Modern Interpretations: Compost Tea & Bokashi Tea
Similar to the ancient fermentation method are modern compost teas—quick brews made by steeping compost in water (often with molasses and aeration to boost microbial growth). These teas provide fast-acting nutrients and beneficial microorganisms for soil health. ([turn0news12], [turn0news11])
Bokashi composting, a Japanese method, uses beneficial microorganisms (EM) to ferment food waste—including meat and dairy—in an airtight bucket. Bokashi tea (the drained liquid) can be diluted and used as fertilizer, while the ferment itself is turned into rich compost. ([turn0news14], [turn0news13])
Step‑by‑Step Guide: From Waste to Liquid Fertilizer
1. Gather Your Ingredients
- Choose plant-based scraps—avoid meat, dairy, or oils that can attract pests
- Mix green (nitrogen) and brown (carbon) materials for balanced nutrition
2. Set Up Fermentation Container
- A 5‑gallon bucket with slight lid opening works. Leave enough room for expansion and gases to escape. ([turn0news14])
- Add water—rainwater preferred to protect beneficial microbes
3. Stir & Support Fermentation
- Stir daily or every few days to oxygenate and distribute microbes
- Warm temperatures (around 20–30 °C) accelerate breakdown
4. Know When It’s Ready
- Look for an earthy, no-longer putrid smell
- Solids should visibly break down, and the liquid should appear brownish and rich
5. Strain & Dilute
- Strain through cloth or fine mesh
- Start with 1:10 dilution; adjust based on plant response
6. Apply With Care
- Apply directly to soil around plant roots—works as a nutrient and microbial boost
- Use in place of or alongside compost tea or bokashi tea
Benefits of Home‑Made Liquid Fertilizer
- Eco‑friendly: Repurposes organic waste instead of letting it rot in landfills. ([turn0news12])
- Cost‑effective: Made from scraps—zero cost versus commercial fertilizers.
- Nutrient‑rich: Loaded with NPK, beneficial microbes, and organic matter.
- Microbial boost: Fermented teas nourish soil life, enhancing plant resilience. ([turn0news11])
Nutrition & Microbial Snapshot
| Component | Function |
|---|---|
| Nitrogen (N) | Promotes leafy growth and protein synthesis |
| Phosphorus (P) | Supports root development and flowering |
| Potassium (K) | Strengthens overall plant health |
| Beneficial microbes | Support nutrient cycling, soil structure, and plant immunity |
10 FAQs About DIY Liquid Fertilizer
- Can I use meat or dairy? Avoid it in basic fermentation—rot can smell bad and attract pests. Bokashi allows these safely. ([turn0news14])
- How long to ferment? 2 weeks to 2 months, depending on the material and temperature.
- Why dilute? To avoid over‑fertilizing or burning tender roots with concentrated nutrients.
- Can I add molasses? Yes—molasses feeds beneficial microbes and enriches compost tea steeping. ([turn0news11])
- Is aeration required? Not strictly—non‑aerated (passive) brews still work, though aeration speeds microbe growth. ([turn0search6])
- Use frequency? Apply monthly or before planting; watch plants’ response to fine‑tune.
- Is smell bad? A mild earthy smell is normal—but if odor is foul, increase ventilation or shorten fermentation.
- Can I compost the leftover solids? Yes—add them to your compost heap or bokashi system for further breakdown.
- Storage? Use the liquid within a week—microbial populations decline over time.
- Works indoors? Absolutely—just ensure container is sealed except for a small vent for gases.
Final Thoughts
This ancient, fermentation‑based method allows you to craft powerful liquid fertilizer from everyday organic scraps—no cost, no waste, no synthetic chemicals. Whether you’re brewing a traditional “tea,” using Bokashi, or reviving methods like Jeevamrutha, you’re nourishing your garden and honoring earth-smart wisdom.
Ready to ferment your way to flourishing plants? Share your compost tea recipes or fermentation triumphs—I’d love to help customize a brew plan for your garden!