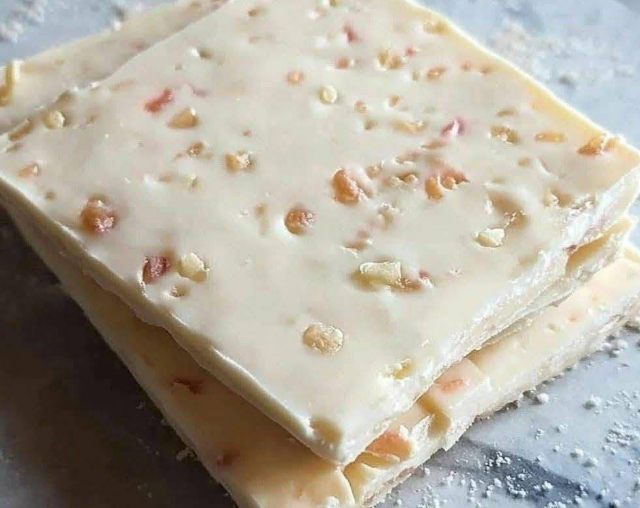
Easy 4‑Ingredient Chewy Nougat Bars
Introduction: A Simple Sweet Fix 🍬
Who doesn’t love a sweet treat that feels indulgent, but with minimal effort? These 4‑ingredient chewy nougat bars deliver on flavor and texture, channeling the soft, chewy interior of your favorite candy bar — without all the fuss. Whether you’re whipping up something fast for a gathering, after‑school snack, or a cozy evening treat, this recipe shines for its simplicity and deliciousness.
In this article, we’ll walk you through step‑by‑step instructions, share variations, offer health tips and safety notes, and even include a nutrition breakdown. I’ll also bring in expert commentary from a chef voice (let’s imagine Chef Gordon Ramsay giving a nod), and answer 10 detailed FAQs. Let’s get into it!
Ingredients & Yield
| Ingredient | Amount | Notes / Substitutions |
|---|---|---|
| Miniature marshmallows | 3 cups | This ensures chewiness — don’t skimp |
| Unsalted butter | ¼ cup (4 Tbsp) | You can use salted, just reduce added salt elsewhere |
| Creamy peanut butter | ¼ cup | Substitute almond butter, SunButter, etc. |
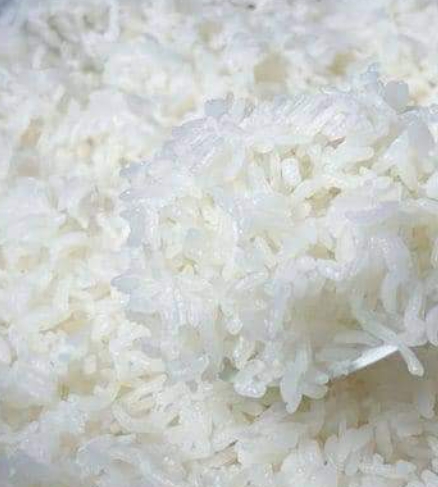
| Crispy rice cereal | 2 cups | Use gluten‑free cereal if needed |
Yield: 9 to 16 bars (depending on how you cut them)
Prep time: ~10 minutes
Setting time: 1–2 hours (or 30–45 min refrigerated)
Step‑by‑Step Instructions
1. Prepare the Pan
Line an 8×8 inch (20×20 cm) square baking pan with parchment paper, leaving an overhang on two opposite sides. Lightly grease the parchment with butter or spray. This step makes it easier to remove the nougat slab once set. A properly lined pan is key to clean edges and neat squares.
2. Melt the Base
In a large microwave-safe bowl, combine the marshmallows and butter. Microwave on high for 1 minute. Stir thoroughly. If not completely melted, continue in 15-second bursts, stirring between each session until smooth. The mixture should be silky, without any visible lumps.
Stovetop Option: You can also use a saucepan over low heat. Stir continuously until everything is fully melted and combined, being cautious not to let the marshmallow scorch.
3. Add the Nut Butter
With the marshmallow-butter mixture still hot, immediately add the peanut butter. Stir until fully incorporated. This helps integrate the flavors and enhances the bar’s chewy texture. The peanut butter adds richness and a bit of protein, balancing the sweetness of the marshmallows.
4. Stir in the Cereal
Add the crispy rice cereal to the marshmallow-peanut mixture. Stir gently but thoroughly to ensure even coating. Use a large spatula to lift and fold the mixture, ensuring every piece of cereal gets a good coating. Be quick, as the mixture can start to set as it cools.
5. Press Into the Pan
Transfer the mixture into your prepared pan. Use the back of a greased spatula or your hands (greased or gloved) to press the mixture down firmly and evenly. Don’t rush this part—pressing firmly prevents air pockets and helps the bars stick together better.
6. Cool & Set
Allow the pan to sit at room temperature for 1 to 2 hours until the bars are fully set. Alternatively, refrigerate the pan for 30 to 45 minutes to speed things up. Avoid freezing as it can alter the texture.
7. Cut & Serve
Once fully set, lift the entire slab out of the pan using the parchment overhang. Place on a cutting board and use a sharp knife to cut into bars. Clean the knife between cuts for neater results. Store in an airtight container once cooled.
Tips for Perfect Bars
- Press firmly: Essential for well-formed bars that don’t crumble when sliced.
- Use full marshmallow amount: Ensures adequate binding and chewiness.
- Experiment with mix-ins: Add sprinkles, mini chocolate chips, or chopped nuts for extra texture and flavor.
- Don’t overheat the mixture: Can cause the marshmallow to become stiff or harden too fast.
- Line and grease well: Prevents sticking and makes cleanup easier.
More from Fresh Toner Hungar
- Need ideas for school lunchbox snacks? Try our No-Bake Snack Guide.
- Want more sweet no-bake options? See our No-Bake Cookie Collection.
- Explore holiday classics in our Festive Fudge Recipes article.
Note: Be sure to adjust ingredients and quantities based on your dietary needs and preferences. Always supervise children during preparation involving heat or sharp tools.