Achieve Non-Stop Blooming: Orchid Care Tips and Homemade Fertilizer Guide
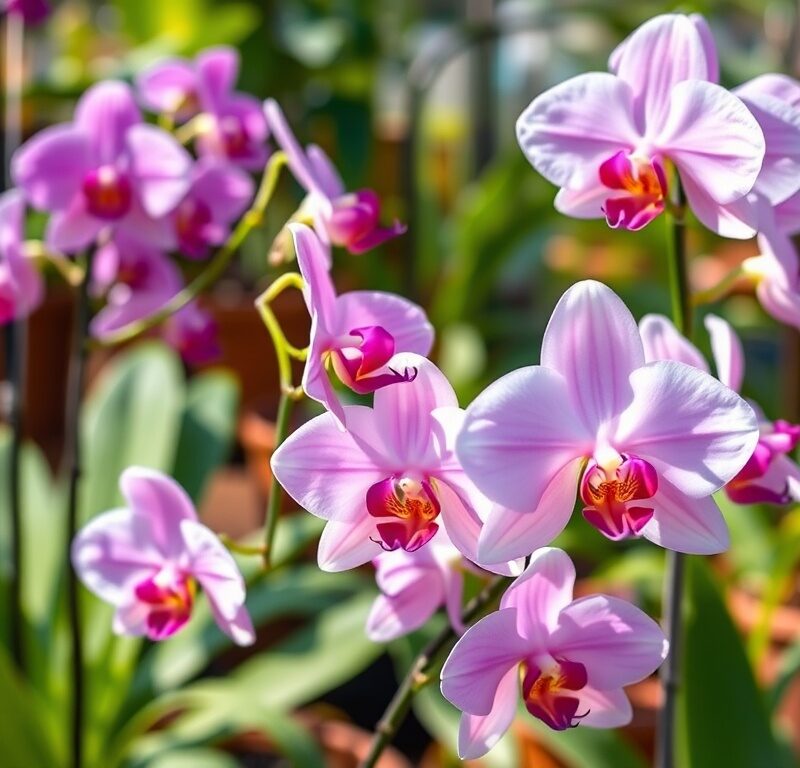
There’s an undeniable magic to orchids. Their exotic beauty, intricate forms, and vibrant colors can transform any space into a tropical haven. But for many plant enthusiasts, the dream of continuous, breathtaking orchid blooms often feels just out of reach. We buy these stunning plants, enjoy their initial display, and then watch as they settle into a period of green foliage, leaving us wondering if we’ll ever witness that spectacular reblooming again.
The good news is that achieving non-stop blooming isn’t a mythical feat reserved for professional growers. While orchids have a reputation for being finicky, they are, in fact, quite resilient and communicative plants. With the right fundamental care and a little understanding of their unique needs, you can unlock their full blooming potential. This comprehensive guide will demystify orchid care, providing you with essential tips and empowering you to craft your own nutrient-rich fertilizers right at home.
Our goal is to equip you with the knowledge and confidence to cultivate a thriving collection of orchids that consistently reward you with prolonged, vibrant flower displays. From mastering light and watering to understanding vital nutrients and even concocting your own DIY orchid food, you’re about to embark on a journey that will turn your home into a blooming oasis.
Nutritional Information
Per serving (approximate values):
- Calories: 0
- Protein: 0g
- Carbohydrates: 0g
- Fat: 0g
- Fiber: 0g
- Sodium: 0mg
Ingredients
- 1-2 Phalaenopsis orchids (or your preferred orchid variety)
- Bright, indirect light source (east-facing window, sheer curtain)
- Watering can
- Rainwater, distilled, or filtered water
- Humidity tray (optional: pebbles, shallow tray)
- Appropriate orchid potting mix (bark, sphagnum moss, perlite blend)
- Clean pot with drainage holes (plastic or terracotta)
- Sterilized pruning shears or razor blade
- **For Epsom Salt Bloom Booster:**
- 1 teaspoon Epsom salt (magnesium sulfate)
- 1 gallon water
- **For Banana Peel Tea:**
- 2-3 banana peels
- 1 liter water
- **For Rice Water Elixir:**
- Water used to rinse 1 cup of uncooked rice
- **For Used Coffee Grounds:**
- 1-2 tablespoons used coffee grounds
Instructions
- Understand Essential Orchid Care: The Foundation for Flowering
- Master Light Requirements: Position your orchid in a location that receives bright, indirect light. An east-facing window is often ideal. Observe your orchid’s leaves: reddish tints indicate too much light, while dark green leaves with no blooms suggest insufficient light. Research the specific light needs for your orchid type (e.g., Phalaenopsis prefer lower light than Cattleya).
- Practice Watering Wisdom: Water only when the potting medium is dry. Lift the pot to feel its weight, check for silvery-white roots (indicating dryness), or insert a wooden skewer into the media to test for moisture. Water thoroughly by soaking the pot in water for 10-15 minutes or by running water through the media until it drains freely. Always ensure no water collects in the crown of monopodial orchids like Phalaenopsis to prevent rot. Use rainwater, distilled, or filtered water whenever possible, as tap water can contain harmful salts.
- Ensure Humidity & Air Circulation: Orchids thrive in high humidity. Increase humidity by placing your orchid on a humidity tray (a shallow tray filled with pebbles and water, ensuring the pot doesn’t sit in the water). Grouping plants together or using a room humidifier can also help. Good air circulation is vital to prevent fungal diseases, so avoid stagnant air.
- Manage Temperature & Repotting: Aim for ideal temperature ranges specific to your orchid type, often with a slight drop at night to encourage blooming. Repot your orchid every 1-2 years, or when the potting media breaks down, after it has finished flowering. Use a fresh, appropriate orchid potting mix (bark, sphagnum moss, or a blend) and a clean pot with excellent drainage.
- Apply The Power of Nutrition: Why Fertilize Your Orchids?
- Understand that potting media provides limited nutrients, which deplete over time. Fertilizing provides the essential macronutrients (Nitrogen, Phosphorus, Potassium) and micronutrients necessary for robust growth and prolific blooming.
- Utilize Nitrogen (N) for healthy leaf and vegetative growth, Phosphorus (P) for strong root development and abundant flower formation, and Potassium (K) for overall plant health, disease resistance, and flower quality.
- Fertilize during the orchid’s active growth phase, typically every 1-2 weeks with a diluted solution (“weakly, weekly”). Reduce or cease fertilizing during dormancy or rest periods.
- Create DIY Orchid Food: Homemade Fertilizer Recipes
- General Principles: Always dilute homemade fertilizers significantly. Consider organic options for gentle, slow-release nutrition. Test new fertilizers on a small area or a less valuable plant first to observe its reaction.
- Recipe 1: Epsom Salt Bloom Booster: Dissolve 1 teaspoon of Epsom salt in 1 gallon of water. Use this solution to water your orchids once a month. The magnesium in Epsom salt aids in photosynthesis and phosphorus uptake, leading to more vibrant and abundant blooms.
- Recipe 2: Banana Peel Tea (Potassium Powerhouse): Place 2-3 banana peels in a jar or container and cover them with 1 liter of water. Let them soak for 2-3 days, then strain the liquid. Dilute this “tea” by mixing 1 part banana tea with 4 parts plain water. Use this diluted solution to water your orchids every 2-4 weeks. This provides a rich source of potassium for stronger stems and enhanced flowering.
- Recipe 3: Rice Water Elixir (Trace Nutrients & Starches): Collect the cloudy water after rinsing uncooked rice. Use this rice water directly, or dilute it further if desired (e.g., 1:1 with plain water), to water your orchids every few weeks. It contains trace amounts of nitrogen, phosphorus, potassium, and beneficial starches that support microbial activity in the potting medium.
- Recipe 4: Used Coffee Grounds (Mild Acidifier & Nitrogen): After brewing coffee, allow the used grounds to dry slightly. Sprinkle a very small amount (1/2 to 1 teaspoon) directly on top of the orchid’s potting media, away from the stem, or brew a very weak “coffee tea” by steeping a small amount of used grounds in water. Use sparingly, as excessive coffee grounds can over-acidify the media or lead to mold growth. This provides a gentle boost of nitrogen and can help maintain a slightly acidic pH, which some orchids prefer.
- Important Considerations for Homemade Fertilizers: Always observe your orchid closely for any adverse reactions. If you notice yellowing leaves, stunted growth, or unusual spots, discontinue use. Homemade fertilizers are generally milder than commercial options; consider supplementing with a balanced commercial orchid fertilizer occasionally if your orchids seem to need an extra boost. Watch for signs of mold or pests, especially when using organic materials.
- Troubleshoot & Encourage Reblooming
- Address Common Blooming Issues: If your orchid isn’t blooming, check for insufficient light, incorrect temperatures, or nutrient deficiencies. Bud blast (buds dropping before opening) can be caused by sudden environmental changes, drafts, or low humidity. Pest issues or environmental stress can lead to short-lived blooms.
- Induce Reblooming with a “Rest Period”: For many Phalaenopsis orchids, a cooler night temperature (around 55-65°F or 13-18°C) for several weeks after their last bloom cycle can trigger new flower spike development. During this period, slightly reduce watering and cease fertilizing until a new spike appears.
- Provide Post-Bloom Care: Once your orchid’s flowers fade, decide whether to cut the spent flower spike. For Phalaenopsis, you can cut it back to a node (a small bump on the stem) below the lowest flower if the spike is still green, or cut it completely if it’s yellow or brown. Continue regular light, water, and humidity care to allow the plant to gather strength for its next bloom cycle.
Cooking Tips and Variations
While we’re not cooking, these “tips” are about optimizing your orchid care for the best blooming results.
- “Weakly, Weekly” Fertilizing: This is the golden rule for orchids. It’s far better to fertilize frequently with a very diluted solution than to fertilize rarely with a strong one. Strong fertilizers can burn delicate orchid roots.
- Observe Your Orchid’s Roots: Healthy orchid roots are a great indicator of overall plant health. They should be firm and, when dry, silvery-white. After watering, they should turn plump and green. If roots are mushy or brown, it’s a sign of overwatering; if they’re shriveled, it’s underwatering.
- Don’t Use Ice Cubes: Despite popular myths, watering orchids with ice cubes is detrimental. It provides insufficient hydration, can shock the plant with cold temperatures, and does not mimic their natural environment. Always use room-temperature water.
- Rotate Your Plant: To ensure even growth and prevent your orchid from leaning towards the light source, rotate it 1/4 turn every week or two.
- Patience is Key: Orchids operate on their own timeline. Don’t get discouraged if your orchid doesn’t rebloom immediately. Consistent, correct care will eventually be rewarded. Many orchids need a period of rest and specific conditions to initiate a new flower spike.
- Consider Specific Orchid Types: While this guide provides general care, remember that different orchid genera (e.g., Phalaenopsis, Cattleya, Oncidium, Dendrobium) have slightly varied needs regarding light, temperature, and dormancy. Research your specific orchid type for tailored advice.
- Cleanliness is Next to Godliness: Always use clean, sterilized tools when repotting or pruning to prevent the spread of diseases. A quick wipe with rubbing alcohol before and after use is sufficient.
- Don’t Overpot: When repotting, choose a pot that is only slightly larger than the previous one, or even the same size if the root ball hasn’t grown significantly. Orchids prefer to be somewhat root-bound.
- Humidity Tray Setup: To make a humidity tray, find a shallow saucer or tray larger than your orchid’s pot. Fill it with a layer of pebbles. Add water to the tray, ensuring the water level is below the top of the pebbles so the orchid’s pot never sits directly in water. As the water evaporates, it creates a humid microclimate around the plant.
Storage and Reheating
Orchid care isn’t about storage and reheating in the culinary sense, but rather about maintaining optimal conditions for their long-term health and continuous blooming. Think of “storage” as providing the right environment for your orchid’s “downtime” or non-blooming periods, and “reheating” as creating the conditions that encourage reblooming.
- Dormancy/Rest Period “Storage”: After an orchid finishes blooming, it often enters a rest period to conserve energy for the next bloom cycle. During this time, continue with consistent, but slightly reduced, care. Maintain good light (though not necessarily as intense as when blooming), reduce watering frequency (allowing the media to dry out more thoroughly between waterings), and cease fertilizing. For Phalaenopsis, this “storage” period often involves a drop in night temperatures (as mentioned in the instructions) to induce new flower spikes. Ensure good air circulation remains paramount to prevent fungal issues.
- Off-Season “Storage” for Non-Phalaenopsis Orchids: Some orchid types, particularly sympodial orchids with pseudobulbs (like Cattleya or Oncidium), have very distinct rest periods that might involve even less water and cooler temperatures. During this time, they are “storing” energy in their pseudobulbs. Understanding your specific orchid’s natural growth cycle is crucial for its “storage” needs.
- Encouraging Reblooming (“Reheating”): The “reheating” process involves adjusting conditions to signal the orchid that it’s time to bloom again. For Phalaenopsis, this means providing that cooler night temperature for several weeks. Once a new flower spike emerges, you can gradually resume regular fertilizing and ensure consistent light and humidity. For other orchids, “reheating” might involve increasing light intensity slightly, resuming regular watering and fertilizing as new growth appears, and ensuring the plant has built up sufficient energy reserves during its rest period.
- Long-Term Health “Storage”: The best “storage” for any orchid is a consistently stable and appropriate environment. Avoid drastic fluctuations in temperature, light, or humidity. Protect them from drafts, extreme heat or cold, and ensure they are free from pests. A healthy orchid, well “stored” in optimal conditions, is much more likely to “reheat” and bloom again and again.
Frequently Asked Questions
My orchid dropped all its buds! What happened?
This common and frustrating occurrence is called “bud blast.” It’s usually triggered by a sudden environmental change or stress. Common culprits include drastic temperature fluctuations (like a cold draft from a window or an open door), extremely low humidity, sudden changes in light intensity, underwatering, overwatering, or exposure to ethylene gas (from ripening fruit or gas leaks). Try to maintain stable conditions around your orchid, especially when it’s developing buds.
How do I know what kind of orchid I have?
If your orchid didn’t come with a label, identifying it can be a fun challenge. Most common orchids sold in stores are Phalaenopsis (Moth Orchids), known for their flat, broad leaves and long-lasting blooms. If your orchid has thick, bulbous growths at the base of its leaves (pseudobulbs), it might be a Cattleya, Oncidium, or Dendrobium. Look at the shape of the flowers and leaves, and consider using a plant identification app or consulting an orchid enthusiast group online for help. Knowing your orchid’s type is crucial for tailored care.
My orchid’s leaves are turning yellow. What does that mean?
Yellowing leaves can indicate several issues. Older, lower leaves naturally yellow and drop off as part of the plant’s life cycle. However, widespread yellowing can signal overwatering (leading to root rot), underwatering (the plant can’t absorb enough moisture), nutrient deficiency (especially nitrogen), or too much direct sunlight. Check your watering habits and root health first. If roots are mushy, reduce watering. If roots are shriveled, increase it carefully. Ensure your plant is not getting scorched by direct sun, and consider a balanced fertilizer if other causes are ruled out.
Can I use regular potting soil for my orchid?
Absolutely not! Most popular orchids are epiphytes, meaning they grow on trees in their natural habitat, not in soil. Regular potting soil retains too much moisture and will suffocate your orchid’s roots, leading to fatal root rot. Always use a specialized orchid potting mix, typically composed of bark chips, sphagnum moss, perlite, or a blend of these. This provides the excellent drainage and air circulation that orchid roots require to thrive.