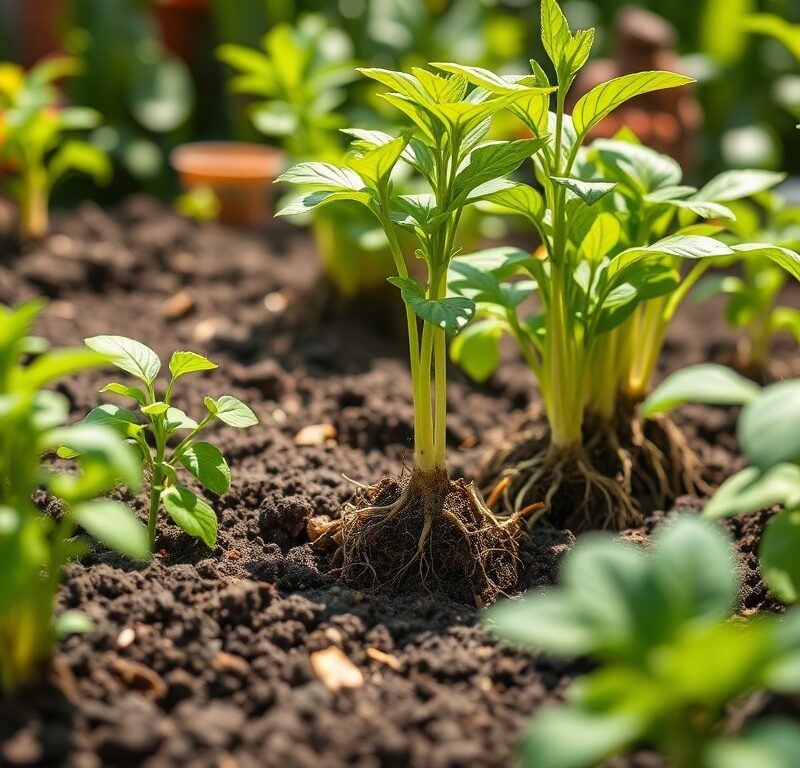
Simple homemade rooting methods can help cuttings grow strong roots faster
Ever wish you could multiply your favorite plants for free, transforming a single beloved specimen into an army of lush greenery? The magic of plant propagation through cuttings makes this dream a tangible reality for any gardener, from novice to seasoned expert. It’s a truly satisfying way to expand your garden, share plants with friends, and even revive struggling varieties, all without spending a dime on new plants.
Propagating plants from cuttings offers a treasure trove of benefits. Beyond the obvious cost savings, it allows you to preserve the exact desirable traits of the parent plant – think of that perfect variegated leaf pattern or the most vibrant flower color. Cuttings can often establish much faster than plants grown from seed, offering quicker gratification and a head start on growth. However, the one universal challenge that often gives aspiring propagators pause is getting those cuttings to develop strong, healthy roots quickly and reliably. It’s the make-or-break moment for any cutting.
Fear not, fellow plant enthusiasts! This article is your ultimate guide to unlocking the secrets of successful rooting. We’re going to dive deep into simple, homemade methods that harness nature’s power to boost your rooting success, turning those hopeful sprigs into thriving new plants. Get ready to transform your garden and your propagation game!
Nutritional Information
Per serving (approximate values):
- Calories: 0
- Protein: 0g
- Carbohydrates: 0g
- Fat: 0g
- Fiber: 0g
- Sodium: 0mg
Ingredients
- 1-2 tablespoons raw, unpasteurized honey (for honey rooting method)
- 3-5 young, thin willow branches (about 1/4 to 1/2 inch thick and 6-12 inches long) (for willow water method)
- 2-4 cups hot water (for willow water method)
- 1 fresh aloe vera leaf (for aloe vera gel method)
- 1-2 tablespoons pure ground cinnamon powder (for cinnamon powder method)
- Sharp, clean pruning shears or a knife
- Rubbing alcohol (for sterilizing tools)
- Healthy plant cuttings (variety specific)
- Sterile rooting medium (e.g., seed starting mix, perlite, vermiculite, or a mix)
- Small pots or trays with drainage holes
- Clear plastic bags, soda bottles, or clear containers (for humidity domes)
- Optional: Seedling heat mat
- Optional: Spray bottle for misting
Instructions
- Prepare Your Tools: Always start by sterilizing your pruning shears or knife with rubbing alcohol. Clean tools prevent the spread of diseases to your precious cuttings and ensure clean cuts.
- Select and Prepare Your Cuttings:
- Choose healthy, vigorous stems from your parent plant. Avoid any stems that show signs of disease, pests, or stress.
- The best time to take cuttings is typically in the morning when the plant is turgid (full of water).
- For most herbaceous and semi-hardwood cuttings, aim for a length of 4-6 inches with at least 2-3 leaf nodes.
- Make a clean cut just below a leaf node. This is where hormones are concentrated and roots are most likely to emerge.
- Remove any flowers or flower buds from the cutting, as these will divert energy away from root production.
- Strip off the lower leaves, leaving only 2-4 leaves at the top. Any leaves submerged in the rooting medium will rot.
- Choose and Apply Your Homemade Rooting Aid: Select one of the following methods:
- Honey Method:
- Pour a small amount of raw, unpasteurized honey onto a clean plate or into a shallow dish.
- Dip the cut end of your prepared cutting directly into the honey, ensuring it’s well coated.
- Immediately after dipping, proceed to plant the cutting.
- Willow Water Method:
- Chop the young willow branches into small pieces (about 1 inch long).
- Place the chopped willow pieces into a heat-proof container.
- Pour hot (but not boiling) water over the willow pieces, ensuring they are fully submerged. Use approximately 1 cup of willow pieces per 2 cups of water.
- Cover the container and let it steep for at least 24 hours (or up to several days) at room temperature.
- Strain the willow pieces out, leaving you with “willow water.”
- You can either soak the cut ends of your cuttings in this willow water for 4-24 hours before planting, or use the willow water to moisten your rooting medium and water your newly planted cuttings.
- Aloe Vera Gel Method:
- Cut a fresh leaf from an aloe vera plant.
- Carefully slice the leaf open lengthwise to expose the gel.
- Rub the fresh aloe vera gel directly onto the cut end of your prepared cutting, ensuring it’s generously coated.
- Plant the cutting immediately after applying the gel.
- Cinnamon Powder Method:
- Pour a small amount of pure ground cinnamon powder onto a clean plate.
- Dip the cut end of your prepared cutting into the cinnamon powder, coating it thoroughly.
- This method is primarily for its antifungal properties, so you might combine it with another rooting aid like willow water or aloe vera for added growth stimulation.
- Honey Method:
- Prepare the Rooting Medium:
- Fill your small pots or trays with a sterile, well-draining rooting medium. A good option is a mix of perlite and vermiculite, or a fine seed-starting mix.
- Pre-moisten the medium thoroughly. It should be damp like a wrung-out sponge, but not soggy.
- Plant the Cuttings:
- Using a pencil or a chopstick, create a small hole in the pre-moistened rooting medium for each cutting. This prevents the rooting aid from being scraped off the cutting as you insert it.
- Gently insert the treated cutting into the hole, ensuring at least one leaf node is buried.
- Carefully firm the medium around the base of the cutting to ensure good contact.
- Label each pot or tray with the plant name and date.
- Create the Ideal Environment:
- Humidity: Cover your potted cuttings with a clear plastic bag, an inverted soda bottle, or a clear plastic container to create a humidity dome. This is crucial for preventing water loss from the leaves before roots can form. Ensure the plastic doesn’t touch the leaves too much.
- Warmth: Place your cuttings in a location with consistent, slightly warm temperatures (around 70-75°F or 21-24°C). A seedling heat mat placed under the pots can significantly speed up root development. If you don’t have one, the top of a refrigerator or a warm spot near a window (but not in direct sun) can work.
- Light: Provide bright, indirect light. Avoid direct, intense sunlight, which can scorch the leaves and stress the cutting. A north-facing window or a spot a few feet away from a south-facing window is often ideal.
- Air Circulation: Briefly open your humidity dome for 5-10 minutes once a day to allow for fresh air circulation and prevent the buildup of mold or fungal issues.
- Ongoing Care:
- Watering: Keep the rooting medium consistently moist, but never soggy. If using a humidity dome, you may not need to water frequently, but check the moisture level daily. You can mist the inside of the dome if it appears too dry.
- Patience: Rooting times vary greatly depending on the plant species. Some plants root in a week or two, while others can take several months. Be patient!
- Check for Roots and Transplant:
- After a few weeks (or longer), you can gently tug on a cutting. If you feel resistance, it likely has developed roots. You may also see new leaf growth, which is a strong indicator of successful rooting.
- Once roots are well-established (typically 1-2 inches long), carefully transplant your new plant into a larger pot with regular potting mix. Handle the delicate new roots with extreme care.
- Gradually acclimate your new plant to lower humidity before removing the dome entirely.
Cooking Tips and Variations
While these aren’t “cooking” tips in the culinary sense, they are essential for successful plant propagation!
- Sterilization is Non-Negotiable: This is perhaps the most critical tip. Always sterilize your cutting tools (shears, knives) with rubbing alcohol between each cut, especially if working with multiple parent plants. This prevents the spread of diseases that can wipe out your entire batch of cuttings. A quick wipe is all it takes.
- Sharp Cuts Matter: Use a very sharp blade or shears to make clean cuts. Crushed stems heal poorly and are more susceptible to rot. A clean cut allows the plant to form callus tissue more effectively, which is where roots will emerge.
- Hydration is Key (Pre-Cut): Take your cuttings in the morning when the parent plant is fully hydrated. You can also give the parent plant a good watering the day before you plan to take cuttings. This ensures the cutting has a good reserve of moisture.
- The Right Cutting Type: Research your specific plant to know whether it roots best from softwood (new, pliable growth), semi-hardwood (partially matured wood), or hardwood (dormant, woody stems). Each type has an optimal time of year for propagation.
- Consider a Combination: Don’t be afraid to combine methods! For example, you could dip a cutting in honey or aloe vera for growth stimulation, and then dust it with cinnamon powder for antifungal protection before planting. Willow water can be used to pre-soak cuttings and also to water the rooting medium.
- Bottom Heat is a Game Changer: If you’re serious about propagation, investing in a seedling heat mat is highly recommended. The gentle warmth at the base of the cuttings significantly accelerates cell division and root formation.
- Experiment with Mediums: While sterile seed starting mix is a good all-rounder, some cuttings prefer pure perlite, vermiculite, or even just water (for very easy rooters like Pothos or Coleus). Experiment to see what works best for your specific plants.
- Label Everything: It’s incredibly easy to forget what plant is in which pot, especially when propagating multiple varieties. Use waterproof labels and a permanent marker, noting the plant name and the date the cutting was taken.
- Don’t Overcrowd: Give your cuttings space in the rooting medium. Overcrowding can lead to poor air circulation and increase the risk of fungal diseases.
- Monitor for Mold: If you notice any fuzzy white or gray mold growing on your cuttings or the medium, remove the affected cuttings immediately, increase air circulation (ventilation time), and ensure the medium isn’t too wet. A light dusting of cinnamon can sometimes help prevent future mold.
Storage and Reheating
This section is not applicable to plant propagation methods. We are not storing or reheating food products here, but rather nurturing living plant cuttings until they develop roots and become independent plants.
However, we can discuss the “storage” of homemade rooting aids and the “re-use” of rooting environments:
- Honey: Raw honey has an indefinite shelf life when stored in a cool, dark place. Any honey used for dipping should be discarded after use to prevent contamination.
- Willow Water: Willow water can be stored in a sealed container in the refrigerator for up to 2-3 weeks. If it starts to smell fermented or develops mold, discard it. For best results, use it fresh.
- Aloe Vera Gel: Fresh aloe vera gel should be used immediately after harvesting from the leaf. It degrades quickly. Do not store leftover gel that has been exposed to air for extended periods.
- Cinnamon Powder: Store ground cinnamon powder in an airtight container in a cool, dark place, just like you would your kitchen spices. It retains its potency for many months.
- Rooting Medium: Used rooting medium that has had failed cuttings or signs of disease should be discarded or sterilized (e.g., by baking in an oven) before re-use, though it’s generally safer to start with fresh, sterile medium for each batch of cuttings.
- Humidity Domes/Trays: Clean and sterilize humidity domes, trays, and pots thoroughly with a bleach solution (1 part bleach to 9 parts water) or rubbing alcohol after each use to prevent the carryover of pathogens to new batches of cuttings.
Frequently Asked Questions
How long does it typically take for cuttings to root using these homemade methods?
The rooting time varies significantly depending on the plant species, the specific homemade method used, and environmental conditions. Some easy-to-root plants like Pothos or Coleus might show roots in 1-2 weeks. More challenging or woody cuttings could take 4-8 weeks, or even several months. Patience is key! Providing optimal conditions like bottom heat and consistent humidity can often speed up the process.
Can I use commercial rooting hormone alongside these natural methods?
Yes, absolutely! Many gardeners choose to combine the best of both worlds. For example, you could apply a commercial rooting hormone (powder or gel) to the cutting end and then dust it with cinnamon powder for antifungal protection. Or, you could soak cuttings in willow water and then apply a commercial hormone before planting. The natural methods can complement and enhance the effects of commercial products, or serve as excellent standalone alternatives if you prefer to go the all-natural route.
My cuttings are wilting even with a humidity dome. What am I doing wrong?
Wilting can be a sign of a few issues. First, ensure your humidity dome is sealed well and maintaining high humidity; sometimes a loose cover isn’t enough. Second, check if your rooting medium is consistently moist but not waterlogged. Too little water, or conversely, too much water leading to rot, can cause wilting. Third, assess your light conditions. Direct, intense sunlight can quickly cause wilting even in a humid environment. Move them to a spot with bright, indirect light. Lastly, ensure the parent plant was healthy and the cutting was taken properly; stressed cuttings have a harder time bouncing back.
When is the best time to transplant my rooted cuttings?
The best time to transplant is when the roots are well-established, typically 1-2 inches long and visible if you gently unpot the cutting (or if it’s in a clear container). You’ll also likely see new, healthy leaf growth. Avoid transplanting too early when roots are just emerging, as they are very fragile. When transplanting, be extremely gentle with the new root system. After transplanting, continue to provide a slightly humid environment for a few days to help the plant acclimate, gradually reducing humidity over a week or two before moving it to its permanent location.