Introduction
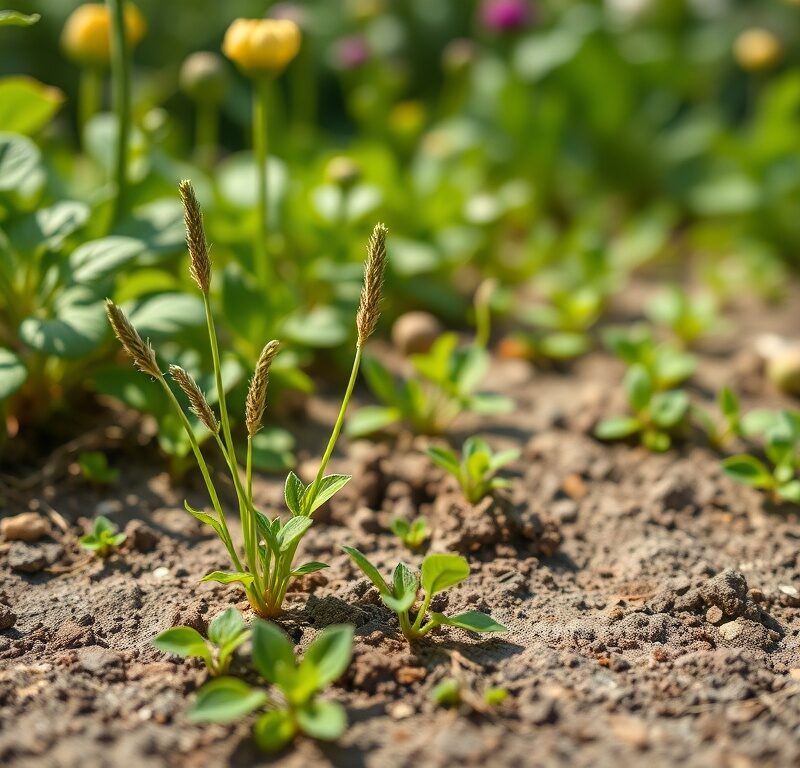
Ah, the humble weed. It starts as a tiny sprout, often barely noticeable, yet possesses an uncanny ability to pop up in the most inconvenient places – especially those stubborn cracks in your driveway, patio, or sidewalk. These little green invaders aren’t just an eyesore; they can actually contribute to the degradation of your hardscaping over time, as their roots expand and exacerbate existing fissures. Before you reach for harsh chemicals or spend hours on your hands and knees pulling them one by one, there’s a simple, effective, and surprisingly eco-friendly solution for those pesky young weeds that are just beginning to take root.
This article unveils a straightforward spot treatment that is specifically designed for these early-stage weeds nestled in cracks and crevices. It’s a targeted approach that minimizes chemical exposure, saves you time and effort, and helps maintain the pristine appearance of your outdoor spaces without the need for heavy-duty gardening equipment. By understanding the “why” and “how” behind this method, you’ll be empowered to tackle those tiny trespassers efficiently and effectively, preventing them from becoming larger, more entrenched problems.
The beauty of this particular treatment lies in its accessibility and precision. It leverages common household items, making it a cost-effective alternative to commercial herbicides. Moreover, its spot-treatment nature means you’re addressing the problem directly where it occurs, rather than broadcasting chemicals across a wider area. This targeted attack is not only better for your wallet and the environment but also incredibly satisfying as you watch those unwelcome guests shrivel away, leaving your cracks clear and your hardscapes looking their best. Let’s dive into the secret weapon that will have your driveways and patios looking neat and tidy in no time.
Nutritional Information
Per serving (approximate values):
- Calories: 0
- Protein: 0g
- Carbohydrates: 0g
- Fat: 0g
- Fiber: 0g
- Sodium: 0mg
Ingredients
- 1 gallon white vinegar (5% acetic acid)
- 1-2 tablespoons dish soap (optional, acts as a surfactant)
Instructions
- Gather Your Tools: Ensure you have a clean spray bottle (preferably one with a “stream” setting for precision), gloves, and eye protection.
- Prepare the Solution: Carefully pour the white vinegar into your spray bottle. If using, add 1-2 tablespoons of liquid dish soap. The dish soap acts as a surfactant, helping the vinegar cling to the weed’s foliage rather than rolling off, thus increasing its effectiveness. Gently swirl the bottle to mix, but avoid excessive shaking that could create too many suds.
- Identify Target Weeds: Walk along your driveway, patio, or sidewalks and pinpoint all the young weeds emerging from cracks. Remember, this method is most effective on small, tender weeds.
- Choose the Right Day: For optimal results, apply this treatment on a hot, sunny day with no rain expected for at least 24 hours. The sun’s heat dramatically enhances the vinegar’s dehydrating effect.
- Protect Yourself: Don your gloves and eye protection before you begin application. While household vinegar is relatively mild, it can still cause irritation if it comes into contact with skin or eyes.
- Apply with Precision: Adjust your spray bottle to a “stream” setting if available. This allows for a concentrated application directly onto the weed, minimizing overspray onto desirable plants or staining of surfaces. Aim directly at the foliage of each young weed, ensuring the leaves are thoroughly coated. Avoid drenching the surrounding soil excessively, especially if there are desirable plants nearby.
- Observe and Wait: Within a few hours, especially on a sunny day, you should start to see the weeds wilting and turning brown or black. The vinegar works by rapidly dehydrating the plant’s cells.
- Inspect and Reapply (if necessary): After 24-48 hours, inspect the treated weeds. If some are still showing signs of life or if they were slightly larger than ideal, a second targeted application can be performed.
- Remove Dead Weeds: Once the weeds are completely dead and brittle, use a stiff brush, a crack weeder tool, or even a gloved hand to scrape them out of the cracks. This prevents organic matter buildup and helps keep the cracks clean.
- Consider Prevention: After removing the dead weeds, consider filling larger cracks with sand or a suitable crack filler. This creates a less hospitable environment for new weed seeds to germinate and take root, offering a layer of long-term prevention.
Cooking Tips and Variations
While we’re not cooking in the traditional sense, these tips are crucial for maximizing the effectiveness of your weed-killing solution and ensuring safety.
Tip 1: The Power of the Sun. This isn’t just a suggestion; it’s a critical factor for success. The hotter and sunnier the day, the faster and more thoroughly the acetic acid in the vinegar will work to desiccate the weeds. Think of the sun as an accelerator, drying out the plant tissue after the vinegar has done its initial work. Applying on a cloudy day or when rain is imminent will significantly reduce the effectiveness, as the vinegar might get diluted or simply not have enough heat to perform its best.
Tip 2: Dish Soap is Your Friend. Adding a squirt or two of liquid dish soap (any brand will do) isn’t just for bubbles; it’s a vital surfactant. Weeds, especially those with waxy leaves, can sometimes repel water-based solutions. The dish soap breaks down the surface tension of the water (vinegar is mostly water), allowing the vinegar to spread out and stick to the weed’s foliage more effectively. This ensures better coverage and absorption, leading to a more complete kill. Without it, some of the vinegar might just bead up and roll off the leaves.
Tip 3: Precision is Paramount. Remember, white vinegar is a non-selective herbicide. This means it will kill any plant it touches. Therefore, using a spray bottle with a “stream” setting is highly recommended over a “mist” setting. The stream allows you to direct the vinegar precisely onto the target weed without overspraying onto your prized petunias, lawn, or other desirable plants. If you don’t have a spray bottle with a stream, you can also use a small paintbrush or even a cotton swab for extremely tiny, isolated weeds to dab the vinegar directly onto the leaves.
Tip 4: Patience and Reapplication. While often effective within hours, especially on small weeds on sunny days, don’t be discouraged if some weeds aren’t completely gone after the first application. Slightly larger young weeds, or those with a bit more resilience, might require a second targeted application a day or two later. Observe the weeds closely; if they’re wilting but not completely brown, a follow-up treatment will usually finish them off. This is still far less effort than continuous pulling.
Tip 5: Test Surfaces First. Before you go spraying your entire concrete driveway, especially if it’s new, decorative, or made of natural stone, always test the vinegar solution on an inconspicuous area first. While household vinegar is generally mild, it is an acid and can potentially etch or discolor some sensitive surfaces over time or with repeated application. This is particularly true for polished stone or certain types of sealants. A quick test will save you potential headaches.
Tip 6: Focus on Foliage. The goal is to coat the leaves of the weed thoroughly. Vinegar works as a contact killer, burning the plant tissue it touches. It doesn’t significantly penetrate the root system, especially of more established weeds. So, drenching the ground around a weed is less effective and can temporarily alter the soil pH, which might affect nearby desirable plants if they share a root zone. Concentrate your efforts on getting good coverage on the visible green parts of the weed.
Variation 1: Stronger Vinegar (Use with Extreme Caution). While household 5% white vinegar is generally sufficient for young weeds, some garden centers sell horticultural vinegar with 10% or even 20% acetic acid. This is significantly more potent and will work faster and on slightly larger weeds. HOWEVER, these stronger concentrations are much more corrosive and dangerous. They can cause severe skin burns and eye damage. If you choose to use horticultural vinegar, wear heavy-duty gloves, eye protection, and long sleeves, and exercise extreme caution. It’s generally not recommended for casual DIY use due to the increased safety risks.
Variation 2: Salt (Not Recommended for Long-Term Use). Some DIY weed killer recipes include salt. While salt can certainly kill weeds by dehydrating them and interfering with nutrient uptake, it has a significant drawback: it can sterilize the soil for prolonged periods. In cracks, this might seem like a good idea, but if the salt leaches into nearby garden beds or lawns, it can harm desired plants. Therefore, for general crack weed control where you might want to plant something nearby in the future, or where runoff is a concern, skipping the salt is usually the wiser choice.
Variation 3: Boiling Water (for a non-chemical option). For a completely chemical-free alternative, especially for very small, isolated weeds in cracks, boiling water can be surprisingly effective. Carefully pour boiling water directly onto the weed. The heat instantly destroys the plant’s cell structure. However, this method requires extreme caution to avoid burns and is less practical for larger areas or numerous weeds due to the need to continuously heat water.
Storage and Reheating
Since this is a gardening solution and not a food item, “storage and reheating” takes on a different meaning. Here’s how to manage your vinegar solution and maintain your weed-free cracks:
Storing the Vinegar Solution:
- Keep it in a Labeled Container: Always store any leftover vinegar solution in its original, clearly labeled vinegar bottle or a designated spray bottle that is clearly marked “Weed Killer” or “Vinegar Solution.” This prevents accidental misuse or confusion with food-grade ingredients.
- Store in a Cool, Dark Place: While vinegar is very stable, keeping it out of direct sunlight and extreme temperatures will help maintain its potency over time. A shed, garage, or pantry is ideal.
- Keep Out of Reach of Children and Pets: Even though it’s household vinegar, it’s still an irritant. Ensure it’s stored safely away from curious hands and paws.
- No Expiration for Effectiveness: White vinegar itself has an indefinite shelf life for cleaning and weed killing purposes. The acetic acid doesn’t degrade significantly over time, so your solution will remain effective for future use.
Maintaining Weed-Free Cracks (The “Reheating” Equivalent):
- Regular Inspection is Key: The best way to keep cracks weed-free is through consistent monitoring. Make it a habit to quickly scan your driveway and patio every week or two, especially after rain, when new weed seeds are likely to germinate.
- Early Intervention: This spot treatment truly excels as an early intervention strategy. The moment you see new, tiny weed sprouts, grab your vinegar spray bottle and tackle them immediately. Don’t let them get established. This is your “reheating” equivalent – preventing small issues from becoming big problems.
- Scrape and Clean: After the vinegar has done its job and the weeds are dead, make sure to physically remove the dead plant material. Use a stiff brush, a crack weeder, or even a screwdriver to scrape out the debris. This prevents organic matter from accumulating, which can provide a breeding ground for new weed seeds and retain moisture, encouraging future growth.
- Fill the Cracks: For long-term prevention, especially in larger cracks, consider filling them. Sand, polymeric sand (for pavers), or a flexible concrete crack filler can be used. This physically blocks weed seeds from reaching the soil below and taking root. While not a permanent solution (cracks can reopen, and new seeds can land), it significantly reduces the frequency of weed emergence.
- Address the Source: Sometimes, weeds in cracks are a symptom of a larger issue, such as nearby untamed garden beds or areas where weed seeds are constantly being produced. If possible, manage those surrounding areas to reduce the overall weed seed bank.
Frequently Asked Questions
Does white vinegar harm my concrete or pavers?
Household white vinegar (5% acetic acid) is generally safe for concrete and most pavers, especially with occasional, targeted use. However, it is an acid, and prolonged or excessive application could potentially cause etching or discoloration on very sensitive or polished surfaces, particularly natural stone like marble or limestone, or newly sealed concrete. It’s always a good practice to test a small, inconspicuous area first before treating a larger section of your hardscaping to ensure there are no adverse reactions. The key is precise application directly onto the weeds, minimizing contact with the surrounding surface.
Can I use this method on larger, older weeds?
While white vinegar can cause some superficial damage to larger, older weeds, it is significantly less effective on them. Established weeds have deeper, more robust root systems that are largely unaffected by a contact herbicide like vinegar, which primarily burns the foliage. You might see the leaves turn brown, but the plant will likely regrow from its healthy roots. This spot treatment is best reserved for young, tender weeds with shallow root systems. For mature weeds, manual removal, a specialized crack weeder tool, or more potent herbicides (if you choose to use them) would be more effective.
How long does it take for the weeds to die after applying vinegar?
The speed at which weeds die after a vinegar application depends heavily on several factors, primarily the size of the weed and the weather conditions. For small, young weeds on a hot, sunny day, you can often see visible wilting and browning within a few hours. On cooler or cloudy days, or for slightly larger young weeds, it might take 24 to 48 hours for them to completely shrivel and die. The sun’s heat plays a crucial role in accelerating the dehydration process initiated by the acetic acid.
Is this method safe for pets and children?
Household white vinegar is significantly safer than synthetic chemical herbicides, but it’s not entirely harmless. It can be an irritant to skin and eyes, and ingestion by pets or children could cause an upset stomach. It’s best to keep pets and children away from the treated area until the vinegar has dried and the weeds have begun to die back, typically within a few hours. Once dry, the risk is minimal. Always store the vinegar solution in a clearly labeled container out of reach of children and pets. If stronger horticultural vinegar is used, the risks are much higher, and extreme caution and extended exclusion times are necessary.