Introduction
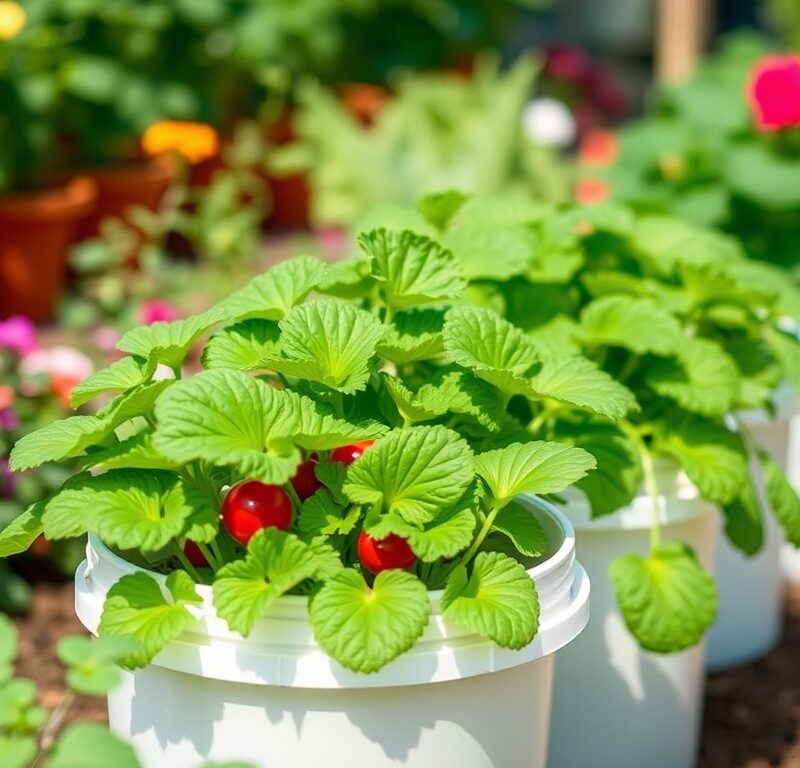
Welcome to the ultimate guide for compact gardening enthusiasts! If you’ve ever dreamt of fresh, homegrown vegetables but are limited by space, a 5-gallon bucket garden is your green-thumbed salvation. This innovative approach to growing food utilizes readily available, inexpensive containers to transform even the smallest patio, balcony, or urban backyard into a thriving edible oasis. It’s not just about saving space; bucket gardening offers unparalleled flexibility, allowing you to move plants to optimize sunlight, protect them from harsh weather, and even better control soil conditions and pests.
The beauty of the 5-gallon bucket lies in its simplicity and versatility. It provides enough root space for a surprising variety of vegetables, making it an ideal choice for beginners and seasoned gardeners alike. In this comprehensive article, we’ll dive deep into setting up your bucket garden, from choosing the right containers and crafting the perfect potting mix to mastering watering and fertilizing techniques. We’ll also unveil our top 14 vegetable picks that thrive in this compact environment, complete with essential tips for success.
Whether you’re looking to cultivate a few fresh herbs for your kitchen, grow your own salad greens, or even harvest a bounty of tomatoes and peppers, the 5-gallon bucket garden makes it all possible. Get ready to discover the power of compact gardening and unlock the delicious potential of your small outdoor spaces!
Nutritional Information
Per serving (approximate values):
- Calories: 0
- Protein: 0g
- Carbohydrates: 0g
- Fat: 0g
- Fiber: 0g
- Sodium: 0mg
Ingredients
- 14-20 (or more, depending on your ambition!) 5-gallon buckets (food-grade recommended)
- Power drill with a 1/2 to 3/4 inch drill bit
- Large bags of high-quality potting mix (not garden soil)
- Perlite or vermiculite (optional, for improved drainage and aeration)
- Compost or well-rotted manure (for enriching potting mix)
- Organic or synthetic slow-release granular fertilizer OR liquid fertilizer (e.g., fish emulsion, balanced liquid feed)
- Seeds or starter plants for your chosen 14 vegetables (see list below)
- Watering can or hose with a gentle spray nozzle
- Gardening gloves
- Small trowel or scoop
- Plant labels and a marker
- Stakes, cages, or small trellises (for vining plants like cucumbers, some tomatoes)
- Mulch (straw, shredded leaves, or wood chips)
- Optional: Pot feet or bricks to elevate buckets
- Optional: Moisture meter
- Optional: Insecticidal soap or neem oil for pest control
Instructions
- Prepare Your Buckets: If using new buckets, thoroughly clean them. Using a power drill, create 5-8 drainage holes, 1/2 to 3/4 inch in diameter, spread evenly across the bottom of each bucket. You can also drill a few additional holes just above the bottom edge for extra drainage.
- Mix Your Potting Medium: In a large wheelbarrow or tarp, combine your high-quality potting mix with compost (about 1 part compost to 3-4 parts potting mix). If desired, add perlite or vermiculite (about 1 part perlite/vermiculite to 4-5 parts potting mix) to further improve drainage and aeration. This mixture will provide a light, well-draining, and nutrient-rich environment for your plants.
- Fill the Buckets: Fill each prepared bucket with your potting mix, leaving about 1-2 inches of space from the rim. This gap, known as the “headspace,” prevents soil from washing out when you water.
- Plant Your Vegetables: Follow the specific planting instructions for each vegetable seed or starter plant. For seeds, plant according to package directions regarding depth and spacing. For starter plants, gently remove them from their nursery pots, loosen any circling roots, and plant them at the same depth they were in their original container.
- Water Thoroughly After Planting: Immediately after planting, water each bucket deeply until water drains freely from the bottom holes. This helps settle the soil around the roots.
- Apply Initial Fertilizer (Optional): If using a slow-release granular fertilizer, mix it into the top few inches of soil according to product instructions, or apply it after planting. If using liquid fertilizer, wait a week or two after planting before the first application.
- Label Your Plants: Place a clear label in each bucket indicating the vegetable type and variety. This will save you confusion later on!
- Position Your Buckets: Place your newly planted buckets in a location that receives at least 6-8 hours of direct sunlight per day. If possible, elevate the buckets slightly using pot feet or bricks to ensure proper drainage and air circulation underneath.
- Add Mulch (Optional but Recommended): Once plants are established, apply a 1-2 inch layer of mulch (straw, shredded leaves) on top of the soil in each bucket. This helps retain moisture, regulate soil temperature, and suppress weeds.
- Provide Support (As Needed): For vining plants like cucumbers and determinate tomatoes, install stakes, cages, or small trellises at the time of planting or when the plants are still small to avoid disturbing roots later.
- Water Consistently: Check the moisture level daily by sticking your finger about 2 inches into the soil. Water when the top inch or two feels dry. Containers dry out faster than in-ground gardens, so consistent watering is crucial.
- Fertilize Regularly: Due to frequent watering, nutrients leach out of containers more quickly. Fertilize every 2-4 weeks with a balanced liquid fertilizer or replenish slow-release granules as directed by the product.
- Monitor for Pests and Diseases: Inspect your plants regularly for any signs of pests or diseases. Address issues promptly with appropriate organic solutions if possible.
- Harvest Regularly: Harvest vegetables at their peak ripeness to encourage continuous production and enjoy the freshest flavors from your compact garden!
Cooking Tips and Variations
While this article focuses on growing, the ultimate goal is to enjoy your harvest! Here are some general tips for making the most of your fresh bucket-grown produce:
- Embrace Freshness: The best part of homegrown is the unparalleled freshness. Use your vegetables soon after harvesting for the best flavor and nutritional value.
- Simple Preparations: Often, the simplest preparations allow the fresh flavors of homegrown vegetables to shine. Think light sautés, fresh salads, or quick roasts.
- Leafy Greens Bonanza: Harvest outer leaves of lettuce, spinach, kale, and Swiss chard regularly to encourage continuous growth. Use them in salads, smoothies, stir-fries, or as a bed for other dishes.
- Versatile Beans: Bush beans are excellent steamed, blanched, or added to stir-fries. Pick them when young and tender.
- Cucumber Creativity: Beyond salads, try making quick pickles with your cucumbers, or blend them into refreshing gazpacho.
- Eggplant Delights: Dwarf eggplants are perfect for grilling, baking, or incorporating into ratatouille or curries.
- Pepper Power: Bell peppers can be stuffed, roasted, or eaten raw. Chili peppers add a kick to almost any savory dish.
- Tomato Treasures: Cherry tomatoes are fantastic in salads, roasted with herbs, or made into a quick fresh pasta sauce.
- Root Vegetable Wonders: Carrots and radishes are delicious raw, roasted, or added to stews. Don’t forget to try radish greens in salads or stir-fries!
- Potato Perfection: New potatoes from buckets are a treat. Boil, roast, or mash them with fresh herbs.
- Zucchini Abundance: Bush zucchini can be spiralized, grilled, baked into bread, or added to stir-fries. Harvest when small and tender for best flavor.
- Herb Infusions: Basil is a must for pesto, caprese salads, and Italian dishes.
- Succession Planting: For quicker crops like lettuce, radishes, and bush beans, plant a small batch every 2-3 weeks. This ensures a continuous harvest rather than one large flush.
- Experiment with Flavors: Don’t be afraid to try new recipes or combine your homegrown veggies in unexpected ways.
Storage and Reheating
Proper storage ensures your hard-earned harvest stays fresh and delicious. Reheating methods depend on the cooked dish.
- Leafy Greens (Lettuce, Spinach, Kale, Swiss Chard, Basil): Wash and thoroughly dry leaves. Store in an airtight container or a plastic bag lined with a paper towel in the refrigerator crisper drawer. Most will last 5-7 days. Basil is best stored at room temperature with stems in water, like a bouquet.
- Bush Beans, Cucumbers, Peppers, Eggplant, Zucchini/Summer Squash: Store unwashed in the crisper drawer of your refrigerator. Beans and cucumbers typically last 5-7 days. Peppers, eggplant, and zucchini can last up to a week or more.
- Tomatoes (Cherry/Determinate): Store at room temperature on the counter, away from direct sunlight, for best flavor. Only refrigerate if they are very ripe and you need to extend their life by a few days (they may lose some flavor and texture).
- Carrots and Radishes: Remove the greens (they draw moisture from the roots). Store roots in a plastic bag in the refrigerator crisper. They can last for several weeks.
- Potatoes: Store in a cool, dark, well-ventilated place (like a pantry or basement), not in the refrigerator. Avoid storing them near onions, as gases from onions can cause potatoes to sprout faster. They can last for several weeks to months.
- Cooked Dishes: Store cooked vegetable dishes in airtight containers in the refrigerator for 3-4 days.
- Reheating Cooked Dishes:
- Soups/Stews: Reheat gently on the stovetop or in the microwave until heated through.
- Roasted/Sautéed Vegetables: Reheat in a preheated oven or toaster oven for best texture, or quickly in a pan on the stovetop. Microwave reheating is an option but may make them softer.
- Pasta Dishes: Reheat gently in a pan with a splash of water or broth to prevent drying out, or in the microwave.
- Freezing: Many vegetables can be blanched and frozen for longer storage (e.g., beans, kale, spinach, zucchini, peppers). Follow specific blanching times for each vegetable. Tomatoes can be frozen whole or as a sauce.
Frequently Asked Questions
Can I reuse the potting mix from my 5-gallon buckets next season?
While you can reuse potting mix, it’s generally not recommended to reuse it entirely without replenishment. Potting mix loses its structure and nutrients over time, and can harbor disease pathogens or pest eggs. For best results, it’s ideal to use fresh potting mix each season. If you must reuse, remove about 1/3 to 1/2 of the old mix and replace it with fresh potting mix and a generous amount of compost to revitalize it. Always ensure you’re not reusing soil from a bucket where plants had significant disease issues.
How do I know if my plants are getting enough water, and how can I avoid overwatering?
The best way to check for moisture is by sticking your finger about 2 inches deep into the soil. If it feels dry at that depth, it’s time to water. You can also use a simple moisture meter for more accuracy. To avoid overwatering, always ensure your buckets have adequate drainage holes. Water slowly and deeply until you see water draining from the bottom. Don’t water again until the top inch or two of soil feels dry. Wilting can be a sign of both under and overwatering; check the soil moisture before adding more water.
What are “determinate” tomatoes, and why are they recommended for buckets?
“Determinate” tomatoes, also known as “bush” tomatoes, are varieties that grow to a specific, compact size and produce most of their fruit within a relatively short period. They are ideal for 5-gallon buckets because their growth habit is more manageable and they don’t require as much extensive trellising or pruning as “indeterminate” (vining) varieties. Look for varieties labeled “bush,” “patio,” or “compact” for the best success in containers. Cherry tomatoes often come in determinate varieties that are perfect for buckets.