Introduction
There’s nothing quite like the taste of a sun-ripened, homegrown tomato. Bursting with flavor, incredibly fresh, and picked right from your own garden, these juicy gems are a favorite among home gardeners for countless reasons. From the satisfying process of nurturing a tiny seed to a thriving plant, to the unparalleled taste that store-bought varieties simply can’t replicate, growing your own tomatoes is a deeply rewarding experience that connects you directly to your food source.
This comprehensive guide will walk you through every essential step of cultivating your own delicious tomatoes, from selecting the perfect variety to harvesting your bountiful crop. Whether you’re a seasoned gardener looking to refine your technique or a complete beginner eager to dig in, we’ll cover everything you need to know to ensure a successful and flavorful harvest. Get ready to transform your garden space into a tomato-growing paradise and savor the true taste of summer!
What makes homegrown tomatoes so special? Beyond the incredible flavor, there’s the freshness that can only come from harvesting at peak ripeness. You have complete control over the growing process, opting for organic methods and avoiding unwanted pesticides. Plus, the sheer variety available when growing from seed far surpasses what you’ll find in any supermarket, allowing you to discover unique shapes, colors, and flavor profiles. Prepare for a summer filled with the sweet, tangy goodness of your very own garden-fresh tomatoes!
Nutritional Information
Per serving (approximate values):
- Calories: 25
- Protein: 1g
- Carbohydrates: 5g
- Fat: 0.3g
- Fiber: 1.5g
- Sodium: 5mg
Ingredients
When growing tomatoes, your “ingredients” are less about what you eat and more about what you need to cultivate success. Here’s what you’ll need to get started:
- 1-2 packets of high-quality tomato seeds (choose your desired variety: Determinate or Indeterminate, Slicer, Cherry, Roma, or Beefsteak) OR 2-4 healthy tomato transplants
- 1 bag (1.5 cubic feet) organic seed starting mix (if starting from seed)
- 1 seed starting tray with clear humidity dome OR small peat pots (if starting from seed)
- 1 heat mat (optional, for seed starting)
- 1 set of grow lights (LED or fluorescent, for seed starting)
- 1 garden plot or large containers (minimum 15-20 gallon for one plant)
- 2-3 cubic feet of high-quality organic compost or aged manure
- 1 bag (1.5 cubic feet) organic potting mix (if growing in containers)
- 1 soil pH test kit
- 1-2 tomato cages, stakes (6-8 ft high), or a trellis system for support
- 1 pair of garden gloves
- 1 small hand trowel
- 1 garden fork or shovel
- 1 watering can or soaker hose
- 1 bag organic balanced fertilizer (e.g., 5-5-5)
- 1 bag organic fertilizer higher in potassium/phosphorus (e.g., 2-4-8)
- 1 bale of organic straw or wood chips for mulch
- 1 pair of sharp pruning shears or bypass pruners
- Insecticidal soap or neem oil (for organic pest control, if needed)
- Companion plants like basil or marigolds (optional)
Instructions
Follow these step-by-step instructions to grow your own delicious tomatoes:
- Step 1: Planning for Success – Choosing & Starting Your Tomatoes
- Choose Your Tomato Variety: Research and select a tomato variety that suits your climate, space, and intended use. Understand the difference between Determinate (bushy, concentrated harvest, less pruning) and Indeterminate (vining, continuous harvest, more pruning and support). Consider Open-pollinated for seed saving or Hybrids for disease resistance.
- Starting from Seed (6-8 weeks before last frost):
- Gather your supplies: seed starting mix, trays/pots, grow lights, and optional heat mat.
- Fill trays or pots with moistened seed starting mix.
- Sow seeds about 1/4 inch deep and 1 inch apart (or 2-3 seeds per pot). Gently cover with mix.
- Water lightly, ensuring the soil remains consistently moist but not waterlogged.
- Place under grow lights immediately, keeping them 2-4 inches above the seedlings for 12-16 hours daily. If using a heat mat, place trays on it to aid germination (remove once seeds sprout).
- Once seedlings develop their first true leaves, thin them to the strongest plant per cell/pot.
- Buying Transplants (when danger of frost has passed):
- Select healthy, stocky plants with dark green leaves and strong stems. Avoid leggy plants or those with yellowing leaves, spots, or flowers already forming.
- If plants have been grown in a greenhouse, gradually “harden them off” by exposing them to outdoor conditions (partial sun, wind, cooler temperatures) for 7-10 days before permanent planting. Start with an hour or two in a sheltered spot and increase duration daily.
- Step 2: Planting for a Bountiful Harvest – From Pot to Garden
- Select Your Site & Prepare Soil: Choose a location that receives at least 6-8 hours of direct sunlight daily (more is better). The soil should be well-draining and rich in organic matter. Amend your garden bed by incorporating 2-4 inches of compost or aged manure, thoroughly mixing it into the top 6-12 inches of soil. Test your soil pH; tomatoes prefer a slightly acidic to neutral range (6.0-6.8).
- Planting Day (after all danger of frost is gone and soil is warm):
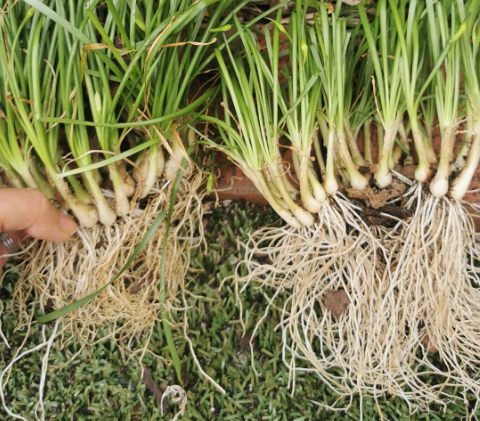
- Dig a hole deep enough to bury two-thirds of the tomato plant’s stem. Tomatoes are unique because they can grow roots from their buried stems (adventitious roots), leading to a stronger root system.
- Carefully remove the plant from its container. If starting from seed, gently tease apart roots if pot-bound. Remove any leaves that would be below the soil line.
- Place the plant in the hole, ensuring the bottom two-thirds of the stem are covered.
- Backfill with soil, gently firming around the base.
- Space plants 2-3 feet apart for adequate air circulation.
- Install Support Systems: Immediately install tomato cages, stakes, or trellis systems at the time of planting to avoid disturbing roots later.
- Water thoroughly immediately after planting to settle the soil.
- Apply a 2-4 inch layer of organic mulch (straw, shredded leaves) around the base of the plants, keeping it a few inches away from the stem to prevent rot. This conserves moisture, suppresses weeds, and regulates soil temperature.
- Step 3: Nurturing Your Plants – Ongoing Care for Healthy Growth
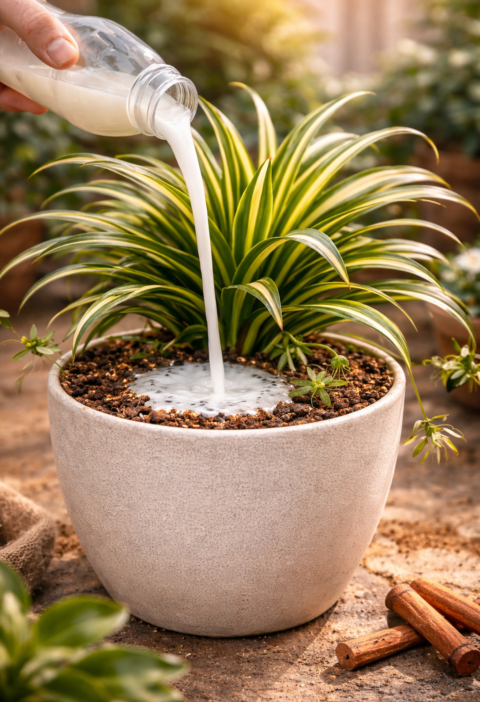
- Watering: Consistency is key. Water deeply and regularly, especially during dry spells and when fruits are developing. Aim for 1-2 inches of water per week. Water at the base of the plant to avoid wetting foliage, which can encourage fungal diseases. Use drip irrigation or soaker hoses if possible. Avoid overhead watering.
- Fertilizing: Tomatoes are heavy feeders.
- About 2-3 weeks after planting, apply a balanced organic fertilizer (e.g., 5-5-5) according to package directions.
- Once fruits begin to set, switch to a fertilizer higher in potassium and phosphorus (e.g., 2-4-8) to support fruit development.
- Avoid excessive nitrogen, as this promotes lush leafy growth at the expense of fruit production.
- Pruning & Training:
- Suckering (for Indeterminate varieties): “Suckers” are shoots that grow in the crotch (axil) between a main stem and a leaf branch. Pinch them off when they are small (2-4 inches) to direct the plant’s energy into fruit production and improve air circulation. Determinate varieties generally require less suckering.
- Lower Leaf Removal: As plants grow, remove the bottom leaves that touch the soil. This prevents soil-borne diseases from splashing onto the foliage and improves air circulation.
- Training: Gently tie main stems to stakes or guide plants through cages as they grow to keep them upright and supported.
- Pest & Disease Management:
- Prevention: Good air circulation, proper watering, mulching, and crop rotation are your best defenses. Inspect your plants daily for any signs of trouble.
- Common Pests: Hand-pick larger pests like tomato hornworms. For aphids, use a strong spray of water or organic insecticidal soap. For cutworms, place collars around young plant stems.
- Common Diseases: Watch for signs of early/late blight (dark spots on leaves), fusarium wilt (yellowing and wilting), or septoria leaf spot (small, dark spots with light centers). Remove affected leaves immediately. Ensure good air circulation.
- Organic Solutions: Utilize organic pesticides like neem oil or introduce beneficial insects for pest control.
- Step 4: Harvest Time – Enjoying the Fruits of Your Labor
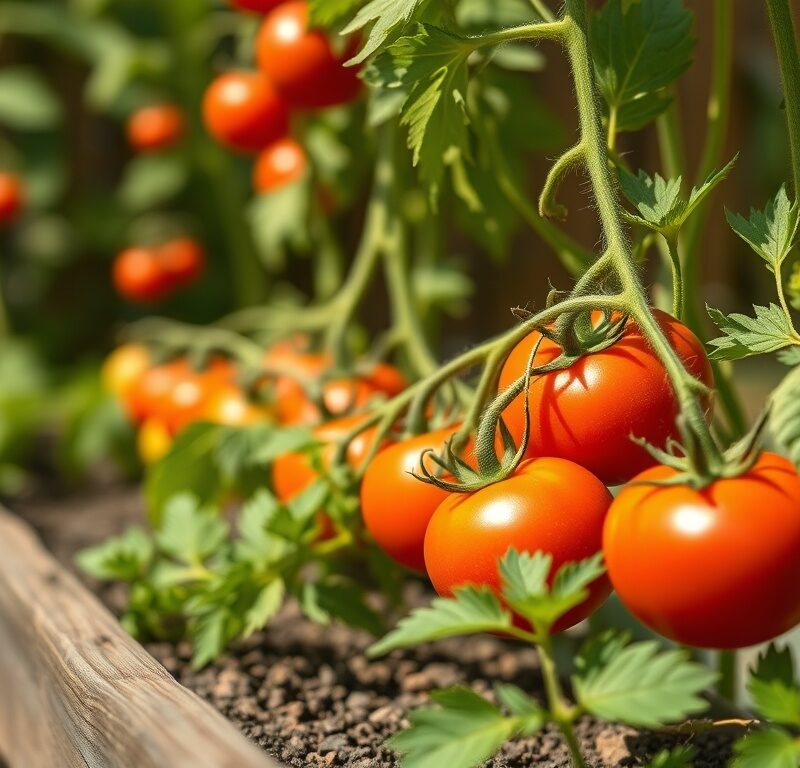
- When to Harvest: Tomatoes are ready to harvest when they are fully colored (according to their variety) and feel firm but slightly soft to the touch.
- How to Harvest: Gently twist or cut the tomato from the vine, leaving a small piece of stem attached if possible, as this can help with storage. Avoid pulling, which can damage the vine.
- Ripening Indoors: If frost threatens and you have green tomatoes, you can ripen them indoors. Store them in a single layer in a cool, dark place (like a closet or garage), or place them in a paper bag with a ripe banana or apple (which release ethylene gas) to speed up ripening.
- Storage: Store ripe tomatoes at room temperature (ideally 55-70°F / 13-21°C), out of direct sunlight. Do NOT refrigerate, as this can degrade their flavor and texture. Store cut tomatoes in the refrigerator.
Cooking Tips and Variations
While this article focuses on growing, the “cooking tips” for tomatoes are really about maximizing your harvest and ensuring the best flavor. For optimal taste, always harvest tomatoes when they are fully ripe and have developed their characteristic color and firmness. If you have an abundance, consider making fresh salsa, tomato sauce, or drying them for later use. For a burst of flavor, roast cherry tomatoes with olive oil and herbs. Experiment with different varieties; a Black Krim offers a smoky sweetness, while a San Marzano is perfect for sauces due to its low seed count and meaty texture. Don’t be afraid to try companion planting with basil near your tomato plants; it’s rumored to enhance the tomato’s flavor and can deter some pests.
Storage and Reheating
For fresh, whole tomatoes, the golden rule is to store them at room temperature, not in the refrigerator. Refrigeration can break down the cell walls, leading to a mealy texture and a significant loss of flavor. Keep them out of direct sunlight on your counter or in a cool pantry. If a tomato is cut, wrap it tightly in plastic wrap and store it in the refrigerator, consuming within a few days. For an abundant harvest, consider processing your tomatoes into sauces, purees, or salsas, which can then be canned or frozen for long-term storage. Roasted or sun-dried tomatoes can also be preserved in olive oil. These processed forms can be easily reheated or incorporated into dishes later.
Frequently Asked Questions
Why are my tomato plants growing lots of leaves but no fruit?
This is often a sign of too much nitrogen in the soil. While nitrogen promotes lush green growth, excessive amounts can inhibit fruit production. Ensure you’re using a balanced fertilizer early on, then switch to one higher in phosphorus and potassium once flowers begin to appear. Also, ensure your plants are receiving enough sunlight (at least 6-8 hours daily) and consistent watering.
What is blossom end rot and how can I prevent it?
Blossom end rot is a common issue where the bottom of the tomato fruit turns black and leathery. It’s not a disease but a physiological disorder caused by a calcium deficiency in the fruit, often due to inconsistent watering or rapid growth. To prevent it, ensure consistent, deep watering, especially during dry spells. Maintain a good layer of mulch to regulate soil moisture, and avoid drastic fluctuations in soil moisture. While calcium deficiency is the direct cause, it’s rarely due to a lack of calcium in the soil itself, but rather the plant’s inability to absorb and transport it efficiently due to water stress.
When should I start my tomato seeds indoors?
Generally, tomato seeds should be started indoors about 6-8 weeks before your average last frost date. This gives the seedlings enough time to develop into strong, healthy plants before they are transplanted outdoors. Starting too early can result in leggy, overgrown plants, while starting too late may delay your harvest.
How often should I water my tomato plants?
The frequency of watering depends on your climate, soil type, and the size of your plants. As a general rule, aim for deep, consistent watering that provides 1-2 inches of water per week. This might mean watering every 2-3 days in hot, dry weather, or less often in cooler, humid conditions. Always check the soil moisture by sticking your finger about an inch or two deep; if it feels dry, it’s time to water. Avoid shallow, frequent watering, which encourages shallow root growth.