Vanilla Custard Cream Squares
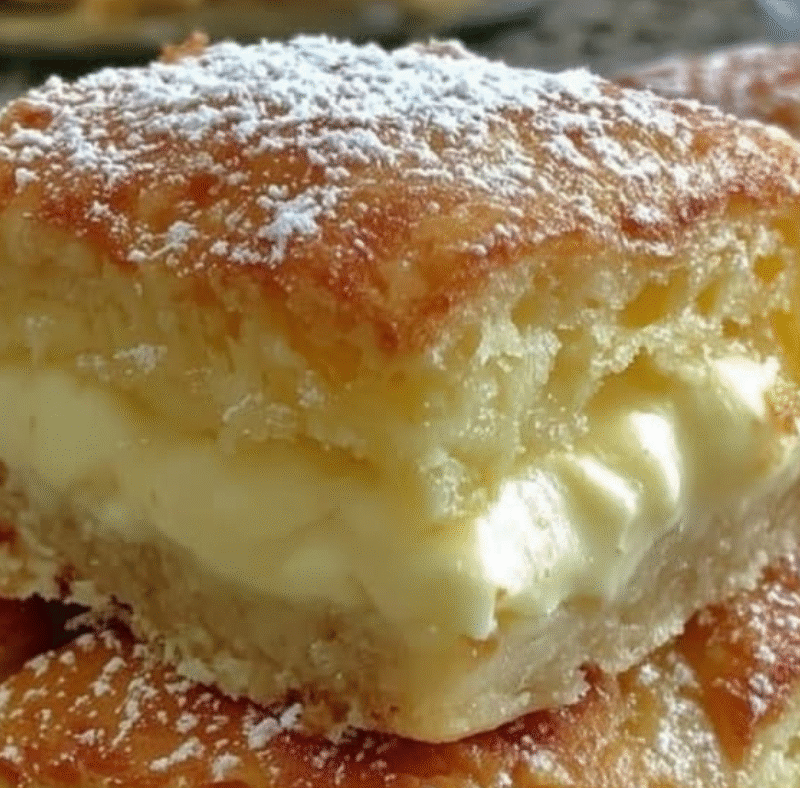
These **Vanilla Custard Cream Squares** (sometimes akin to a mille‑feuille or custard slice) marry crisp, flaky puff pastry layers with silky, vanilla‑rich pastry cream (custard). The contrast between the crisp pastry and smooth filling is what makes this dessert elegant yet approachable. This guide gives you everything: ingredient rationale, method in detail, chef tricks, variations, nutrition data, troubleshooting, and FAQs.
Why This Dessert Works & Overview
The design of this dessert is layered: pastry, custard, pastry, custard, pastry. Puff pastry gives you a buttery, flaky crunch; the custard provides creamy texture, sweetness, richness, and the classic vanilla flavor. Because custard (or pastry cream) needs time to set, chilling and patience are key. The crisp pastry layers also benefit from being baked well ahead and cooled thoroughly so they don’t steam under the custard.
Many European pastries use this layering principle (e.g. French “mille-feuille,” Italian “millefoglie,” or custard slices). This version simplifies with a single puff pastry sheet cut into layers, making it more accessible yet still impressive.
What You’ll Find in This Guide
- A full ingredient list (U.S. + metric) with roles explained
- Step‑by‑step method with timing, technique, and tips
- Chef secrets, pitfalls, and variations (lighter, gluten-free, etc.)
- Nutrition estimates & health considerations
- Storage, reheating, and food safety guidance
- Common issues and how to fix them
- 10 FAQs to answer likely questions
- Serving & presentation ideas to show off your squares
Ingredients & Roles
Pastry Layers
- 1 sheet puff pastry (from a ~17.3‑oz box), thawed but still cold — this gives your crispy, flaky structural layers
- Optional topping: powdered sugar or a simple glaze (½ cup powdered sugar + 1–2 tbsp milk) — adds visual appeal and sweetness
Vanilla Custard Cream (Pastry Cream)
- 2 cups (480 mL) whole milk — the creamy base and source of liquid
- ½ cup (100 g) granulated sugar — sweetens and balances flavors
- 4 large egg yolks — principal thickener and gives richness
- ¼ cup (30 g) cornstarch — a thickening agent to help set the custard
- ⅛ tsp salt — balances sweetness
- 2 tablespoons (28 g) unsalted butter, cold and cubed — enriches and smooths the custard
- 2 teaspoons vanilla extract (or 1 tsp vanilla bean paste) — gives classic vanilla flavor
Metric / Approximate Conversions
- Milk: ~480 mL
- Sugar: 100 g
- Egg yolks: from 4 large eggs (~76 g yolk mass depending on size)
- Cornstarch: 30 g
- Butter: 28 g
Why Each Ingredient Matters
- Puff pastry: Provides crisp texture. Because it’s laminated with fat, it puffs and flakes. Keeping it cold helps maintain structure and prevents excessive spreading.
- Milk: The fluid medium. Whole milk gives richness; using lower-fat milk might produce a thinner custard unless compensated with more thickener.
- Sugar: Sweetness; also contributes to browning of pastry topping if glazed or dusted.
- Egg yolks: Contain fat and proteins that emulsify and thicken when heated.
- Cornstarch: Provides structure and stability, allowing the custard to set firmly without being too gelatinous.
- Butter: Adds silkiness, flavor, and helps the custard remain smooth even when chilled.
- Vanilla: The defining flavor. Use extract or bean paste for deeper aroma.
- Salt: Enhances and balances sweetness.
Step‑by‑Step Instructions
Part 1: Bake the Puff Pastry Layers
- Preheat oven to 400 °F (200 °C). Line a baking sheet with parchment paper.
- On a lightly floured surface, unfold the thawed puff pastry. If it’s not a perfect rectangle, gently roll to even it out into a rectangle. Be careful not to overhandle it (which can deflate layers).
- Using a sharp knife or pizza cutter, cut into three equal, long rectangles (widthwise). These will become your bottom, middle, and top layers.
- Transfer them to the prepared baking sheet(s). Dock them (prick all over with a fork) to prevent excessive puffing.
- Bake for ~15–20 minutes, or until puffed and golden brown. They should be crisp and well-baked. Remove to a wire rack to cool completely. Once cooled, they will retain crispness.
Part 2: Make the Vanilla Custard Cream (Pastry Cream)
- In a medium saucepan, heat the milk over medium heat until it just begins to steam (small bubbles at edge), but do **not** bring to a boil.
- Meanwhile, in a separate bowl, whisk together the egg yolks, sugar, cornstarch, and salt until very smooth and pale yellow.
- Temper the eggs: slowly (a bit at a time) pour about ½ cup of the hot milk into the yolk mixture while whisking constantly. This warms the eggs gently so they don’t scramble.
- Pour this warmed egg mixture back into the saucepan with the remaining milk, whisking constantly over medium heat. The mixture will thicken quickly. Once it begins to bubble, cook for exactly **1 more minute** (still whisking). This step is crucial to fully activate the starch and remove any raw taste.
- Remove from heat immediately. Whisk in cold cubed butter and vanilla extract (or vanilla bean paste) until the butter is fully melted and incorporated.
- Pour the custard into a clean bowl. Press a piece of plastic wrap **directly onto the surface** (to prevent a skin) and refrigerate until completely cold and set, at least 2–3 hours (preferably overnight).
Part 3: Assemble the Squares
- Ensure both pastry and custard are fully cooled (custard firmly set, pastry crisp).
- Choose the flattest, most even pastry rectangle as the **middle** layer. The other two become the **top** and **bottom**.
- Layer 1: Place one pastry rectangle on your serving plate or cutting board. Spread half of the chilled custard evenly over it, spreading to edges.
- Layer 2: Carefully place the second pastry rectangle on top, gently pressing to adhere. Spread the remaining custard evenly over this middle layer.
- Layer 3: Place the final pastry rectangle on top. Gently press edges if needed to align.
- Chill the assembled dessert for at least 1–2 hours (or up to overnight). Chilling allows the custard to meld and soften the pastry slightly, making cutting easier.
Part 4: Final Touch & Serving
Right before serving:
- Dust heavily with powdered sugar. For a decorative look, place strips of parchment on top before dusting, then remove them to leave lines.
- Alternatively, whisk together powdered sugar + milk to make a thin glaze and drizzle over the top.
- Using a very sharp, serrated knife (or a long slicing knife), gently **saw** through the layers to cut into 9 or 12 squares. Wipe the knife between cuts for clean edges.
- Serve chilled or slightly cool. The contrast of crisp pastry and creamy interior is at its best.
Chef Tips, Techniques & Common Pitfalls
- Keep puff pastry cold: Work quickly and keep pastry chilled. Warm pastry loses structure and won’t puff nicely.
- Dock well: Pricking prevents excessive puffing and uneven rise in the pastry layers.
- Temper eggs properly: Adding a bit of hot milk gradually avoids scrambling yolks — a crucial step.
- Cook custard long enough: The “one more minute after bubbling” stage ensures the starch fully activates and removes any raw flour taste.
- Use good butter and vanilla: Quality ingredients elevate the flavor. Unsalted butter gives you control; real vanilla or bean paste gives depth.
- Prevent skin formation: Always press plastic wrap onto custard surface immediately to avoid a crust forming.
- Chill thoroughly: Don’t rush — custard needs time to firm up so filling supports the pastry above it.
- Cut carefully: Use a sharp, serrated or long slicing knife; saw gently. Wiping blade between cuts helps maintain clean edges.
- Serve promptly: Over long time, pastry may soften from custard moisture — best served within a day or two.
Variations & Custom Adaptations
Diplomat Cream (Lighter, Airy Filling)
Once custard is cold and set, whip heavy cream to soft peaks, then gently fold into custard (½ to full cup). This lighter, airy filling — called diplomate cream — gives a mousse-like texture.
Chocolate or Coffee Custard
Add a tablespoon of cocoa powder (sifted) to the dry custard mixture, or a teaspoon of espresso/instant coffee for a mocha twist. Adjust sugar accordingly.
Fruit or Berry Layered Version
Add a thin layer of fruit jam or fresh fruit (e.g. berries) between custard and pastry layers for flavor contrast. Or swirl berry purée into the custard before chilling.
Almond / Nutty Topping
Brush top pastry with melted butter and sprinkle sliced almonds, chopped pistachios, or crushed nuts before baking (or after just before serving) for crunch.
Gluten-Free / Paleo Version
Use gluten-free puff pastry or a homemade nut‑flour pastry. For the custard, use a suitable gluten-free thickener (e.g. arrowroot, tapioca) instead of cornstarch.
Reduced Sugar / Lighter Version
Reduce sugar in custard slightly (e.g. to ⅓ cup) or use a natural sweetener. Use lower-fat milk or half-and-half. The custard will be lighter but still satisfying.
Nutrition & Health Considerations
Here is an approximate estimate per square (assuming 9 squares). Numbers may vary depending on ingredients and portion size.
| Nutrient | Estimate per Square |
|---|---|
| Calories | ~ 250‑350 kcal |
| Protein | ~ 4‑6 g |
| Total Fat | ~ 12‑18 g |
| Saturated Fat | ~ 6‑10 g |
| Carbohydrates | ~ 25‑35 g (mostly pastry + milk) |
| Fiber | ~ 1 g (from pastry) |
| Sugars | ~ 10‑18 g (custard + pastry sugar) |
| Sodium | ~ moderate (from butter, milk, pastry dough) |
Health Notes & Tips:
- Choose whole milk for richness, or lighten with part-skim or lower-fat dairy (custard may be softer).
- Use unsalted butter and control salt in pastry dough or custard to manage sodium.
- Add fruit or serve with berries to add some fiber, antioxidants, and dimension.
- Serve smaller pieces to manage portion control — it is a rich dessert.
Storage, Reheating & Food Safety
Storage
- Cover and refrigerate assembled squares. Because the custard is dairy, keep them chilled at all times.
- Best consumed within **24–48 hours**. Over time, pastry may soften from moisture migration.
- You can keep pastry and custard components separately if assembling later to preserve crispness.
Reheating / Serving
- Serve chilled or at a cool room temperature — reheating is not recommended as custard may degrade.
- If you want the top to be crisp again, you can briefly put a square under a broiler for a very short time (watch carefully) or use a kitchen torch — but be cautious not to overheat the custard.
Food Safety Tips
- Use fresh, high-quality dairy and eggs.
- Cool custard rapidly (using ice bath, then refrigerate) before assembly to prevent bacterial growth.
- Don’t leave assembled dessert at room temperature for more than ~2 hours (less in warm climates).
- Use clean utensils and surfaces, especially as custard is a dairy-based preparation.
Troubleshooting & Common Problems
- Custard too thin or runny: Perhaps undercooked (skip the full 1 minute after bubbling), or wrong proportion of cornstarch. Next time increase thickener or simmer a bit longer.
- Custard lumps or curdled: Likely eggs cooked too quickly (lack of tempering or too high heat). Always temper slowly and whisk continuously.
- Pastry soggy under custard: If pastry was not crisp or custard was too moist. Pre-bake pastry well, and ensure custard chilled and not too hot when assembled.
- Top layer sliding or misalignment: Press gently when layering; chill between layers if needed.
- Hard to cut clean squares: Use a serrated or long slicing knife; wiping blade between cuts helps maintain clean edges.
- Pastry edges burn: If edges over-brown, consider shielding with foil or lowering oven rack position.
10 FAQs You Might Ask
1. Can I use multiple puff pastry sheets instead of cutting one?
Yes — if you have several sheets, you can layer them or use extra pieces. Just ensure they are baked crisp and cooled before layering.
2. Can I skip cornstarch or use flour?
Cornstarch gives a cleaner, silkier custard. You could use pastry flour or all-purpose flour, but you may need more and the texture will be slightly different (less translucent).
3. Why must I chill the custard thoroughly?
Hot or warm custard will melt pastry and lead to sogginess. Cool custard sets properly and ensures structure when slicing.
4. Can I freeze the assembled squares?
Freezing is not ideal — the pastry may soften when thawed, and custard texture may degrade. If necessary, freeze components separately (pastry and custard) and assemble fresh.
5. How long does the custard last on its own?
Chilled custard can last ~2–3 days in the fridge (covered), though flavor and texture may begin to change. Always cover surface to avoid skin formation or contamination.
6. What if top dusting or glaze melts into pastry too quickly?
Dust just before serving. If glazing, use a thin glaze and let it set briefly before cutting. Chill a bit before serving so it doesn’t run.
7. Can I serve these squares warm?
They’re best chilled or slightly cool. Warming may soften the custard too much and spoil the texture contrast.
8. How thick should the pastry layers be?
Try to keep pastry thickness uniform. If one layer is much thinner, it might break or become overly soft under custard pressure.
9. Can I use egg whites in custard or whole eggs instead of just yolks?
Traditional pastry cream uses yolks for richness and texture. Using whole eggs dilutes fat content and changes firmness. If using egg whites, expect a lighter, less rich result.
10. Why does custard sometimes “weep” (liquid separation) after chilling?
If custard is overwhipped, or if it sits too long, or if there’s condensation — it may release liquid (syneresis). Use proper thickening, chill promptly, and avoid agitation.
Serving & Presentation Ideas
- Serve on a chilled plate to slow softening.
- Dust heavily with powdered sugar or pipe a light vanilla glaze for visual contrast.
- Garnish with fresh berries (strawberries, raspberries) or mint for color and freshness.
- Place small edible flowers or thin chocolate shavings on top for elegance.
- Serve each square on a dessert plate with a small dollop of whipped cream or crème fraîche.
- Arrange squares in a grid on a large platter for a striking presentation at gatherings.
Conclusion & Final Thoughts
These **Vanilla Custard Cream Squares** combine textures and flavors beautifully: crisp pastry, silky custard, and vanilla richness. The technique emphasizes patience—cooling and layering carefully. Use the tips and variations above to adapt to your kitchen, dietary needs, or flavor preferences. Let me know if you’d like a **printable recipe card**, **metric-only version**, or version customized for gluten-free, lighter, etc. Happy baking!