Introduction
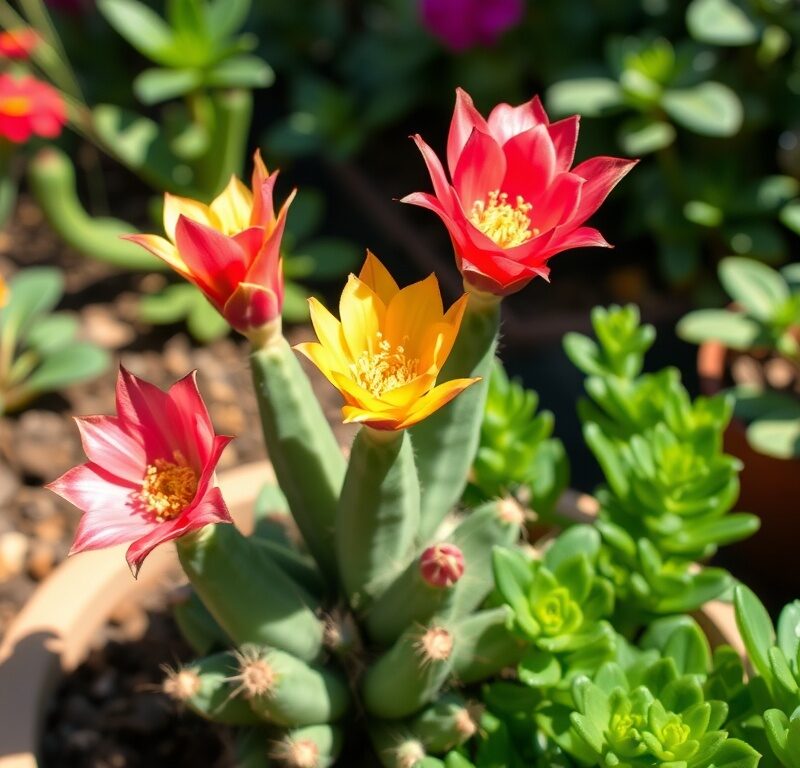
The joy of a Christmas cactus bursting into vibrant, festive blooms is a sight to behold, a true herald of the holiday season. Its colorful flowers, cascading elegantly from its segmented stems, can brighten even the dreariest winter day. But what happens when your beloved plant, year after year, just sits there, stubbornly refusing to produce a single bud? The disappointment is real, and for many, it feels like a personal affront from a plant that should, by its very name, be celebrating with you. You’ve watered it, given it light, perhaps even whispered sweet nothings to its leafy segments, yet still, nothing. It’s a common frustration, often leading plant parents to believe they simply have “bad luck” or a “wrong plant” that’s destined to be a foliage-only display.
Forget those common misconceptions right now! The truth is, coaxing a Christmas cactus to bloom isn’t about luck; it’s about understanding its unique needs and providing the right environmental triggers. While it might seem like a finicky plant, its blooming cycle is largely controllable, and with a few simple adjustments, you can transform your non-bloomer into a festive floral powerhouse. We’re about to reveal a surprisingly effective solution – an easy, “one-spoon hack” that works wonders – alongside other crucial care tips that will turn your Christmas cactus into the holiday showstopper it was always meant to be.
So, if you’re ready to banish the bloom-less blues and welcome a cascade of color this holiday season, read on. This guide will demystify the art of Christmas cactus care, explaining not only the “one-spoon hack” but also the essential environmental factors that work in harmony to trigger those much-anticipated buds. Get ready to impress your holiday guests with a vibrant, blooming Christmas cactus that you, yes you, helped flourish!
Nutritional Information
Per serving (approximate values):
- Calories: 0
- Protein: 0g
- Carbohydrates: 0g
- Fat: 0g
- Fiber: 0g
- Sodium: 0mg
Ingredients
- 1 tablespoon Epsom salts (Magnesium Sulfate)
- 1 gallon of water (preferably distilled or rainwater, but tap water is usually fine)
Instructions
- Understand Your Christmas Cactus: The Basics of Blooming
- What is a Christmas Cactus? First, let’s clarify. Your Christmas cactus is botanically known as a *Schlumbergera*. It’s not a true desert cactus that thrives in arid conditions; instead, it’s an epiphytic plant, meaning it grows on other plants (like trees) in its native Brazilian rainforest habitat. This distinction is crucial for understanding its care needs. It prefers humidity and consistent moisture, unlike its desert-dwelling cousins.
- Key Factors for Flower Bud Formation: To get those beautiful blooms, you need to provide specific conditions:
- Light: Bright, indirect light is paramount for overall plant health and energy storage.
- Temperature: Cool temperatures are a primary trigger for bud initiation.
- Darkness: A period of uninterrupted darkness is absolutely essential.
- Water & Humidity: Consistent moisture (never soggy) and good humidity levels are vital.
- Nutrients: This is where our “one-spoon hack” comes into play, providing the vital micronutrients often overlooked.
- The “One-Spoon Hack” Revealed: Epsom Salts
- The Problem: Often, even with good light and water, your Christmas cactus might be lacking specific nutrients critical for flowering. It’s not always about major fertilizers; sometimes, it’s the micronutrients that make all the difference.
- The “Hack” Revealed: The secret ingredient is simple and inexpensive: Epsom Salts (Magnesium Sulfate).
- Why Epsom Salts?
- Provides Magnesium: Magnesium is vital for chlorophyll production, the green pigment responsible for photosynthesis. Efficient photosynthesis means a healthier plant capable of storing energy for flowering. It also aids in the uptake of other essential nutrients.
- Provides Sulfur: Sulfur is crucial for plant protein and enzyme formation, supporting overall plant vigor.
- Crucially: Epsom salts are not a primary fertilizer, but rather a micronutrient booster. They enhance the plant’s overall health and its ability to utilize other nutrients, thereby improving its capacity to produce flowers.
- How to Apply (The “One-Spoon” Method):
- Measurement: Dissolve 1 tablespoon of Epsom salts in 1 gallon of water. Stir well until the crystals are completely dissolved.
- Frequency: Apply this solution monthly. The ideal time to start is 6-8 weeks before your desired bloom time. For Christmas blooms, this means starting in late August or early September.
- Application: Use the Epsom salt solution to water your plant as you normally would. Water until you see a little drainage from the bottom of the pot.
- Important Caveat: Do NOT overdo it. More is not better when it comes to Epsom salts. Stick to the recommended dosage and frequency. Over-application can lead to nutrient imbalances or salt buildup in the soil.
- Beyond the Spoon: Essential Care for Abundant Blooms
- The “Cool Down” Period (Temperature):
- Ideal Range: For 6-8 weeks, starting in early fall, provide your plant with cooler temperatures, ideally between 50-60°F (10-15°C).
- Practical Tip: Move your plant to a cooler room in your house, a slightly drafty window sill (away from direct cold drafts), or even an unheated porch or garage if temperatures remain within the safe range and there’s no risk of frost.
- The “Darkness” Requirement (Photoperiod):
- Rule: This is ESSENTIAL. Your Christmas cactus needs 12-14 hours of *uninterrupted* darkness daily for 6-8 weeks to initiate flower buds. Even a brief flash of light during this period can reset the process.
- Practical Tips:
- Cover the plant with a cardboard box or a thick, dark cloth every evening.
- Place it in a dark closet or cabinet overnight.
- Ensure it’s not exposed to streetlights, car headlights, or artificial indoor lights from other rooms.
- Watering & Humidity:
- During Budding Initiation (Cool/Dark Period): Reduce watering slightly. Allow the top inch or two of soil to dry out completely before watering again. Do not let the plant sit in soggy soil.
- As Buds Develop: Once you see tiny buds forming, increase watering slightly to keep the soil consistently moist but never waterlogged. Maintain good humidity around the plant (50-60%) using a pebble tray or a room humidifier.
- Avoid: Overwatering (leads to root rot) and letting it completely dry out (can cause bud drop).
- Light:
- Year-Round: Provide bright, indirect light. A north or east-facing window is often ideal.
- Avoid: Direct, intense sunlight, especially during the hottest parts of the day, as this can scorch the plant’s segments.
- Fertilization (Standard):
- During the spring and summer growing season (after flowering and before the bloom initiation period), use a balanced houseplant fertilizer (e.g., 10-10-10 or 20-20-20) at half the recommended strength.
- Key: Stop all standard fertilization in late summer/early fall when you begin the bloom cycle (cool/dark period and Epsom salts application).
- The “Cool Down” Period (Temperature):
Cooking Tips and Variations
While this isn’t a cooking recipe, think of these as “gardening tips” for the best “bloom recipe” results!
- Consistency is Key: The most important “tip” for blooming success is consistency. Stick to your watering schedule, maintain the dark period diligently, and apply the Epsom salts regularly during the recommended window.
- Don’t Move Once Buds Form: Once those precious buds appear, resist the urge to move your plant. Sudden changes in light, temperature, or even orientation can cause bud drop. Find a good spot and let it be.
- Patience is a Virtue: It might take a few weeks for buds to appear after starting the dark and cool treatments, combined with Epsom salts. Don’t get discouraged if you don’t see immediate results.
- Listen to Your Plant: Observe your Christmas cactus closely. If leaves look shriveled, it needs water. If they’re yellowing, it might be overwatered or need nutrients. Your plant will communicate its needs.
- Check for Pests: A healthy plant is a blooming plant. Regularly check for common houseplant pests like mealybugs or spider mites and address them promptly if found.
- Consider a Pebble Tray for Humidity: Especially in dry indoor environments, a pebble tray (a shallow tray filled with pebbles and water, ensuring the pot does not sit directly in the water) can significantly boost humidity around your plant, which is crucial for preventing bud drop.
- Pruning for Bushiness & More Blooms: After your plant finishes flowering in the spring/early summer, you can gently pinch back a few segments. This encourages the plant to branch out, leading to a bushier plant with potentially more flowering points in the future.
- Repotting Sparingly: Christmas cacti prefer to be slightly pot-bound. Only repot when it’s truly root-bound, usually every 2-3 years. Use a well-draining potting mix, such as an orchid mix or a cactus mix amended with perlite for extra drainage.
Storage and Reheating
This section isn’t applicable to a plant care article. However, if we were to translate the concept, think of “storage” as the plant’s dormant period and “reheating” as bringing it back to bloom.
“Storage” (Dormancy/Rest Period): After flowering, allow your Christmas cactus a period of rest. Reduce watering slightly, but don’t let it dry out completely. You can also reduce fertilization during this time. This period of less active growth allows the plant to conserve energy for the next blooming cycle. Keep it in a bright, indirect light location.
“Reheating” (Initiating Bloom Cycle): To “reheat” and encourage new blooms, you’ll re-introduce the specific environmental triggers discussed in this article: the cool temperatures, the strict darkness period, and the monthly application of Epsom salts, all starting 6-8 weeks before you want to see flowers.
Frequently Asked Questions
Why are my Christmas cactus buds falling off?
Bud drop is a common and frustrating issue. It’s usually caused by sudden environmental changes. This can include abrupt shifts in temperature (e.g., a cold draft or moving it near a heat vent), inconsistent watering (either too much or too little), low humidity, or moving the plant once buds have already formed. Consistency and a stable environment are key once buds appear.
Can I use regular fertilizer instead of Epsom salts?
While a balanced houseplant fertilizer (like a 10-10-10) is good for general growth during the spring and summer, it’s not a substitute for Epsom salts. Epsom salts provide specific micronutrients (magnesium and sulfur) that boost the plant’s ability to photosynthesize and absorb other nutrients, which indirectly supports flowering. Regular fertilizers provide macronutrients. For blooming, it’s best to use both: regular fertilizer during growth, and Epsom salts during the bloom initiation period (while pausing regular fertilizer).
How long does it take for buds to appear after starting the darkness treatment?
Typically, you can expect to see tiny flower buds begin to form within 4-6 weeks of consistently providing the 12-14 hours of uninterrupted darkness and cooler temperatures, especially when combined with the Epsom salt treatment. Once buds are visible, it can take another 2-4 weeks for them to fully develop and open, depending on the plant’s health and environmental conditions.