Why Every Home Needs a Spider Plant
Introduction
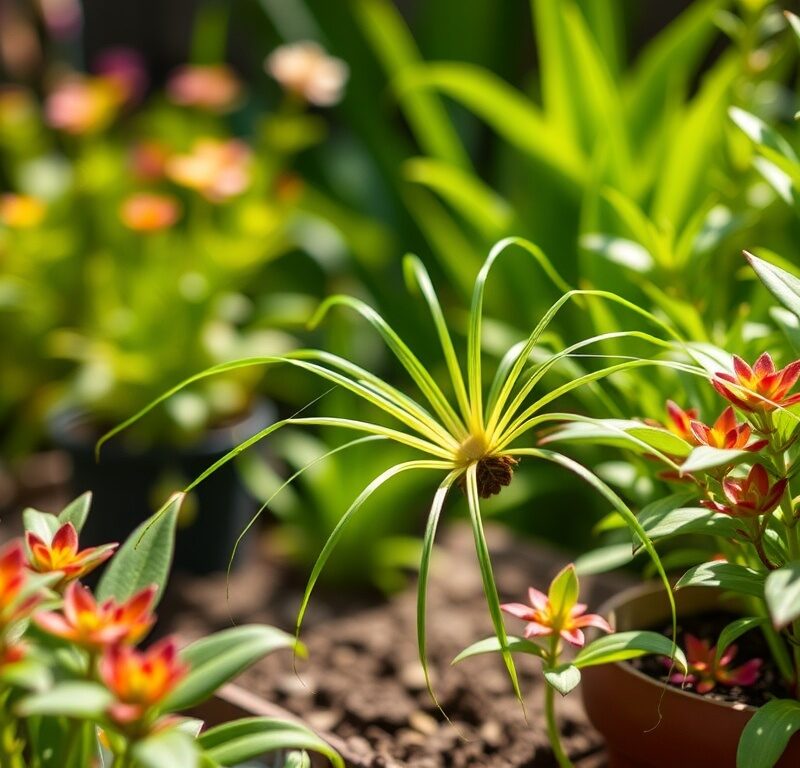
In the vibrant world of indoor gardening, where lush foliage and vibrant blooms vie for attention, one humble hero consistently stands out: the spider plant. With its captivating cascades of variegated leaves and playful “spiderettes” dangling like botanical chandeliers, Chlorophytum comosum has charmed its way into homes and hearts for generations. It’s more than just a pretty face; this resilient houseplant is a testament to nature’s ability to thrive indoors, offering both aesthetic beauty and tangible benefits for your well-being. From minimalist modern apartments to cozy farmhouse kitchens, the spider plant seamlessly integrates into any decor, transforming sterile spaces into serene sanctuaries.
What makes the spider plant so universally adored? Its widespread appeal stems from a perfect trifecta of attributes: stunning visual appeal, remarkable health benefits, and an almost unbelievably forgiving nature. This isn’t a plant that demands constant attention or a green thumb honed over decades. Instead, it’s a patient teacher, rewarding even the most novice gardener with lush growth and the joy of successful cultivation. Whether you’re looking to add a touch of natural elegance, purify your indoor air, or simply enjoy the calming presence of greenery, the spider plant delivers on all fronts, making it an undisputed must-have for every home.
From its role in NASA’s clean air studies to its effortless propagation, the spider plant is truly the unsung hero of houseplants. It’s a plant that gives back tenfold, asking for little in return. Its ease of care is legendary, making it the perfect entry point for aspiring plant parents and a reliable friend for seasoned enthusiasts. Get ready to discover why this graceful, adaptable, and beneficial plant deserves a prime spot in your living space, enhancing both its beauty and your quality of life.
Nutritional Information
Per serving (approximate values):
- Calories: 0
- Protein: 0g
- Carbohydrates: 0g
- Fat: 0g
- Fiber: 0g
- Sodium: 0mg
Ingredients
- 1 Spider Plant (Chlorophytum comosum)
- 1 Pot with drainage holes (at least 6-8 inches in diameter for a medium plant)
- 1 bag (8-quart) of well-draining potting mix
- Filtered water or tap water left out for 24 hours
- Optional: Liquid houseplant fertilizer (balanced, 10-10-10 or similar)
- Optional: Hanging basket or decorative planter
- Optional: Spray bottle for misting
Instructions
- Choosing Your Spider Plant: Select a healthy spider plant from your local nursery or garden center. Look for vibrant green or variegated leaves, no signs of pests, and a robust root system (if visible).
- Prepare the Pot: Ensure your chosen pot has adequate drainage holes. If you’re using a decorative pot without holes, place a smaller nursery pot with drainage inside it, or create a layer of pebbles at the bottom of the outer pot to act as a reservoir, though direct potting with drainage is always preferred.
- Add Potting Mix: Fill the bottom of your pot with a 1-2 inch layer of well-draining potting mix. A standard indoor potting mix enriched with perlite or vermiculite is ideal to ensure good aeration and prevent waterlogging.
- Remove from Nursery Pot: Gently remove the spider plant from its nursery container. You may need to lightly squeeze the sides of the pot to loosen the root ball.
- Inspect Roots: Carefully inspect the roots. If they are tightly coiled or circling the bottom, gently tease them apart with your fingers to encourage outward growth.
- Position the Plant: Place the spider plant in the new pot, ensuring the base of the plant is at the same level as it was in its original pot. The top of the root ball should be about 1 inch below the rim of the new pot to allow for watering.
- Fill with Potting Mix: Fill the remaining space around the root ball with fresh potting mix, gently patting it down to remove large air pockets. Avoid compacting the soil too tightly.
- Initial Watering: Water the plant thoroughly immediately after potting. Water until you see water draining from the bottom of the pot. This helps settle the soil and hydrate the roots. Discard any excess water from the saucer.
- Choose the Right Location: Place your newly potted spider plant in a spot that receives bright, indirect light. An east or west-facing window is often ideal. Avoid direct, intense sunlight, which can scorch the leaves.
- Establish a Watering Routine: Allow the top 1-2 inches of soil to dry out completely before watering again. Stick your finger into the soil to check moisture levels. Water thoroughly each time, allowing water to drain out, then empty the saucer.
- Monitor and Adjust: Observe your plant for signs of stress (e.g., brown tips, yellowing leaves) and adjust its care as needed. Brown tips can often be mitigated by using filtered water or increasing humidity.
- Fertilize (Growing Season): During the spring and summer growing seasons, you can fertilize your spider plant once every 2-4 weeks with a diluted liquid houseplant fertilizer (at half strength). Do not fertilize in fall or winter when growth naturally slows.
- Propagate “Spiderettes”: Once your plant produces “spiderettes” (small plantlets on long stems), you can easily propagate them. Snip them off, place the base in a glass of water until roots form, then plant them in soil. Alternatively, plant them directly into moist soil.
- Regular Maintenance: Periodically wipe dust from the leaves with a damp cloth to ensure efficient photosynthesis. Prune any yellow, brown, or dead leaves at the base to maintain plant health and appearance.
Cooking Tips and Variations
While spider plants aren’t for eating, there are plenty of “gardening tips” that ensure your plant thrives and variations in how you can display and enjoy them.
Tips for Best Results:
- Water Quality Matters: Spider plants are sensitive to fluoride and chlorine often found in tap water, which can lead to unsightly brown leaf tips. To combat this, use filtered water, rainwater, or simply let your tap water sit out in an open container for 24 hours before use. This allows chlorine to evaporate.
- Don’t Be Afraid to Prune: Regularly remove any yellowing, brown, or dead leaves at the base of the plant. This not only keeps your plant looking tidy but also encourages new, healthy growth. You can also trim off excessive “spiderettes” if the plant becomes too crowded or if you don’t wish to propagate them.
- Rotate Your Plant: Spider plants will naturally grow towards their light source. To ensure even, symmetrical growth and prevent it from becoming lopsided, rotate your plant 90 degrees every week or two.
- Humidity Boost: While tolerant of average household humidity, spider plants appreciate a bit more moisture in the air, especially in dry indoor environments. Misting with a spray bottle a few times a week, placing it near a humidifier, or setting its pot on a pebble tray filled with water (ensuring the pot doesn’t sit directly in the water) can be beneficial.
- Listen to Your Plant: Your spider plant will communicate its needs. Wilting can indicate thirst or, less commonly, overwatering. Pale or dull foliage might mean it needs more light, while scorched leaves indicate too much direct sun. Brown tips often point to water quality or humidity issues.
- Root Bound is Okay (to a point): Spider plants actually prefer to be slightly root-bound, as this encourages them to produce more “spiderettes.” However, if roots are heavily circling the pot or growing out of the drainage holes, it’s time to repot into a slightly larger container (usually 1-2 inches wider).
Display and Propagation Variations:
- Hanging Basket Elegance: The natural arching growth habit and trailing “spiderettes” make spider plants absolutely stunning in hanging baskets. This allows the plantlets to dangle freely, creating a beautiful cascading effect that truly showcases its unique charm.
- Shelf & Tabletop Accents: For a more contained display, place your spider plant on a high shelf, a mantelpiece, or a sturdy tabletop where its leaves can gently spill over the edge. This adds a touch of natural softness to any surface.
- Terrarium Companion: Smaller spider plant varieties or young plants can be a lovely addition to open terrariums, especially those with a focus on humidity-loving plants.
- Water Propagation Display: Instead of immediately planting your “spiderettes” in soil, root them in small decorative glass jars or bottles filled with water. This creates a charming display of growing roots and allows you to watch the propagation process unfold.
- Gifting “Spiderettes”: The ease of propagation means you can effortlessly share the joy of spider plants. Rooted “spiderettes” make thoughtful, personalized gifts for friends, family, or even as party favors. Plant them in cute small pots for an instant present.
- Different Varieties: While the classic variegated green and white is most common, look for other varieties like ‘Vittatum’ (cream stripe down the center), ‘Variegatum’ (white stripe on the edges), or ‘Bonnie’ (a curly-leaved variety) to add subtle variations to your collection.
Storage and Reheating
As spider plants are living organisms, “storage and reheating” doesn’t apply in the traditional sense of food. However, we can interpret this section as maintaining plant health over time and recovering from neglect.
Maintaining Plant Health for Long-Term Enjoyment:
- Consistent Care is Key: The best way to “store” your spider plant for long-term health and enjoyment is to provide consistent, appropriate care. This means sticking to a regular watering schedule (allowing the topsoil to dry), providing ample bright, indirect light, and maintaining average room temperatures.
- Seasonal Adjustments: Understand that your plant’s needs will change with the seasons. During the active growing months of spring and summer, it will require more frequent watering and occasional fertilization. In fall and winter, growth slows, so reduce watering frequency and stop fertilizing altogether. This “winter rest” is crucial for its long-term vitality.
- Repotting as Needed: While spider plants appreciate being slightly root-bound, they will eventually outgrow their pot. Repotting every 1-2 years into a pot that is only 1-2 inches larger in diameter will refresh the soil, provide new nutrients, and give the roots room to grow without shocking the plant.
- Pest Vigilance: Regularly inspect your plant for any signs of pests. Early detection is key. A healthy plant is more resilient, but even then, pests can appear. Address them promptly with appropriate organic solutions like neem oil or insecticidal soap to prevent widespread infestation.
“Reheating” (Reviving) a Stressed Spider Plant:
- Assess the Damage: First, identify the likely cause of stress. Is it underwatered (dry, crispy leaves)? Overwatered (drooping, yellowing leaves, mushy stem)? Lacking light (pale, leggy growth)? Too much direct sun (scorched spots)?
- For Underwatering: If the soil is bone dry and the leaves are limp, give it a thorough watering. You can even submerge the entire pot (with drainage) in a basin of water for 30 minutes to allow the soil to fully rehydrate. Let it drain completely.
- For Overwatering: If the soil is soggy, stop watering immediately. Allow the soil to dry out completely. If the problem is severe and the roots suspect root rot, carefully remove the plant from its pot, inspect the roots (trim any mushy, black ones), and repot into fresh, dry potting mix.
- Adjust Light: Move the plant to a location with appropriate light conditions – bright, indirect light is almost always the answer.
- Improve Humidity: If brown tips are prominent and indoor air is dry, increase humidity around the plant using misting, a pebble tray, or a humidifier.
- Prune Away Dead or Heavily Damaged Foliage: This helps the plant redirect its energy towards new, healthy growth rather than trying to sustain severely damaged parts. Use clean, sharp scissors.
- Be Patient: Reviving a stressed plant takes time. Provide optimal conditions and monitor it closely, but avoid over-correcting or making too many changes at once. Consistent, gentle care will help it “reheat” and bounce back.
Frequently Asked Questions
What are the benefits of having a spider plant in my home?
Spider plants offer a multitude of benefits, making them an excellent addition to any home. They are renowned for their air-purifying capabilities, effectively removing common indoor toxins like formaldehyde, xylene, and carbon monoxide, as highlighted by NASA’s Clean Air Study. Beyond air quality, their graceful, arching foliage and cascading “spiderettes” add significant aesthetic appeal and a touch of natural elegance to any room. They are incredibly easy to care for, making them perfect for beginners, and are completely non-toxic to pets, providing peace of mind for animal owners. Plus, their easy propagation allows for endless opportunities to share the joy of plants with others.
Why are the tips of my spider plant’s leaves turning brown?
Brown leaf tips are a very common issue with spider plants, and several factors can contribute to it. The most frequent culprits are fluoride and chlorine found in tap water, which can accumulate in the leaf tips. Low humidity in your home, inconsistent watering (especially allowing the soil to dry out too much between waterings), and a buildup of fertilizer salts can also cause browning. To remedy this, try using filtered water or letting tap water sit out for 24 hours before watering. Increase humidity around the plant with misting or a pebble tray, and ensure you’re watering consistently, allowing the top inch or two of soil to dry before the next watering.
How do I get my spider plant to produce more “spiderettes”?
Spider plants typically produce “spiderettes” (plantlets) when they reach maturity and are slightly root-bound. If your plant isn’t producing them, consider these factors: ensure it’s receiving ample bright, indirect light, as insufficient light can hinder growth and plantlet production. Avoid over-fertilizing, especially with high-nitrogen fertilizers, which can promote leafy growth at the expense of plantlets. Sometimes, younger plants simply need more time to mature before they start producing offspring. If your plant is in a very large pot, it might be putting energy into root growth rather than plantlets; a slightly root-bound condition can actually encourage them.
Is it safe to have a spider plant if I have pets?
Yes, absolutely! One of the most wonderful qualities of the spider plant is that it is completely non-toxic to both humans and pets, including curious cats and dogs. This makes it an ideal choice for households with animals, as you don’t have to worry if your furry friends decide to nibble on the leaves. You can enjoy the beauty and air-purifying benefits of this plant without any concern for your pet’s safety, setting it apart from many other common houseplants that can be harmful if ingested.