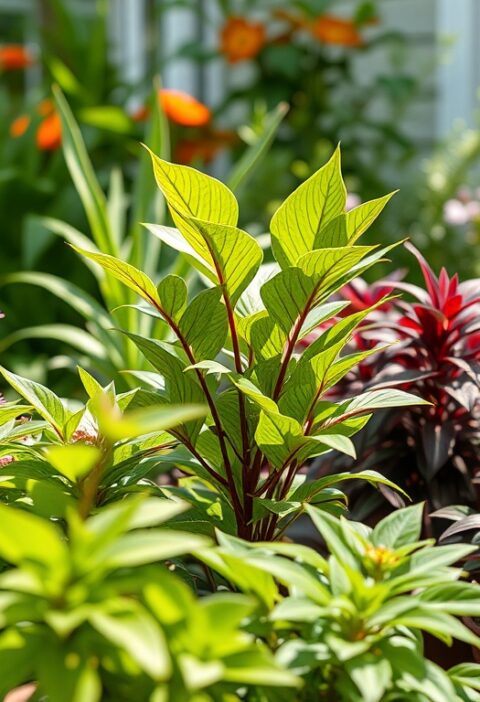
How to Grow Orchids in Water
Imagine graceful orchids, not nestled in bark or moss, but elegantly suspended in clear glass, their intricate root systems on full display. This isn’t a fantasy; it’s the beautiful and increasingly popular method of growing orchids in water, often referred to as hydroponic orchid culture. Forget messy potting mixes and guesswork about watering; this innovative approach offers a clean, visually stunning, and surprisingly low-maintenance way to enjoy these exquisite flowers right in your home. Whether you’re a seasoned orchid enthusiast looking for a new challenge or a beginner intimidated by traditional methods, water culture opens up a fascinating world of orchid care.
The allure of water culture lies in its simplicity and the direct insight it provides into your orchid’s health. By seeing the roots, you can easily monitor hydration, nutrient uptake, and identify potential issues long before they become critical. This method not only simplifies watering routines but also minimizes common problems like root rot caused by stale, overly wet potting media. Plus, the aesthetic appeal of a vibrant orchid floating in a stylish glass container is undeniable, turning your plant into a living centerpiece that sparks conversation and admiration.
While the concept might seem revolutionary, it actually aligns well with how many orchids, particularly the popular Phalaenopsis, thrive in their natural epiphytic habitats. Their aerial roots are designed to absorb moisture and nutrients from the air and intermittent rainfall, making them surprisingly adaptable to a water-based environment. This guide will walk you through everything you need to know to successfully transition your orchids to water culture, from selecting the right plant to daily care and troubleshooting, ensuring you can enjoy the unique beauty of these hydroponic wonders.
Nutritional Information
Per serving (approximate values):
- Calories: 0
- Protein: 0g
- Carbohydrates: 0g
- Fat: 0g
- Fiber: 0g
- Sodium: 0mg
Ingredients
- 1 healthy orchid (Phalaenopsis recommended for beginners)
- 1 clear glass container (vase, jar, or pitcher)
- Filtered water, rainwater, or distilled water
- Orchid-specific, water-soluble fertilizer
- Sterile pruning shears or a razor blade
- Hydrogen peroxide (3% solution, optional for root sterilization)
Instructions
- Choose Your Orchid Wisely: Select a healthy orchid, ideally a Phalaenopsis, with a robust root system. Avoid plants with extensive root rot, pests, or significant damage, as these will struggle to adapt.
- Gather Your Supplies: Ensure you have a clean, clear glass container, filtered water, your chosen fertilizer, and sterilized pruning tools ready before you begin.
- Prepare the Orchid: Carefully remove the orchid from its original pot and growing medium (bark, moss, etc.). Gently but thoroughly remove all traces of the old media from the roots. You may need to rinse the roots under lukewarm water.
- Inspect and Trim Roots: Examine the roots closely. Healthy roots are firm, plump, and often green or silvery. Trim away any dead, mushy, brown, black, or hollow roots using your sterile shears or razor blade. Make clean cuts. If desired, you can dip the trimmed roots in a diluted hydrogen peroxide solution (1 part 3% hydrogen peroxide to 10 parts water) for a few minutes to sterilize, then rinse thoroughly.
- Initial Placement in Water: Place the prepared orchid into your clear glass container. The goal is partial submersion. For beginners, aim to have the bottom one-third to one-half of the roots submerged in water, leaving the upper roots exposed to air. This allows crucial air circulation. Do not fully submerge all roots initially, as this can lead to suffocation.
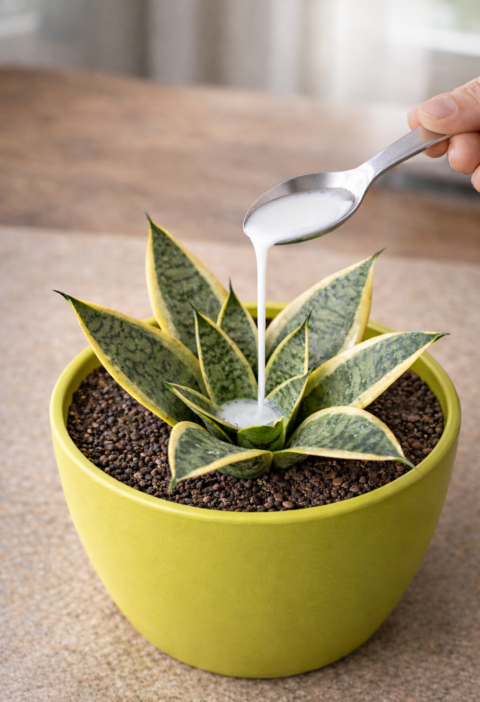
- Fill with Filtered Water: Carefully pour filtered, rainwater, or distilled water into the container until the desired root level is reached. Ensure the water level is consistent with your partial submersion strategy.
- Establish a Water Change Routine: Begin a regular water change schedule. Initially, you might change the water every 2-3 days for the first week or two as the orchid adjusts. Once established, change the water completely once a week. When changing water, briefly remove the orchid, discard the old water, and rinse the roots and container thoroughly before refilling with fresh water.
- Introduce Fertilization (Weakly, Weekly): After the first 2-4 weeks of adjustment, begin fertilizing. Use an orchid-specific, water-soluble fertilizer diluted to 1/4 to 1/8 of the recommended strength. Apply this diluted solution during your weekly water change. Alternatively, you can apply it for one week, then use plain water for the next three weeks, repeating the cycle. Always flush the roots with plain water after a fertilization period to prevent salt buildup.
- Provide Adequate Lighting: Place your water-cultured orchid in a location that receives bright, indirect light. An east-facing window is often ideal. Avoid direct sunlight, which can quickly burn the leaves and heat the water to detrimental levels.
- Monitor and Adjust: Regularly observe your orchid’s roots and leaves. Look for new root growth (green tips), healthy leaf color, and signs of stress. Adjust your watering, fertilization, or light as needed based on your orchid’s response.
Cooking Tips and Variations
When starting with water culture, patience is truly key. Your orchid will need time to adapt, and it’s common for some older roots to die off as new water-adapted roots begin to grow. Don’t be discouraged by this initial phase. Always use a clear glass container; this isn’t just for aesthetics, it’s vital for monitoring root health, water levels, and detecting algae early. For optimal root health, consider allowing the roots to dry out completely for a few hours or even a full day between water changes, especially if you notice any signs of root rot or excessive algae. This “dry period” mimics natural conditions and encourages stronger root development. Remember to sterilize your pruning tools every single time you use them to prevent the spread of diseases. A quick wipe with rubbing alcohol or a flame treatment is sufficient. While Phalaenopsis are the easiest, you can experiment with other epiphytic orchids like some Cattleyas or Oncidiums once you gain confidence, though their root structures might require slightly different water levels.
For a variation that offers more stability and less frequent water changes, consider semi-hydroponics using LECA (Lightweight Expanded Clay Aggregate). In this method, the orchid roots are nestled in LECA pellets within a pot that has a reservoir at the bottom, providing a consistent moisture wick while still allowing air circulation. This can be a great intermediate step if you find full water culture too demanding or if your orchid struggles to adapt.
Another practical tip is to rotate your orchid periodically. This ensures that all sides of the plant receive even light exposure, promoting balanced growth and preventing your orchid from leaning towards the light source. If you notice algae growing in your clear container, it’s usually harmless to the plant but indicates too much light hitting the water. While regular cleaning helps, consider placing your clear container inside a slightly larger, opaque decorative pot to block some light from the water and reduce algae growth, especially if it becomes a persistent problem.
Storage and Reheating
Orchids grown in water culture are living plants and do not require “storage” or “reheating” in the culinary sense. However, proper environmental conditions are crucial for their continued health and longevity. Maintain consistent room temperatures, ideally between 65-80°F (18-27°C) during the day and slightly cooler at night. Protect them from sudden temperature fluctuations and cold drafts. Ensure they receive adequate bright, indirect light daily. If you need to temporarily move your orchid, such as for cleaning the container or while on vacation, ensure its basic needs (light, water, temperature) are met. For short absences (a few days), simply ensuring the container is full of fresh water before you leave should suffice. For longer periods, consider enlisting a trusted plant sitter or exploring automated watering systems designed for hydroponics, though these are typically more complex than needed for simple water culture.
Think of “storage” as maintaining the ideal habitat for your orchid. This involves regularly checking water levels, performing weekly water changes, and adjusting fertilizer application based on the orchid’s growth cycle (less during dormancy, more during active growth and flowering). Keeping the environment clean and free of pests is also part of “storage” for a living plant. Regular observation will guide you in providing the best care, ensuring your water-grown orchid thrives for years to come.
Frequently Asked Questions
Why are my orchid’s roots turning brown or mushy in water?
Brown or mushy roots typically indicate root rot, which can occur even in water culture if the roots are constantly submerged without adequate air exposure, or if the water is stagnant and not changed frequently enough. Ensure you are leaving at least one-third to one-half of the roots exposed to air, and that you are changing the water weekly. If you see signs of rot, remove the orchid, trim off all affected roots with sterile shears, and consider letting the roots dry out completely for a day or two before returning to fresh water.
Can I use tap water for my water-cultured orchid?
While some growers may get away with it, it’s generally not recommended. Tap water often contains chlorine, fluoride, and dissolved mineral salts that can build up on the sensitive orchid roots over time, causing damage and inhibiting nutrient uptake. Filtered water, rainwater, or distilled water are much safer and will lead to healthier root development in the long run. If tap water is your only option, let it sit out for 24-48 hours to allow chlorine to dissipate, but be aware that other harmful minerals may still be present.
My orchid isn’t flowering in water culture. What could be wrong?
Lack of flowering is often related to insufficient light or improper fertilization. Orchids need bright, indirect light to produce the energy required for blooming. Ensure your orchid is receiving adequate light without being exposed to direct sun. Also, review your fertilization schedule. While “weakly, weekly” is good for growth, some orchids benefit from a fertilizer with a slightly higher phosphorus content (the middle number in the N-P-K ratio) to encourage blooming, particularly as they mature. Lastly, remember that orchids have natural dormancy periods; they won’t flower year-round. Patience is key!