Introduction
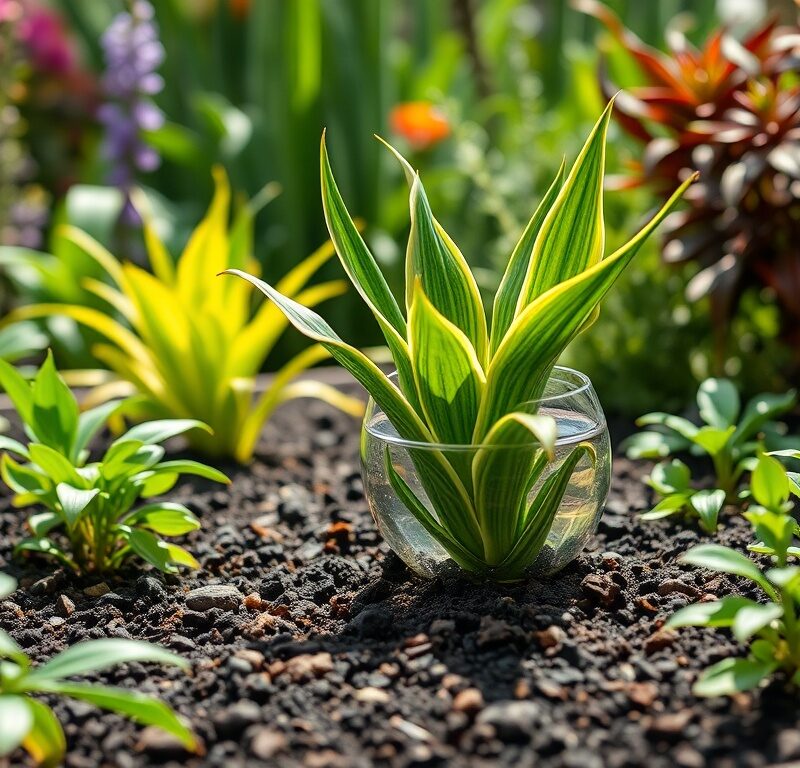
You’ve done it! You’ve successfully transformed a humble snake plant leaf or cutting into a thriving cluster of roots, all thanks to the magic of water propagation. There’s a real sense of accomplishment that comes with watching those delicate white threads emerge. But now, your aquatic leafy friend is ready for its next big adventure: moving to soil. This transition isn’t just a simple swap; it’s a crucial step that can make or break your plant’s long-term health. While water roots are fantastic for getting things started, they’re not built for the rigors of soil life, and understanding this difference is key to avoiding transplant shock.
This guide is designed to be your comprehensive playbook for a seamless transition. We’ll dive deep into why water roots and soil roots are fundamentally different, and how to prepare your snake plant for success even before it touches the dirt. From choosing the perfect potting mix and pot to the gentle art of transplanting and the essential aftercare, we’ll cover every detail. By the end of this article, you’ll have all the knowledge and confidence to move your prized snake plant from its watery home to a cozy pot of soil, ensuring it continues to flourish and bring life to your space for years to come.
So, get ready to learn the “secret sauce” of acclimatization, master the art of gentle potting, and avoid the common pitfalls that can lead to a stressed-out snake plant. Your plant’s a survivor, but with a little guidance, it can be a thriver. Let’s make this move a success!
Nutritional Information
Per serving (approximate values):
- Calories: 0
- Protein: 0g
- Carbohydrates: 0g
- Fat: 0g
- Fiber: 0g
- Sodium: 0mg
Ingredients
- 1 Snake plant cutting, rooted in water (roots 2-4 inches long)
- 1 Pot (terracotta recommended, with drainage holes, 1-2 inches wider than the root ball)
- 1 Bag of well-draining cactus/succulent potting mix (or general potting mix amended with perlite/pumice)
- Sterilized scissors or sharp knife
- Watering can with fresh water
- Optional: Horticultural charcoal (for added drainage/odor control)
- Optional: Small trowel or scoop
Instructions
- Assess Your Rooted Cutting: Before you begin, ensure your snake plant cutting has developed a healthy root system in water. The ideal length for these roots is typically 2-4 inches (5-10 cm). Roots that are too short may struggle to establish in soil, while excessively long roots can be more prone to damage during transplanting. Look for multiple healthy, white roots, not just one or two.
- Prepare Your Pot: Select a pot that is appropriate for the size of your snake plant. Terracotta pots are highly recommended for snake plants due to their porous nature, which allows for better airflow and helps prevent overwatering, a common issue for these drought-tolerant succulents. Crucially, ensure the pot has at least one drainage hole at the bottom. Without proper drainage, water can accumulate and lead to fatal root rot. If using a new terracotta pot, you might consider soaking it in water for an hour or two to prevent it from wicking too much moisture from the initial watering of your plant.
- Mix Your Soil: Snake plants absolutely require well-draining soil to prevent root rot. If you’re using a pre-made cactus or succulent potting mix, it’s usually ready to go. If using a general potting mix, amend it significantly to improve drainage. A good ratio is often 2 parts potting mix to 1 part perlite, pumice, or coarse sand. Perlite and pumice are excellent for adding aeration and drainage without adding significant weight. Mix thoroughly to ensure an even distribution of amendments. If using horticultural charcoal, you can mix a small amount (about 10-15% of the total volume) into your soil mix.
- Optional: Acclimatize Roots Gradually (The “Secret Sauce”): This step is highly recommended for a smoother transition. Over several days or even a week, gradually introduce small amounts of your chosen potting mix into the water where your snake plant is rooting. Start with a pinch, then a teaspoon, increasing the amount each day. The goal is to slowly get the water roots accustomed to the presence of soil particles and the change in environment. This helps them begin to adapt to extracting nutrients from soil rather than just dissolved in water. If you skip this step, simply ensure your roots are robust enough to handle the direct change.
- Gather Your Supplies: Have your chosen pot, prepared soil mix, your rooted snake plant, sterilized scissors, and a watering can filled with room-temperature water all within easy reach. This prevents fumbling and minimizes stress on the plant during the process.
- Gently Remove from Water: Carefully lift your snake plant cutting from its water container. Be extremely gentle, as the water roots are delicate and easily damaged. Try to support the entire root system as you lift it out. Avoid pulling on the leaves, which could separate them from the root structure.
- Inspect and Trim Roots: Once out of the water, gently examine the roots. Look for any roots that appear mushy, discolored (brown or black), or damaged. Using sterilized scissors or a sharp knife, carefully trim away any unhealthy parts. Sterilizing your tools with rubbing alcohol before and after use prevents the spread of potential diseases. Healthy roots should be firm and white or light tan.
- Prepare the Pot with Soil: Place a small layer of your prepared potting mix at the bottom of the pot. The amount will depend on the length of your snake plant’s roots. You want to create a base that allows the plant to sit at the correct depth once potted. The base of the leaves should be just above the soil line, not buried.
- Position the Plant: Hold the snake plant cutting upright in the center of the pot, ensuring the roots are spread out as much as possible rather than bunched up. Adjust the amount of soil at the bottom until the plant is at the desired height. The base of the plant (where the leaves emerge) should be level with or slightly above the rim of the pot to prevent moisture accumulation around the crown.
- Backfill with Soil: Carefully begin to add the potting mix around the roots, filling the pot. Use your fingers or a small scoop to gently work the soil around and between the roots. Ensure that the roots are fully covered. Do not bury the leaves or the base of the plant too deeply, as this can lead to rot. Leave about half an inch to an inch of space between the soil surface and the rim of the pot for easier watering.
- Lightly Compact the Soil: Once the pot is filled, gently tap the sides of the pot or press down lightly on the soil surface with your fingers. This helps to settle the soil and remove any large air pockets that could dry out roots or create inconsistent moisture. Avoid packing the soil too tightly, as this can hinder drainage and aeration.
- Initial Watering: Water the newly potted snake plant thoroughly until you see water draining from the bottom of the pot. This initial watering helps to further settle the soil around the roots and provides essential moisture for the transition. Ensure that the water completely saturates the soil. If the soil level drops significantly after watering, add a little more soil.
- Post-Potting Placement: Place your newly potted snake plant in a location that receives bright, indirect light. Avoid placing it in direct, harsh sunlight immediately after potting, as this can be too intense for a plant that is still adapting. A consistent, warm temperature is also beneficial during this recovery period.
Cooking Tips and Variations
While we’re not cooking in the traditional sense, these “tips and variations” are crucial for the best outcome for your snake plant:
- The Golden Rule: Don’t Overwater! This cannot be stressed enough. Snake plants are succulents and are highly susceptible to root rot, especially after a transition from water to soil. Always err on the side of underwatering.
- Patience is Paramount: Your snake plant might look a little shocked or show no new growth for a few weeks or even a month after potting. This is completely normal. It’s busy developing new soil-adapted roots. Resist the urge to constantly check on it, repot it, or overwater it out of concern.
- Consider a Smaller Pot Initially: If you’re propagating a single small leaf, don’t put it in a huge pot. A pot that’s only slightly larger than the root ball (e.g., a 3-4 inch pot) is often better. Too large a pot holds too much soil and thus too much moisture, increasing the risk of root rot.
- Terracotta is Your Friend: Seriously, terracotta pots are a game-changer for snake plants. Their porous nature allows excess moisture to evaporate through the pot walls, preventing waterlogging. If you must use a ceramic or plastic pot, be extra vigilant with your watering schedule and ensure it has ample drainage holes.
- Bottom Watering (After Establishment): Once your snake plant has settled into its new soil home (after a month or two), consider bottom watering. Place the pot in a tray of water for 20-30 minutes, allowing the soil to soak up water from the drainage holes. This encourages deeper root growth and ensures the plant gets a good drink without saturating the top layer of soil, which can deter pests.
- Dusting for Health: Snake plants have broad leaves that can collect dust. Periodically wipe them down with a damp cloth. This not only keeps them looking shiny but also allows the plant to photosynthesize more efficiently.
- Fertilize with Caution: Young, newly transplanted snake plants don’t need fertilizer. Wait at least 4-6 weeks, or even until you see signs of new growth, before considering fertilization. When you do, use a balanced liquid fertilizer diluted to half strength, and only during the growing season (spring/summer).
- Sunlight Adaptation: While snake plants are famously low-light tolerant, they thrive in bright, indirect light. If your plant was in a very low-light spot in water, gradually introduce it to brighter (but still indirect) light over a week or two after potting. A sudden blast of bright light can scorch delicate leaves.
- Know Your Climate: If you live in a very humid environment, you’ll need to water even less frequently. In arid climates, you might find yourself watering slightly more often, but always check the soil first.
- Alternative Acclimatization Method (Less Common): Some gardeners advocate for a “semi-hydroponic” transition, where the plant is moved from water to a substrate like LECA (Lightweight Expanded Clay Aggregate) before moving to soil. This provides an intermediate step. However, for most home growers, the direct soil acclimatization or careful direct transfer works well with the right precautions.
Storage and Reheating
As we’re dealing with live plants, not food, “storage and reheating” takes on a different meaning. Here’s how to ensure the long-term well-being and “storage” of your snake plant:
Long-Term Placement and Care
Think of this as the permanent “storage” solution for your thriving snake plant. Once your snake plant has successfully transitioned to soil and shown signs of new growth, it’s settled. Its long-term health depends on consistent, appropriate care.
- Light: Continue to provide bright, indirect light. While they tolerate low light, they will grow slowly and may lose some vibrancy. Direct, intense sunlight can scorch the leaves, especially if it’s a sudden change. Rotate the pot every few weeks to ensure even light exposure on all sides.
- Watering: This remains the most critical aspect. Allow the soil to dry out completely between waterings. This often means watering only every 2-4 weeks, or even less frequently in winter when the plant’s growth slows down. Use the “finger test” – stick your finger 2-3 inches into the soil. If it feels dry, it’s time to water. If it’s damp, wait. Overwatering is the quickest way to kill a snake plant.
- Temperature and Humidity: Snake plants prefer average room temperatures, generally between 65-80°F (18-27°C). They are not particular about humidity, tolerating both dry and moderately humid conditions. Avoid sudden temperature drops or drafts.
- Fertilizing: During the active growing season (spring and summer), you can fertilize your snake plant every 2-3 months with a balanced liquid houseplant fertilizer diluted to half strength. Do not fertilize in fall or winter when the plant is dormant. Remember, these are not heavy feeders.
- Pest Control: Regularly inspect your snake plant for common houseplant pests like spider mites, mealybugs, or scale. Early detection makes treatment much easier. A simple wipe-down with a damp cloth can often dislodge pests. For more persistent issues, use insecticidal soap or neem oil.
- Repotting: Snake plants generally enjoy being a bit root-bound. You typically won’t need to repot them more often than every 2-5 years, or when the roots start to push the plant out of the pot or grow out of the drainage holes. When you do repot, only go up one pot size (e.g., from a 6-inch to an 8-inch pot) and use fresh, well-draining soil.
Troubleshooting and “Reheating” (Reviving)
If your snake plant shows signs of distress, think of it as needing a “reheat” or revival. Most issues stem from improper watering or light.
- Yellowing/Mushy Leaves: This is a classic sign of overwatering and potential root rot. Immediately stop watering. Gently unpot the plant and inspect the roots. Trim off any mushy, brown, or black roots with sterilized scissors. Repot in fresh, dry, well-draining soil, and adjust your watering schedule drastically.
- Crispy/Brown Leaf Tips: Often a sign of underwatering or sometimes too much direct sun. Check the soil moisture. If dry, water thoroughly. If in direct sun, move to a brighter, indirect light location.
- Lack of Growth: If your plant isn’t growing, it might be in too low light, not getting enough nutrients (if it’s a very old plant that hasn’t been fertilized or repotted in years), or simply dormant. Ensure it’s in bright, indirect light. Consider a light fertilization during the growing season. Patience is also key here.
- Leaning/Unstable: If the plant seems unstable, it might be top-heavy or not anchored well. You might need to add more soil, or if it’s a tall variety, consider staking it temporarily until it establishes better.
By understanding these “storage” and “reheating” principles, you can ensure your snake plant remains a vibrant and low-maintenance addition to your home for many years.
Frequently Asked Questions
How do I know when my snake plant roots are ready to be transferred to soil?
Your snake plant roots are typically ready for transfer when they are 2-4 inches (5-10 cm) long. At this length, they are robust enough to establish themselves in soil but not so long that they become overly delicate and prone to damage during the potting process. You should see multiple healthy, white roots, indicating a strong foundation for growth in a new medium. Avoid transferring too early, as very short roots will struggle to find moisture and nutrients in soil, increasing the risk of transplant shock.
What kind of soil is best for snake plants, and why is drainage so important?
The absolute best soil for snake plants is a well-draining cactus or succulent potting mix. If you’re using a general potting mix, it’s crucial to amend it with materials like perlite, pumice, or coarse sand to improve drainage. Drainage is paramount because snake plants are succulents, adapted to arid conditions. They store water in their thick leaves and are highly susceptible to root rot if their roots sit in consistently wet soil. Good drainage allows excess water to escape quickly, preventing waterlogging and ensuring the roots have access to essential oxygen, which is vital for their health and function.
My snake plant looks stressed after moving it to soil. Is this normal, and what should I do?
Yes, it is completely normal for your snake plant to appear stressed or show little to no growth for a few weeks after being moved from water to soil. This is known as “transplant shock.” The plant is expending energy to adapt its delicate water roots to the new soil environment and develop more robust soil roots. During this period, resist the urge to overwater or constantly check on it. Ensure it’s in bright, indirect light and maintain a consistent temperature. Water only when the soil is completely dry. Patience is key; given time and proper care, your snake plant will recover and begin to thrive in its new home.
How often should I water my snake plant after it’s been transferred to soil?
After transferring your snake plant to soil, watering frequency is crucial and should be significantly less than when it was in water. The most important rule is to allow the soil to dry out completely between waterings. This often means watering every 2-4 weeks, but it can vary depending on factors like light, temperature, humidity, and pot size. To check, stick your finger 2-3 inches into the soil; if it feels dry, it’s time to water thoroughly until water drains from the bottom. If it feels damp, wait a few more days. Overwatering is the biggest killer of snake plants, so always err on the side of underwatering.