How to Propagate an Orchid from a Leaf: A Simple Guide
Orchids are among the most admired houseplants in the world, known for their unique beauty, exotic blooms, and air of sophistication. But for many enthusiasts, collecting or gifting orchids can become expensive over time. What if you could propagate orchids at home and grow new plants from your existing collection?
This detailed guide explains how to propagate an orchid using a leaf and a piece of its stem—a method that is both cost-effective and rewarding. While more complex and time-consuming than other propagation methods, it’s a fascinating process for plant lovers ready to commit to patience and precision.
🌱 Understanding Orchid Propagation
Orchid propagation typically involves several methods:
- 🪴 Division: Separating mature plants at the roots
- 🌱 Cuttings: Using portions of flower spikes or stems
- 🌸 Flower Spike Propagation: Encouraging keiki growth from flowering stems
- 🌾 Seeding: A complex and highly sterile process usually performed in labs
However, propagation from a leaf with a stem segment is less known and more advanced—but possible with the right technique.
⚠️ Can You Really Grow Orchids from Just a Leaf?
Technically, a single orchid leaf alone cannot produce roots or develop into a new plant. This is because it lacks the necessary growth points or meristem cells. That’s why it’s essential to include a portion of the stem—where these growth cells reside—when cutting the leaf for propagation.
🧰 What You’ll Need
Gather these materials before starting:
- Sharp, sterilized garden scissors or pruning shears
- A healthy orchid leaf with part of the stem attached
- Rooting hormone
- Activated charcoal
- Filtered or distilled water
- Plastic container (clear preferred)
- Cytokinin and succinic acid (optional for enhanced root stimulation)
🪴 Step-by-Step Guide: Propagating Orchids from a Leaf
1. Choose a Healthy Donor Plant
Select a mature, disease-free orchid with no visible signs of stress. Look for firm, green leaves and a strong stem.
2. Make the Cut
Using sterilized scissors, cut off one of the outer leaves with a small segment of the stem still attached. Avoid cutting too close to the base of the plant.
3. Let It Air Dry
Lay the leaf and stem cutting on a clean surface and allow it to dry for approximately 8 hours. This helps seal the wound and prevent rot.
4. Apply Rooting Hormone
Lightly apply rooting hormone to the base of the stem and the surrounding area. This encourages cellular growth and root development.
5. Prepare the Charcoal Solution
Crush a small amount of activated charcoal and dissolve it in filtered water. Charcoal has natural antifungal properties that help protect the developing cutting from infection.
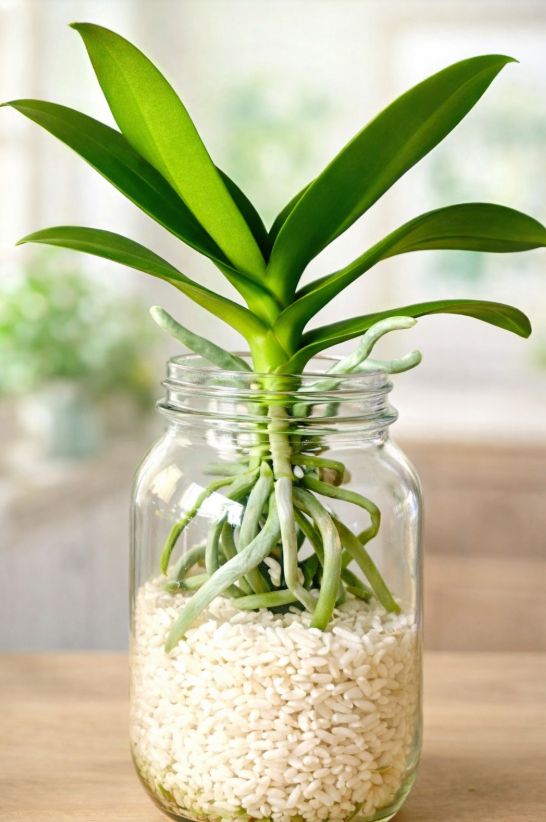
6. Submerge the Cutting
Place the stem and part of the leaf into the charcoal solution. The base should be fully immersed in water. Keep the container in a bright, indirect light area away from direct sun and cold drafts.
7. Monitor and Maintain
Change the water weekly to avoid bacterial buildup. Check for signs of mold, rot, or blackening. You may also add a small amount of cytokinin and succinic acid to support growth (optional).
📊 Orchid Propagation Tool & Benefit Chart
| Item | Measurement | Function | Practical Value |
|---|---|---|---|
| Rooting Hormone | 1 small pinch | Stimulates root cells | Speeds root development |
| Activated Charcoal | 1/2 tsp in 1 cup water | Prevents rot and fungi | Sanitizes the cutting |
| Filtered Water | Room temperature | Hydration without chlorine | Supports clean environment |
| Drying Time | 8 hours | Seals wounds | Reduces infection risk |
| Growth Additives | Trace amounts (optional) | Supports root stimulation | Encourages cell division |
🚫 Common Mistakes in Leaf Propagation
- ❌ Using only the leaf without a stem segment
- ❌ Overexposing to direct sunlight or drafts
- ❌ Failing to sterilize tools, causing infections
- ❌ Not changing the water regularly
- ❌ Rushing the process—root development can take over a year
🔟 Frequently Asked Questions
- How long does it take to root an orchid from a leaf?
It can take 12–18 months to see significant root growth. - Can I propagate all orchid types this way?
This method is best for specific types like Phalaenopsis; others may require different techniques. - Is using a rooting hormone necessary?
It’s not mandatory but greatly improves your chances of success. - Why is charcoal used in the water?
Charcoal prevents fungal and bacterial infections during the rooting stage. - Do I need to cover the container?
Not required, but a loose plastic cover can help retain humidity. - Can I use tap water?
Filtered or distilled water is safer to avoid mineral and chlorine buildup. - What should I do if the leaf turns yellow?
This may signal rot or stress—remove it and inspect the stem for damage. - How often should I change the water?
Every 5–7 days is ideal to prevent bacterial growth. - Can I propagate using flower spikes instead?
Yes, flower spike propagation is a common alternative and often faster. - When can I transplant into soil?
Once roots are at least 2–3 inches long and healthy.
🌸 Final Thoughts: Is Leaf Propagation Worth It?
While orchid leaf propagation is not the fastest or easiest method, it offers a fascinating look into the biology and resilience of plants. With the right tools, knowledge, and patience, you can grow your orchid family from a single cutting—right from your windowsill.
For more botanical guides, sustainable gardening projects, and plant care recipes, visit this curated resource hub and keep growing your green thumb. 🌿