🌿 How to Propagate Rosemary from Cuttings — The Complete Guide for Beginners & Gardeners
Rosemary is one of the most rewarding and fragrant herbs you can grow — and propagating it from cuttings is one of the most satisfying ways to expand your garden without spending money on new plants. Whether you’re a seasoned gardener or just starting out, learning how to propagate rosemary from cuttings will give you a reliable source of fresh, aromatic rosemary for cooking, crafting, gifting, and landscaping.
In this in‑depth guide, you’ll discover **step‑by‑step instructions, expert tips, common mistakes to avoid, detailed timelines, and choices that help you succeed quickly and confidently** — even if you’ve struggled with cuttings before.
By the time you finish reading, you’ll be able to propagate rosemary like a pro and grow healthy, robust plants ready to thrive in pots or in your garden 🌱.
🌱 Why Propagate Rosemary Instead of Buying New Plants?
Many gardeners don’t realize just how easy rosemary is to multiply — but once you learn the method, you’ll never buy another starter plant again. Here’s why propagating from cuttings is worth it:
- 💰 Cost‑effective: Save money on plant purchases by multiplying your existing plants.
- 🌿 Genetic consistency: Cuttings produce plants identical to the parent, preserving flavor and traits.
- 🎁 Share with friends: Give away rosemary cuttings as thoughtful, sustainable gifts.
- 🌼 Faster establishment: Compared to seeds, cuttings root quicker and produce harvestable plants sooner.
However, the process does require patience and attention to detail. Let’s break it down so your success rate improves dramatically.
🛠 Essential Tools & Materials You’ll Need
Before you begin, gather the following tools and materials. Being prepared will make the process smoother and more reliable.
- ✂️ Sharp scissors or pruning shears — for clean, precise cuts.
- 🪴 Small pots or seed trays — at least 2–3 inches deep.
- 🌱 High‑quality potting mix — light and well‑draining.
- 💧 Water — for watering and optional water propagation.
- 📏 Ruler or measuring tape — to ensure ideal cutting length.
- ✨ Optional rooting hormone — can boost root development.
- ☀️ Bright, indirect light source — windowsill or grow light.
- 🌡️ Thermometer (optional) — to help monitor temperature.
✂️ Step‑by‑Step Guide: How to Take Healthy Rosemary Cuttings
The first step in successful propagation is selecting and preparing your rosemary cuttings. This part sets the foundation for everything that follows, so take your time and choose the right stems.
1️⃣ Choose the Right Stems
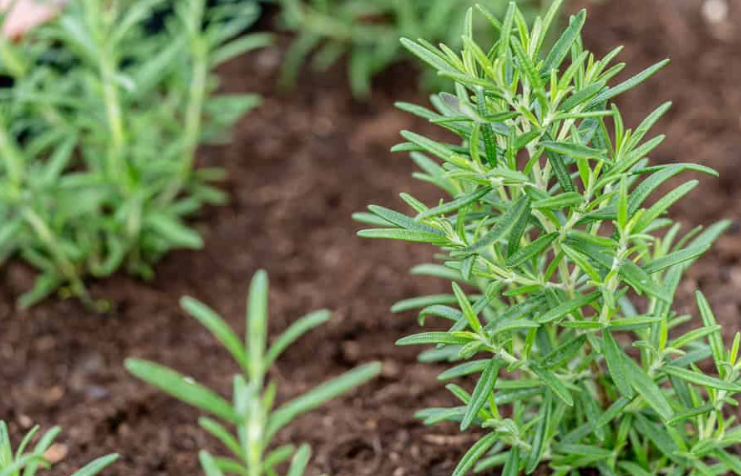
Not all stems are created equal when it comes to propagation. The best rosemary cuttings come from **fresh, green, vigorous stems** rather than older, woody ones. Here’s what to look for:
- 🌿 Green and firm: Avoid stems that are dark brown and woody.
- 📏 5–7 inches (12–18 cm) long: This length ensures enough nodes for roots to form.
- 🍃 Multiple leaf nodes: These are the points along the stem where roots will emerge.
Using clean pruning shears, cut just below a leaf node — that’s where the highest concentration of root‑forming hormones resides.
2️⃣ Prepare the Cutting for Planting
Once you’ve taken your cutting, remove the lower leaves from the bottom 1–2 inches so you have bare stem to insert into soil or water. This helps expose the nodes and prevents leaf rot when buried or submerged.
🌿 Two Proven Rosemary Propagation Methods
There are two common and reliable ways to root rosemary cuttings. Both work well — your choice depends on whether you want instant visibility of roots (water method) or immediate soil establishment.
🌱 Method A — Directly in Soil
Soil propagation gives your cuttings immediate stability where they will continue to grow. Follow these steps:
- Fill small pots with a light, well‑draining potting mix (add perlite or sand if needed).
- Create a small hole using your finger or a pencil.
- Dip the cut end in rooting hormone (optional but helpful).
- Insert the cutting about 1–2 inches into the soil.
- Firm the soil gently around the stem to secure it upright.
💧 Method B — Water Propagation (Then Transplant)
Water propagation lets you watch roots form and can feel very rewarding:
- Place cuttings in a glass of clean water, ensuring no leaves are submerged.
- Change the water every 2–3 days to keep it fresh.
- After about 10–14 days, you should see small roots forming.
- Once roots are 1–2 cm long, transplant the cutting into potting mix.
Both methods work well — soil gives immediate stability, while water allows you to monitor root progress.
💧 Watering & Aftercare for Rooting Success
After planting, care determines whether your cuttings thrive or fail. Here’s how to give them the best conditions for rooting:
- 💦 Watering: Keep the soil moist but never soggy. Rosemary hates “wet feet,” and overwatering leads to rot.
- ☀️ Light: Place cuttings in bright, indirect sunlight. Strong light encourages healthy growth without stressing them.
- 💨 Airflow: Good ventilation reduces the risk of mold and fungus.
- 🌡️ Temperature: Ideal range is 65–75°F (18–24°C). Avoid cold drafts and intense midday sun.
📈 What to Expect — Rooting Timeline & Growth Stages
Understanding the timeline helps you know what to expect and when to be patient versus when to troubleshoot:
| Stage | Time | What to Expect |
|---|---|---|
| Cutting taken | Day 0 | Fresh cuttings in soil or water |
| Roots start forming | 10–21 days | Visible roots in water or early soil signs |
| Strong root system | 4–6 weeks | Well‑developed roots ready for transplant |
| Ready to transplant | After solid new growth | Healthy foliage and firm roots |
🌟 Pro Tips for Better Rooting Success
Here are extra expert tips to improve your success rate and avoid common pitfalls:
- ✔ Use **vigorous young growth** rather than old, woody stems.
- ✔ Clean tools before cutting to prevent disease transfer.
- ✔ Avoid overcrowding — cuttings need space for roots.
- ✔ Keep consistent moisture, but let the topsoil dry slightly between waterings.
- ✔ Be patient — rosemary is slower to root compared to herbs like basil or mint.
❌ Common Mistakes to Avoid
- 🚫 Using old, woody stems — they root poorly.
- 🚫 Planting too deep — only the bottom nodes need soil contact.
- 🚫 Overwatering — leads to rot and fungal diseases.
- 🚫 Poor drainage — always use a light, airy mix.
- 🚫 Crowding cuttings — reduces airflow and increases disease risk.
❓ Frequently Asked Questions (FAQs)
1. Can I use hardwood cuttings?
No — soft to semi‑hardwood cuttings root much more reliably than old, woody ones.
2. Do I need rooting hormone?
Rooting hormone is optional but can increase success and speed up root development.
3. Should I mist the cuttings?
A light mist once a day can help maintain humidity without making soil soggy.
4. Can rosemary cuttings root indoors in winter?
Yes — just keep them warm and in bright light (a sunny window or grow light).
5. How long until I can harvest from new plants?
Usually 3–4 months after transplanting into larger pots or garden beds.
6. Do they need fertilizer while rooting?
No — wait until they are well established before feeding lightly.
7. What soil mix is best for rosemary cuttings?
A mix with perlite or sand for excellent drainage works best.
8. How often should I water?
Water when the top inch of soil feels dry — usually every few days in warm weather.
9. Can I root more than one cutting per pot?
Yes — if each cutting has enough space so roots don’t tangle.
10. What if my cuttings wilt?
Wilting often means too much water, poor drainage, or inadequate light. Adjust conditions and be patient.
🌿 Final Thoughts — Grow Rosemary with Confidence!
Propagating rosemary from cuttings is one of the most fulfilling gardening projects because it’s easy, inexpensive, and yields beautiful plants that reward you for months and years. Once you master these steps, you’ll be able to multiply your rosemary plants with confidence and pride.
Remember: choose healthy stems, give them the right environment, avoid overwatering, and be patient. With consistent care and attention, you’ll soon have a thriving patch of rosemary ready to enhance your kitchen, garden, and gifts to friends.
Happy gardening! 🌱