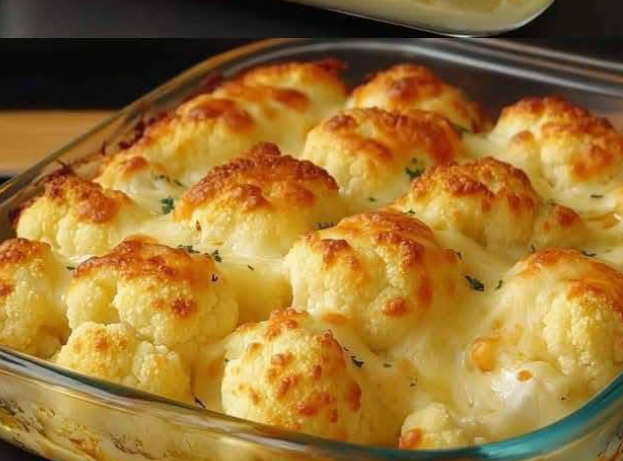
Baked Cauliflower Cheese: The Ultimate Comforting Cheesy Bake
When the weather turns chilly or you’re craving a warm, comforting dish, nothing beats the creamy satisfaction of **Baked Cauliflower Cheese**. Tender cauliflower florets bathed in a rich, cheesy sauce and baked until golden — it’s the kind of side dish (or even main) that feels like a hug in a bowl. Not only is it a fantastic vegetarian option, but it also pairs beautifully with roasted meats, grilled fish, or a crisp salad.
In this article, you’ll find a detailed recipe, chef-approved tips, nutrition and health insights, safety pointers, plus internal links to related recipes on FreshTonerHungar. Let’s dive in!
—
Why This Baked Cauliflower Cheese Works (and What Makes It Special)
This dish is essentially a variation on the British classic “cauliflower cheese,” where cauliflower is coated in a béchamel-style cheese sauce and baked until bubbling and golden. :contentReference[oaicite:0]{index=0} What elevates it is attention to technique: blanching or par-boiling the florets just enough, making a silky cheese sauce without lumps, seasoning with nutmeg or mustard, and finishing under the grill for an irresistible crust.
Chef Gordon Ramsay might remind us that texture is just as important as flavor — the cauliflower should retain a slight bite (not turn mushy), while the sauce should cling and coat, not separate. Coupling that with golden browning gives you both mouthfeel and visual appeal.
Chef Ina Garten might suggest using a blend of cheeses (sharp cheddar + Gruyère or Parmesan) and finishing with a crunchy topping (breadcrumbs or panko) to contrast the creaminess. These small touches make a big difference.
—
Ingredients & Equipment
Ingredients (serves 4–6)
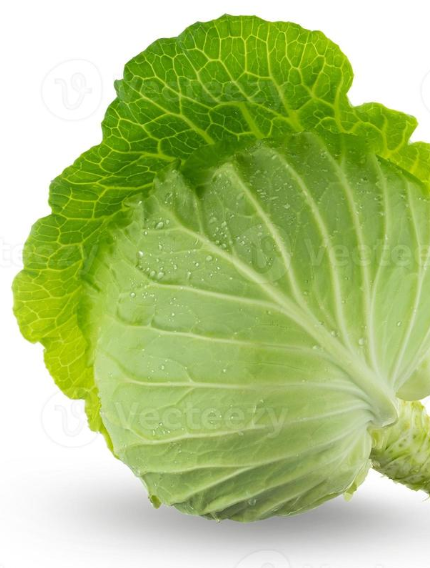
- 1 large head of cauliflower, trimmed and cut into florets
- 2 tablespoons butter (plus extra for greasing)
- 2 tablespoons all-purpose flour
- 2 cups (500 ml) milk, warmed
- 1 to 1½ cups (100–150 g) grated cheese (cheddar is classic; blend with Gruyère, Swiss, or Parmesan)
- A pinch of freshly grated nutmeg
- Salt and freshly ground black pepper, to taste
- Optional mustard (½ teaspoon Dijon or English mustard) for a subtle bite
- Optional topping: ½ cup breadcrumbs or panko, mixed with a little melted butter
Equipment
- Large pot for boiling or steaming
- Slotted spoon or strainer
- Saucepan for sauce
- Whisk
- Ovenproof baking dish (approx. 20×25 cm or similar)
- Grater for cheese
- Oven and grill/broiler function
- Optional: thermometer or timing tools
—
Step‑by‑Step Method
Step 1: Preheat & Prepare
Preheat your oven to **375 °F (190 °C)** (or about 180 °C fan). Grease your baking dish with butter or nonstick spray so the cheese sauce can’t glue itself to the sides.
Step 2: Blanch the Cauliflower
Bring a large pot of salted water to a boil. Add cauliflower florets and cook for **3 to 5 minutes** — just until they begin to soften but are still firm. You don’t want them fully cooked, since they’ll bake further. Drain well (use a colander or slotted spoon) and let them sit to evaporate excess moisture. You can also steam them lightly instead of boiling.
Step 3: Make the Cheese Sauce (Roux → Bechamel → Cheese)
1. In your saucepan, melt **2 tablespoons butter** over medium heat.
2. Stir in the **flour**, whisking constantly to make a paste (roux). Cook for about 1 minute, but don’t brown it.
3. Gradually whisk in warm milk a little at a time, ensuring no lumps. Continue whisking until the mixture thickens enough to coat the back of a spoon.
4. Remove from heat, then stir in **most** of the grated cheese (reserve some for topping).
5. Season with **salt, black pepper, nutmeg**, and, if using, mustard. Taste and adjust. The sauce should be creamy and smooth.
Step 4: Assemble the Dish
Arrange the cauliflower florets evenly in your baking dish. Pour the cheese sauce over them so everything is coated. Sprinkle the remaining cheese on top. If using a breadcrumb topping, scatter that over as well, pressing lightly so it adheres.
Step 5: Bake & Brown
Bake in the oven for **20–25 minutes**, until bubbling around the edges. Then, switch to the grill (broiler) mode for **2–3 minutes** to brown the top and crisp the crumbs or cheese layer. Watch carefully so it doesn’t burn.
Step 6: Rest & Serve
Remove from oven and let it rest 5 minutes before serving. This helps the sauce settle and reduces runniness. Garnish with chopped parsley or chives if desired.
—
Chef Tips, Variations & Flavor Boosters
- Cheese blends: Combine a sharper cheddar with a milder melting cheese (e.g. Gruyère, Emmental) for complexity.
- Mustard kick: Stir in ½ teaspoon Dijon or English mustard for subtle tang (classic in many traditional recipes).
- Nutmeg whisper: Just a pinch of freshly grated nutmeg adds classic warmth without overpowering.
- Crispy topping: Use panko breadcrumbs mixed with melted butter or a little spice (paprika, cayenne) for extra crunch.
- Garlic or shallots: Sauté finely minced shallot or garlic in the butter before making your roux for added depth.
- Alternate veg: Add par‑cooked broccoli, cauliflower stems, or even sliced leeks to bulk it up.
- Gluten-free option: Use a gluten-free flour or cornstarch slurry instead of roux flour.
- Vegan twist: Use plant‑based milk (soy, oat) and vegan cheeses, making sure to choose ones that melt well.
- Make ahead: You can assemble the dish (up to before baking) and refrigerate for a few hours; bake just before serving.
—
Nutrition, Health Benefits & Considerations
While this is a comfort dish, cauliflower is a nutritional powerhouse, and with mindful choices, this baked version can be quite wholesome. Below is an approximate nutrition table based on a moderate recipe — final values depend on cheese types, milk fat, and portion sizes.
| Nutrient | Per Serving (≈ 1/6 of dish) | Notes / Context |
|---|---|---|
| Calories | ~ 280–350 kcal | Higher with full‑fat milk and rich cheese |
| Protein | 10–15 g | From milk and cheese |
| Total Fat | 15–22 g | Depending on cheese and milk fat |
| Saturated Fat | 8–12 g | Watch portions if limiting saturated fat |
| Carbohydrates | 10–15 g | From milk, cauliflower, roux flour |
| Fiber | 3–5 g | From cauliflower |
| Calcium | 150–250 mg | Depends heavily on cheese & milk used |
| Sodium | ~ 300–500 mg (or more) | Cheese and added salt contribute |
Cauliflower’s Health Benefits
Cauliflower is a low-calorie cruciferous vegetable packed with vitamins, minerals, and beneficial plant compounds:
- High in **vitamin C** and K, supporting immune function and bone health. :contentReference[oaicite:1]{index=1}
- Good source of **fiber**, which supports digestion and gut health. :contentReference[oaicite:2]{index=2}
- Contains **antioxidants** and phytochemicals like sulforaphane, which may help reduce inflammation and oxidative stress. :contentReference[oaicite:3]{index=3}
- A low‑calorie, nutrient-dense vegetable — ideal in balanced diets. :contentReference[oaicite:4]{index=4}
However, cheese and milk add saturated fat, sodium, and calories, so balance and moderation matter. If you want a lighter version, use low-fat milk, modest cheese, or portion carefully.
—
Safety, Storage & Serving Tips
- Avoid separation: Don’t overheat the cheese sauce after adding cheese; gentle, moderate heat helps keep it smooth.
- Even cooking: Par-boiling the cauliflower ensures it and the sauce bake in sync, avoiding undercooked bits or overcooked mush.
- Temperature control: Use the oven’s middle rack, and rotate if your oven has hot spots.
- Resting is helpful: Let the dish sit a few minutes after baking — the sauce thickens and flavors meld.
- Storage: Cool to near room temperature, then cover and refrigerate up to 3–4 days.
- Reheat carefully: Warm in oven at ~325 °F (160 °C) until bubbling again. Microwave works too, but heat gradually to avoid splitting the sauce.
- Freezing: This dish can be frozen, though texture of cauliflower and sauce may soften somewhat. Best to freeze before browning. Reheat from frozen in a covered dish, finishing under grill for crust.
—
Serving Suggestions & Pairings
This recipe is versatile: serve it as a side or even a vegetarian main. Here are ideas:
- Serve alongside roast chicken, turkey, or pork.
- Pair with grilled fish or baked salmon for contrast.
- Make a “veg-forward” plate by adding sautéed greens or steamed broccoli.
- Top with breadcrumbs and extra cheese for a crispy crust — ideal for Sunday dinners or holiday meals.
- Turn leftovers into a creamy mash or use as a topping for baked potatoes or pasta.
- For more comforting sides, explore our Side Dish Recipes on FreshTonerHungar.
—
10 FAQs About Baked Cauliflower Cheese
1. Can I skip the par‑boiling step and bake raw cauliflower?
You can, but you risk uneven cooking: the florets may remain too firm by the time the sauce is bubbling. Par-boiling ensures tenderness and better absorption of sauce.
2. Can I use different milk (e.g. almond, oat, ICBM)?
Yes — but results vary. Use unsweetened, plain plant milks. Because they often lack protein/fat, the sauce will be thinner; you may need to thicken with extra flour or use a vegan “cheese” that melts well.
3. What cheeses are best?
A sharp cheddar is classic. You can mix with Gruyère, Emmental, Swiss, or Parmesan. Avoid pre-shredded cheeses with anti-caking agents (they sometimes melt poorly).
4. Why is my sauce grainy or separated?
Likely overheated after cheese addition or not whisked well. Always add cheese off-heat or on very gentle heat, stirring continuously. If separation happens, a bit of warm milk may help re-emulsify.
5. How do I make it lighter?
Use low-fat or skim milk, reduce cheese, use more cauliflower (bulk it up), or incorporate veggies. You could also replace part of the cheese with creamy ricotta or cottage cheese.
6. Can I make this ahead and reheat later?
Yes. Assemble it fully (without browning) and refrigerate up to several hours. When ready, bake until hot and golden. For best top crisping, brown under the broiler just before serving.
7. Is this gluten-free?
Not in the basic form (because of flour). To make it gluten-free, substitute a gluten-free all-purpose flour or cornstarch slurry (mix 1 tablespoon cornstarch + a bit of milk) to thicken.
8. Can I add breadcrumbs or nuts on top?
Absolutely. Use panko or fine breadcrumbs mixed with melted butter (or olive oil) for crunch. Chopped toasted nuts (almonds, walnuts, hazelnuts) also add texture and flavor.
9. How do I store leftovers and reheat them?
Cover and refrigerate for up to 3–4 days. Reheat in oven at ~325 °F (160 °C) until warm; finish under the broiler for 1–2 minutes to refresh the top. Microwaving works, but may soften toppings.
10. Can I double or halve the recipe?
Yes — scale ingredients proportionally. A deeper or larger baking dish may change bake time slightly (add 5–10 minutes if deeper). Always check the sauce is bubbling and the top is browned.
—
Troubleshooting & Pro Tips
- If the top browns too fast, cover loosely with foil mid‑bake and uncover near the end.
- For better browning, place the dish a little higher in the oven or use the grill function at the end.
- If your sauce is too thick, whisk in a little warm milk. If too thin, return to low heat and whisk in a small bit of extra flour or cornstarch (pre-dissolved in milk).
- Ensure cauliflower is drained really well — excess water dilutes the sauce.
- Use an oven thermometer to ensure your oven is at the intended temperature, especially if your oven tends to run hot or cool.
—
Conclusion
Baked Cauliflower Cheese is one of those dishes that feels luxurious, satisfying, and comforting, yet is relatively simple to prepare. With the right technique — par-boiling, silky cheese sauce, seasoning, and a golden top — you can deliver something that rivals cheesy gratins or mac & cheese, but with a vegetable-forward twist.
Whether you serve it for a cozy family meal, holiday dinner, or vegetarian main, this recipe can be adapted, lightened, or dressed up. Don’t forget to explore more vegetable-forward comfort recipes in our Vegetarian Recipes section on FreshTonerHungar.
Wishing you many golden, bubbly servings ahead! 🥦🧀