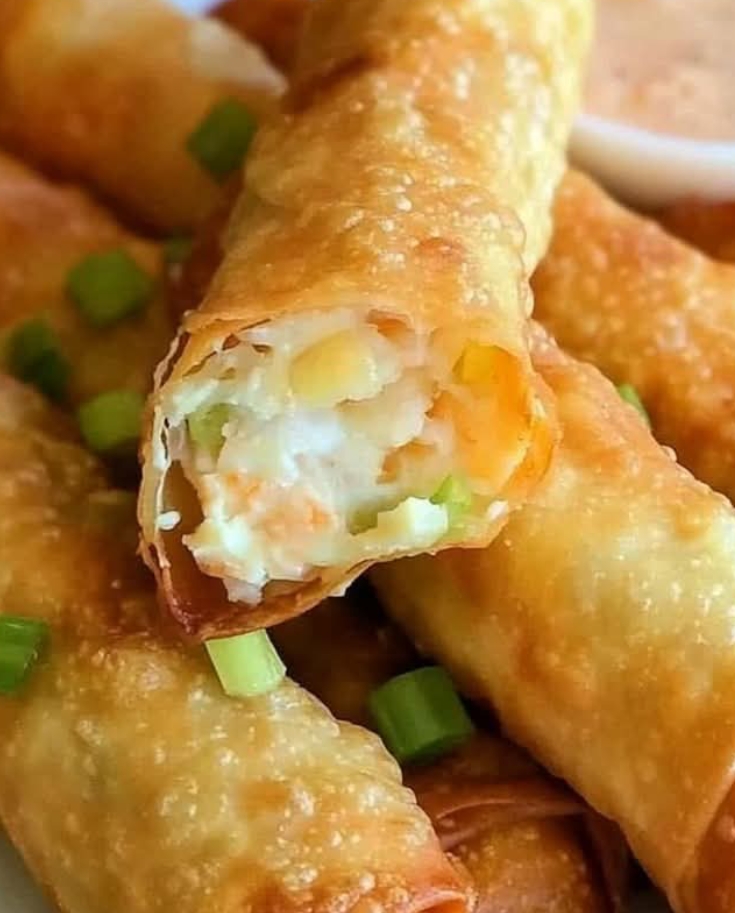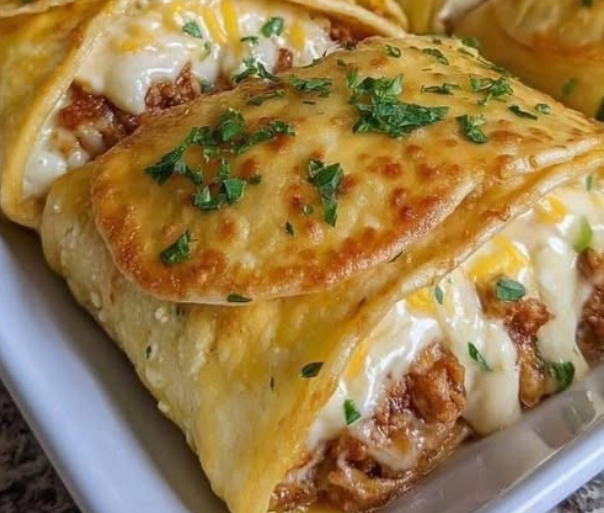
Loaded Cheesy Pocket Tacos
These **Loaded Cheesy Pocket Tacos** combine the fun of a taco with the comfort of a grilled pocket—you get crispy tortillas filled with seasoned meat, melted cheeses, beans, corn, and flavor boosters. They’re perfect for busy weeknights, parties, or anytime you want something satisfying and customizable. This guide gives you everything: a complete ingredient breakdown, step-by-step method, chef tips, variations, nutrition, storage & safety, and FAQs.
Why This Recipe Works
Traditional tacos require tortillas, filling, assembly, and sometimes extra cleanup. Pocket tacos simplify that: everything is enclosed, making them easy to eat, portable, and less messy. The combination of seasoned meat, cheese, beans, and corn gives you protein, texture contrast, and flavor complexity in one bite. The technique of sealing and grilling gives you that satisfying crisp exterior with molten filling inside.
What You’ll Learn in This Guide
- A full ingredient list (U.S. + metric) with roles explained
- Step-by-step instructions, with tips and timing
- Chef insights & pitfalls to watch out for
- Variations & customization ideas
- Nutrition estimates and health notes
- Storage, reheating & food safety advice
- Troubleshooting & common mistakes
- 10 FAQs to cover your likely questions
- Serving & presentation suggestions
Ingredients & Purpose
Base Ingredients (U.S. / Imperial)
- 1 lb ground beef (or turkey, chicken, or plant-based crumbles)
- 1 packet taco seasoning (approx. 2 tbsp)
- ½ cup water
- 1 cup shredded cheddar cheese
- 1 cup shredded Monterey Jack or pepper Jack cheese
- ½ cup canned black beans, rinsed & drained
- ½ cup corn kernels (canned, frozen/thawed, or roasted)
- ¼ cup finely diced red onion
- 2 tbsp chopped fresh cilantro (optional)
- 4 large burrito-size flour tortillas (10-inch)
- 2 tbsp softened butter or olive oil (for brushing)
- Optional garnishes: sour cream, salsa, guacamole, shredded lettuce, pico de gallo, pickled jalapeños
Metric / Approximate Conversions
- Ground beef: ~450 g
- Taco seasoning: ~15–20 g (depending on brand)
- Water: ~120 mL
- Cheddar: ~110 g
- Monterey Jack / Pepper Jack: ~110 g
- Black beans: ~120 mL (½ cup)
- Corn: ~120 mL (½ cup)
- Onion: ~40 g (¼ cup diced)
- Cilantro: ~8 g (2 tbsp chopped)
- Tortillas: 4 × 25‑26 cm / 10 inch flour tortillas
- Butter / oil: ~28 g or mL
Ingredient Roles & Notes
- Ground meat: Provides protein and savory base; the fat and browning flavor are key.
- Taco seasoning + water: Seasoning flavors the meat; water helps dissolve and distribute it, then reduces for a thick coating.
- Cheeses: The two types give melt, flavor, and stretch; mixing a milder and spicier cheese gives complexity.
- Beans & corn: Add texture, fiber, and volume; help stretch the filling.
- Red onion: Adds sharpness, bite, and contrast. It also balances richness.
- Cilantro (optional): Bright, fresh herb to cut richness.
- Tortillas: Serve as the vessel/enclosure; using large tortillas helps contain filling.
- Butter or oil (for brushing): Helps crisp and brown the exterior of the pocket tacos.
- Garnishes: Let each eater customize with cream, salsa, or pickled heat.
Step‑by‑Step Instructions
Step 1: Make the Filling
- In a skillet over medium-high heat, add the ground meat. Break it up with a spoon and cook until no longer pink. Drain any excess grease if needed.
- Add taco seasoning and ½ cup water. Stir to combine, then reduce heat to simmer. Cook 3–5 minutes until most of the water evaporates and the meat is coated in a thick sauce.
- Remove from heat and allow the meat mixture to cool slightly (this helps prevent the tortillas from becoming soggy or tearing when assembling).
- In a large bowl, combine the cooled meat, shredded cheeses, black beans, corn, diced red onion, and cilantro (if using). Mix well. The residual heat from the meat will start melting the cheese—this is fine (and helpful). This is your filling.
Step 2: Assemble the Pocket Tacos
- Lay one tortilla flat on a clean surface.
- Spoon about **1 heaping cup** of the filling onto one half of the tortilla, leaving a ~1-inch border around the edge for sealing.
- Fold the other half of the tortilla over the filling, making a half-moon shape.
- Seal the edge using one of these methods:
- **Fork Press:** Press firmly all around the curved edge with fork tines to crimp it.
- **Water Brush:** Lightly moisten the edge of the tortilla with a little water (using your finger or brush), then press the edges together to help them stick.
Step 3: Cook to Golden Perfection
- Heat a large skillet or griddle over medium heat.
- Brush the outside of one pocket taco lightly with softened butter or olive oil.
- Place it butter-side down in the hot skillet. Cook 3–4 minutes, until the bottom is golden brown and crispy.
- While the first side cooks, brush the top side with more butter or oil.
- Carefully flip the pocket taco, and cook the other side for another 3–4 minutes, until golden brown and the cheese inside is fully melted and gooey.
- Remove from the skillet and set aside. Repeat with the remaining pocket tacos.
Step 4: Rest & Serve
Allow the cooked pocket tacos to rest for a minute or two before cutting—they will be piping hot inside. Then slice them in half (or quarters) and serve immediately with your favorite garnishes: sour cream, salsa, guacamole, shredded lettuce, pico de gallo, pickled jalapeños, etc.
Chef Tips & Best Practices
- Don’t overfill: Overfilling is a common cause of pockets bursting open. Be generous, but leave enough border for sealing.
- Seal well: Use fork-press or water-press method to ensure a good edge seal.
- Cool filling slightly: Hot filling right from the pan can make tortillas soggy or tear. Let it rest just a bit before assembling.
- Use moderate heat: Too high heat burns the tortilla before the interior heats; too low won’t make it crisp. Medium is key.
- Brush evenly: Apply butter or oil lightly and evenly—especially edges—to aid crisping and browning.
- Watch flipping: Use a wide spatula to carefully flip so the pockets don’t spill.
- Don’t overcrowd the skillet: Leave space between pockets so steam escapes and crisping works properly.
- Let rest before slicing: This helps the melted cheese set slightly so it doesn’t run too much when cut.
Variations & Customizations
Air Fryer Version
For a crispier, lower-oil version, preheat your air fryer to 375 °F (190 °C). Brush the pocket tacos lightly with oil, then air fry for ~6–8 minutes, flipping halfway, until golden and crispy. This method reduces grease and gives a light crunch.
Vegetarian / Meatless Version
Use plant-based crumbles or sautéed mushrooms + beans instead of ground meat. You can also add extra veggies like bell peppers, zucchini, or spinach. Many taco-focused recipes do this to make “veggie taco pockets.”
Rice or Grain Booster
Mix in cooked Spanish rice or cilantro-lime rice (½ cup) to make the filling heartier. This turns it into more of a full meal pocket.
Spicy Version
Add diced jalapeños or serrano peppers, hot sauce, or use pepper jack cheese instead of Monterey Jack to give your tacos extra heat.
Cheese Mix Variations
Try combining different cheeses: queso blanco, Colby Jack, Oaxaca, or smoked cheddar to vary flavor and meltiness.
Sauce InsertsIntroduce a small spoonful of salsa, queso sauce, or enchilada sauce inside the filling before folding for a saucy interior surprise.
Nutrition & Health Notes
Below is an approximate nutrition estimate per large pocket taco (makes 4). Use your specific ingredients for better accuracy:
| Nutrient | Estimate per Pocket |
|---|---|
| Calories | ~ 450–600 kcal |
| Protein | ~ 25–35 g |
| Total Fat | ~ 20–30 g |
| Saturated Fat | ~ 8–12 g |
| Carbohydrates | ~ 35–45 g |
| Fiber | ~ 4–6 g (from beans, corn, tortilla) |
| Sugars | ~ 2–5 g |
| Sodium | Moderate to high (depending on taco seasoning, cheese, tortilla) |
Health Tips & Modifications:
- Choose lean ground meat (e.g. 90% lean) to reduce fat content.
- Use reduced-fat cheeses, or reduce the total cheese volume slightly.
- Use whole‑wheat or high-fiber tortillas to up fiber and lower glycemic load.
- Limit salt in other components (beans, seasoning) if your taco seasoning is high sodium.
- Add more vegetables (bell pepper, spinach, zucchini) to boost volume and micronutrients without adding many calories.
Storage, Reheating & Food Safety
Storage
- Allow the pockets to cool to near room temperature (but not longer than ~2 hours out) before storing.
- Store in an airtight container in the refrigerator. Use within **2–3 days** for optimal texture and flavor.
- Do not freeze filled & cooked pockets with cheese inside—they may become soggy or separate. You can freeze the filling separately and assemble fresh before cooking.
Reheating
Food Safety Tips
Troubleshooting & Common Mistakes
- Pockets burst open: Overfilling or not sealing edges properly are common causes.
- Cheese not melted: Either filling was too cool or heat too low. Ensure interior is hot before folding and cook sufficiently.
- Tortilla too soft / soggy: Using wet filling or cooking too slowly can make them limp. Use moderate heat and crisp edges properly.
- Uneven browning: Flip carefully and brush both sides with butter/oil to encourage even crisping.
- Dry interior: If meat mixture is too dry, it may pull moisture from other components; adjust moisture (water, stock, or a bit of tomato sauce) slightly.
- Flavor too bland: Use bold cheese, quality taco seasoning, a splash of lime juice or hot sauce in filling for brightness.
10 FAQs You Might Have
1. Can I use corn tortillas or smaller tortillas instead?
You can, but corn tortillas are less flexible and may crack when folded. You might need to stack two or warm them well. Smaller tortillas may need smaller servings or less filling.
2. Can I prepare the filling ahead of time?
Yes — you can cook the meat filling in advance, refrigerate, then assemble and cook the pocket tacos later. Just reheat filling lightly before filling, so it melts cheese better.
3. What if my tortilla tears while folding?
Use slightly thicker tortillas, warm them briefly in microwave (10 seconds) to make them pliable, and avoid overstuffing. Also, pressing edges well helps keep them together.
4. Can I bake them instead of skillet-frying?
Yes—assemble and place on a baking sheet, brush with oil or butter, and bake in a preheated oven (e.g. 375 °F / 190 °C) for ~10–12 minutes per side (or 8–10 and then flip) until crisp and cheese is melted.
5. Is there a gluten-free version?
Yes—use gluten-free flour tortillas and ensure your taco seasoning is gluten-free. Beans, meat, cheese, and other fillings are typically naturally gluten-free.
6. Can I make this dairy-free?
Substitute plant-based cheese for dairy cheese, and use vegan butter or olive oil. Many plant‑based taco recipes swap those without losing too much flavor.
7. How to prevent cheese from leaking out?
Use moderate amounts of cheese, press edges firmly, and cook gently so cheese melts without forcing filling out. A little cooling/rest helps the cheese set slightly.
8. Can I make mini / appetizer versions?
Yes—use smaller tortillas, smaller portions of filling, and reduce cooking time accordingly. They make excellent party appetizers.
9. What side dishes pair well?
Serve with Mexican rice, refried beans, corn salad, guacamole, chips & salsa, or a crisp green salad to balance richness.
10. Can I freeze assembled but uncooked pockets?
Yes—assemble, wrap tightly in foil or plastic wrap, and freeze. When ready to cook, thaw and cook as directed. The texture is generally better if cooked fresh, but this method is acceptable for convenience.
Serving & Presentation Ideas
- Slice each pocket in half to show the colorful, cheesy filling inside.
- Arrange on a platter with small bowls of garnishes (sour cream, guacamole, salsa, pickled jalapeños).
- Garnish with fresh cilantro, chopped green onions, or a drizzle of crema.
- Serve with a wedge of lime on the side for brightness.
- Offer a side of tortilla chips or a fresh salad to round out the plate.
- For parties, serve pockets on a tray with toothpick flags or mini bowls of garnish for dipping.
Conclusion & Final Thoughts
These **Loaded Cheesy Pocket Tacos** are fun, flavorful, and fully customizable. From meat choices to cheese blends, veggie add-ins, and heat levels, you can make them your own. The key is balancing filling moisture, sealing well, and cooking at the right temperature for crispness and melt. Use the tips, variations, and troubleshooting above to adapt to your kitchen and preferences—and enjoy the delight of biting into a warm, cheesy, flavor-packed taco pocket!
If you want, I can format this into a printable recipe card, or send a version with only metric units, or even a “kitchen cheat card” you can tape near your stove. Want me to prepare that now?