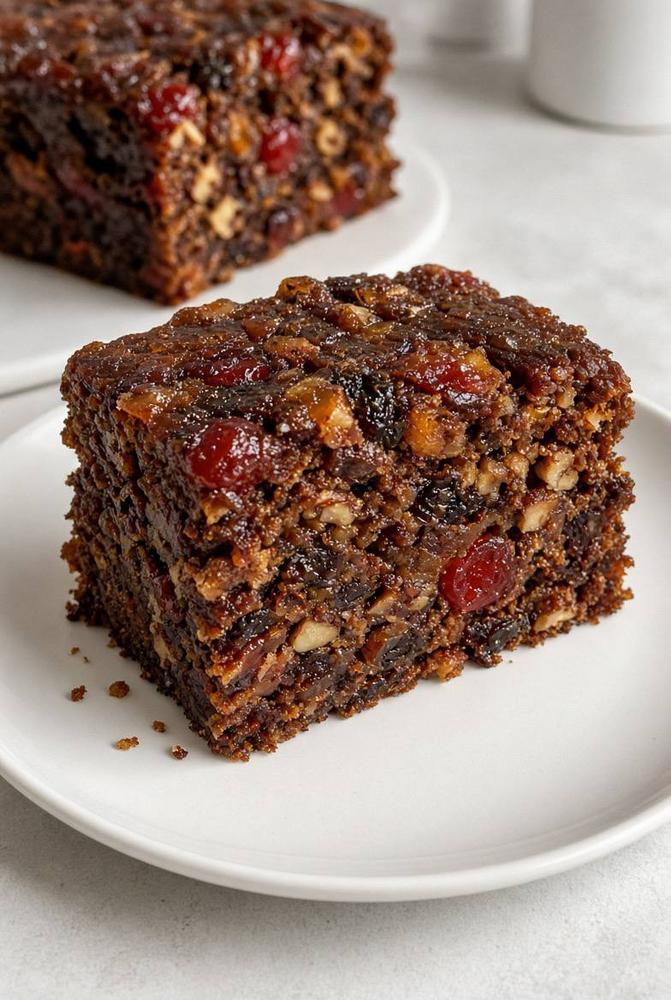
Instructions
- Begin by preparing your dried fruits and nuts. In a large bowl, combine the golden raisins, dark raisins, dried cranberries/cherries, candied orange peel, candied lemon peel, dried figs, and chopped dates. Pour the cooled strong black tea (or orange juice, or alcohol of your choice) over the fruit mixture. Stir well to ensure all fruits are moistened. Cover the bowl and let it soak for at least 4 hours, or preferably overnight, at room temperature. This step is crucial for plumping the fruits and infusing them with moisture and flavor.
- Once the fruits have soaked, preheat your oven to 300°F (150°C). Grease and flour a 9×5 inch loaf pan or an 8×8 inch square pan. For easy removal, you can also line the pan with parchment paper, leaving an overhang on the longer sides.
- In a medium bowl, whisk together the 1 1/2 cups of all-purpose flour, baking powder, baking soda, cinnamon, nutmeg, cloves, ginger, and salt. Set aside.
- Drain any excess liquid from the soaked fruit (if there’s a lot, otherwise just proceed). Toss the soaked fruit and chopped nuts with the remaining 2 tablespoons of flour. This light dusting helps prevent the fruit and nuts from sinking to the bottom of the cake during baking.
- In a large bowl, using an electric mixer, cream together the softened unsalted butter and dark brown sugar on medium speed until light and fluffy, about 2-3 minutes.
- Beat in the molasses until well combined.
- Add the eggs one at a time, beating well after each addition until fully incorporated. Scrape down the sides of the bowl as needed. Stir in the vanilla extract.
- Gradually add the dry ingredient mixture to the wet ingredients, alternating with the milk. Begin and end with the dry ingredients. Mix on low speed until just combined, being careful not to overmix. A few streaks of flour are acceptable.
- Gently fold in the floured fruit and nut mixture into the batter using a spatula. Ensure the fruits and nuts are evenly distributed throughout the thick batter.
- Spoon the batter into the prepared loaf pan, spreading it evenly and smoothing the top.
- Bake for 2 to 2.5 hours, or until a wooden skewer inserted into the center of the cake comes out clean (or with a few moist crumbs attached, but no wet batter). Due to the density of the cake, it’s important to bake it low and slow to ensure it cooks through without drying out or burning the edges. If the top starts to brown too quickly, you can loosely tent it with aluminum foil.
- Once baked, remove the cake from the oven and let it cool in the pan on a wire rack for 15-20 minutes.
- Carefully invert the cake onto the wire rack to cool completely. If you plan to “feed” the cake, you can do so once it’s completely cool.
- To “feed” the cake: Using a skewer, poke several holes all over the top and sides of the cooled cake. Drizzle 1/4 cup of your chosen alcohol (brandy or rum) or orange juice evenly over the cake. This step enhances moisture and flavor over time. Wrap the cake tightly in plastic wrap, then again in aluminum foil. Store in an airtight container in a cool, dark place. For best results, “feed” the cake weekly for 2-4 weeks, or until ready to serve.
Cooking Tips and Variations
To achieve the ultimate moist fruit cake, the soaking of your dried fruit is non-negotiable. Don’t skip it! Soaking plumps the fruits, preventing them from absorbing moisture from your cake batter during baking, which is a common cause of dry fruit cake. While tea or orange juice work wonderfully, using a good quality brandy, rum, or even a spiced whiskey will add an incredible depth of flavor that develops beautifully as the cake ages. For an extra boost of flavor and moisture, you can replace a portion of the milk with apple sauce or pureed prunes in the batter.
When it comes to fruit and nut variations, the possibilities are endless! Feel free to customize this recipe to your liking. Instead of the specified fruits, you could use glacé cherries, dried apricots (chopped), golden raisins, or even chopped dried pineapple. For nuts, almonds, walnuts, pecans, and even hazelnuts work well. Just ensure the total quantity of fruit and nuts remains similar to maintain the cake’s structure. For a citrusy twist, add the zest of one orange or lemon to the batter. If you prefer a lighter-colored cake, you can omit the molasses and use all brown sugar, though the molasses contributes significantly to the characteristic dark color and deep flavor.
Achieving maximum moisture and flavor also hinges on proper baking and storage. Bake your fruit cake at a lower temperature for a longer time. This allows the dense cake to cook through evenly without drying out the edges. Always test for doneness with a skewer; it should come out clean or with just a few moist crumbs. Overbaking is the enemy of moisture! Once cooled, wrapping your cake tightly is paramount. Use multiple layers of plastic wrap and then foil, or store it in an airtight container. This prevents air exposure, which dries out the cake. For an even more profound flavor, allow your fruit cake to “age” for at least a week, or even up to a month, before slicing. The flavors meld and deepen beautifully over time, especially if you “feed” it with alcohol or juice. Just remember to re-wrap it tightly after each feeding.
Troubleshooting common fruit cake issues is easy once you know the tricks. If your fruit cake turns out dry, it’s likely due to overbaking or not soaking the fruit sufficiently. Ensure your oven temperature is accurate and use a thermometer if unsure. If your fruit sinks to the bottom, it’s usually because the fruit wasn’t floured, or the batter was too thin. This recipe uses a thick batter and calls for flouring the fruit to prevent sinking. If you find your cake is still too moist in the center but done on the outside, it might need a longer baking time at a slightly lower temperature, or your pan size might be too small for the amount of batter. Always let the cake cool completely before slicing to prevent crumbling and allow the structure to set.
Storage and Reheating
This Moist Fruit Cake is a true champion when it comes to storage, often improving with age. Once completely cooled, the best way to store it is to wrap it tightly in several layers of plastic wrap, followed by a layer of aluminum foil. This double wrapping prevents air from reaching the cake, which is key to maintaining its moisture and freshness. Place the wrapped cake in an airtight container to further protect it. Stored this way in a cool, dark pantry, it will last for 2-3 weeks, or even longer if “fed” regularly with alcohol. For extended storage, the fruit cake can be refrigerated for up to 2 months. If you plan to keep it for several months, such as making it well in advance for the holidays, it can be frozen for up to 6-12 months. To freeze, wrap it as described above, then place it in a heavy-duty freezer bag or container. Thaw frozen fruit cake overnight in the refrigerator before unwrapping and serving.
Reheating fruit cake is generally not necessary, as it is traditionally served at room temperature. However, if you prefer a warm slice, you can gently heat individual portions. Place a slice on a microwave-safe plate and microwave for 10-15 seconds, or until just warmed through. Be careful not to overheat, as this can dry out the cake. Alternatively, you can warm a slice in a toaster oven or conventional oven preheated to 250°F (120°C) for about 5-10 minutes. A warm slice of fruit cake is particularly delightful when served with a dollop of brandy butter or a scoop of vanilla bean ice cream, allowing the heat to release the cake’s aromatic spices and rich fruit flavors.
Frequently Asked Questions
Can I make this fruit cake without alcohol?
Absolutely! While alcohol is traditionally used for soaking fruit and “feeding” the cake for flavor development and preservation, you can easily substitute it. For soaking the fruit, strong brewed black tea, orange juice, or apple juice work wonderfully to plump the fruits and add moisture. For “feeding” the cake, simply use additional orange juice or a sugar syrup (equal parts sugar and water simmered until dissolved and cooled) to keep it moist and flavorful. The cake will still be incredibly delicious and moist.
Why did my fruit sink to the bottom of the cake?
Fruit sinking to the bottom is a common issue, but easily preventable! It usually happens for two main reasons: the fruit wasn’t properly floured, or the cake batter was too thin. This recipe combats this by calling for a generous dusting of flour on the soaked fruit and nuts. The flour creates a barrier that helps the fruit cling to the batter. Also, ensure your batter is thick enough to suspend the heavy fruit. If your batter seems too thin, you can add a tablespoon or two more flour to thicken it slightly before folding in the fruit.
How far in advance can I make this fruit cake?
One of the best qualities of a good fruit cake is that it actually improves with age! You can confidently make this fruit cake 2-4 weeks in advance of when you plan to serve it. This allows the flavors to meld and deepen, especially if you opt to “feed” it with alcohol or juice regularly. For even longer storage, you can bake it up to 2-3 months in advance and store it in the refrigerator, or freeze it for up to 6-12 months. Just ensure it’s wrapped very tightly to prevent it from drying out.