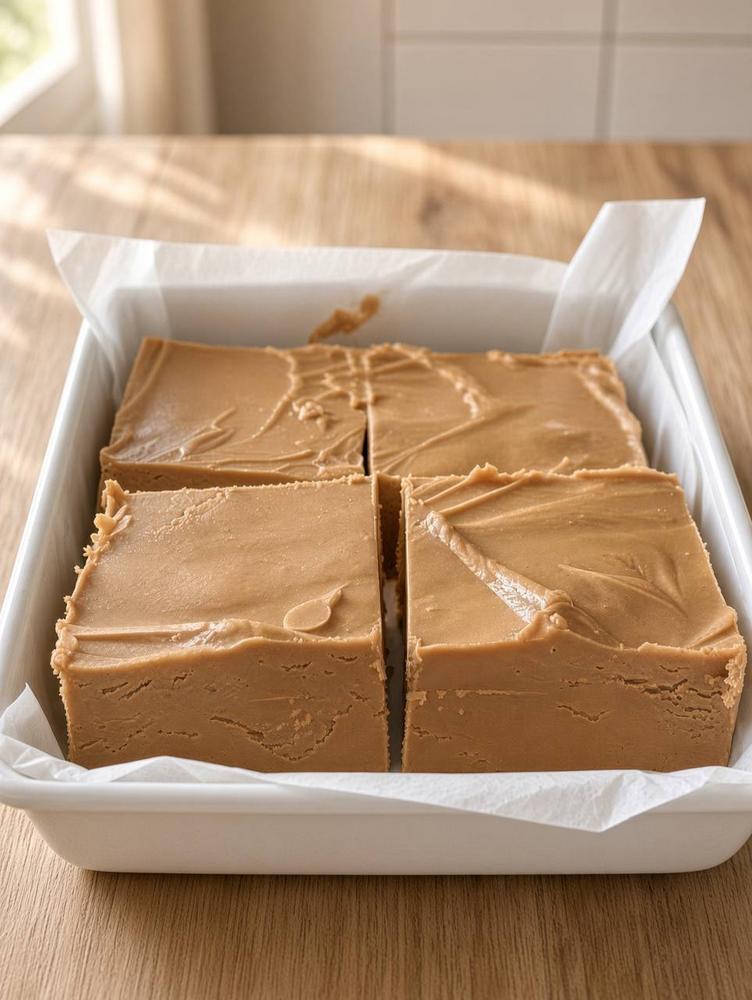
Instructions
- Line an 8×8 inch square baking pan with parchment paper, leaving an overhang on all sides. This will make it much easier to lift the fudge out of the pan once it’s set.
- In a large microwave-safe bowl, combine the sweetened condensed milk and creamy peanut butter.
- Heat the mixture in the microwave on high for 60 seconds.
- Remove from the microwave and stir well with a sturdy spatula or wooden spoon until the mixture is completely smooth and well combined. The mixture should be thick and glossy. If there are any streaks of unmixed ingredients, return it to the microwave for another 30 seconds and stir again until uniform.
- Pour the peanut butter fudge mixture into the prepared 8×8 inch pan.
- Using the back of your spatula or a spoon, spread the fudge evenly into the pan, making sure the top is as smooth as possible.
- Place the pan in the refrigerator and chill for at least 2-4 hours, or until the fudge is firm and completely set. For best results and easiest cutting, chilling overnight is ideal.
- Once the fudge is firm, use the parchment paper overhang to lift the entire block of fudge out of the pan and place it on a cutting board.
- Using a sharp knife, cut the fudge into 1-inch or 1.5-inch squares. For cleaner cuts, you can run your knife under hot water and wipe it clean between each cut.
- Serve and enjoy your incredibly easy and delicious 2-ingredient peanut butter fudge!
Cooking Tips and Variations
Achieving perfect fudge every time is simple with a few key tips and tricks. For the best texture, always opt for full-fat sweetened condensed milk; the fat content contributes to the creamy mouthfeel. When it comes to peanut butter, creamy varieties are highly recommended for the smoothest possible fudge. If you prefer a bit of crunch, you can certainly use crunchy peanut butter, but be aware that it will change the overall texture of the fudge. If using natural peanut butter, ensure it’s well-stirred to reincorporate any separated oil before mixing. If your peanut butter is very stiff, a quick 15-second microwave before combining with the condensed milk can help it blend more easily.
For an extra boost of flavor, consider adding a tiny pinch of sea salt to the mixture before chilling. This helps to balance the sweetness and enhance the rich peanut butter taste. A teaspoon of pure vanilla extract can also add a lovely depth of flavor. If you’re feeling adventurous, this recipe is a fantastic canvas for various mix-ins. Stir in mini chocolate chips, chopped roasted peanuts, or even a sprinkle of your favorite sprinkles before chilling. For a decorative touch, once the fudge is spread in the pan, you can drizzle melted chocolate or white chocolate over the top and swirl it with a toothpick before chilling.
When cutting the fudge, using a warm, sharp knife will yield the cleanest edges. Simply run your knife under hot water for a few seconds, wipe it dry, and then make your cuts. Repeat this process for each cut to prevent sticking and crumbling. Don’t rush the chilling process; allowing the fudge ample time to set is crucial for it to hold its shape and achieve that perfect firm-yet-creamy consistency.
Storage and Reheating
Storing your 2-ingredient peanut butter fudge properly will ensure it stays fresh and delicious for as long as possible. Once cut into squares, place the fudge in an airtight container. You can layer the fudge pieces with small sheets of parchment paper between layers to prevent them from sticking together. This fudge can be stored at room temperature for up to one week. If your kitchen is particularly warm, or if you prefer a firmer fudge, storing it in the refrigerator is also a great option. Refrigerated fudge will last for up to two weeks.
For longer storage, peanut butter fudge freezes beautifully. Wrap individual pieces tightly in plastic wrap, then place them in a freezer-safe airtight container or freezer bag. Frozen fudge can last for up to 2-3 months. When you’re ready to enjoy it, simply remove the desired amount from the freezer and let it thaw at room temperature for about 15-30 minutes, or until it reaches your preferred texture. There is no need to “reheat” this fudge; it’s best enjoyed at room temperature or slightly chilled.
Frequently Asked Questions
Why didn’t my fudge set properly?
The most common reasons for fudge not setting are either not enough chilling time or using a type of peanut butter that doesn’t have the right consistency. Ensure you’ve chilled the fudge for at least 4 hours, or preferably overnight. Also, natural peanut butters (especially those that are very oily or liquidy) can sometimes make the fudge softer. For best results, use a standard creamy peanut butter like Jif or Skippy, and full-fat sweetened condensed milk.
Can I use powdered sugar instead of sweetened condensed milk?
While some 2-ingredient fudge recipes use powdered sugar, this particular recipe is designed for sweetened condensed milk, which acts as both a sweetener and a binding agent, contributing to the creamy texture. Substituting powdered sugar would require different ratios and potentially added liquid (like milk or butter) to achieve a similar consistency, essentially making it a different recipe. For this specific method, stick with sweetened condensed milk.
Is this fudge gluten-free?
Yes, this 2-ingredient peanut butter fudge is naturally gluten-free, assuming your peanut butter and sweetened condensed milk do not contain any added gluten-containing ingredients. Always check the labels of your specific brands to confirm, especially if you have a severe gluten allergy or intolerance.
How can I make this fudge less sweet?
Sweetened condensed milk is inherently very sweet, so it’s difficult to significantly reduce the sweetness without altering the recipe’s integrity. However, you can balance the sweetness by adding a pinch of sea salt, which enhances the peanut butter flavor and provides a contrast. Using unsweetened peanut butter will also help, but the condensed milk will still provide a strong sweet base.